Use Product Control on the App
Table of Contents
There are four components to using Product Control Tracking on the app:
1. Print and Log Menu Items Prepped
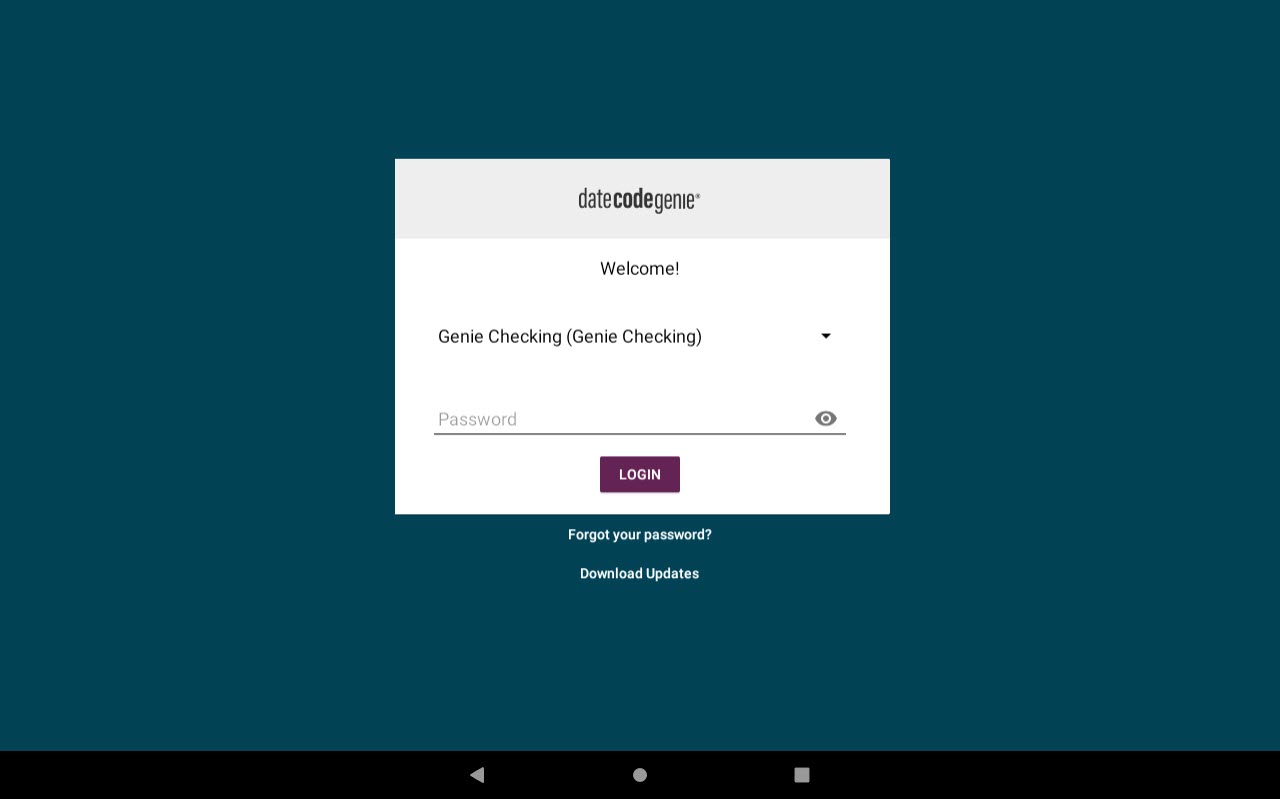
1. Log in to the app with your username and password, if required.
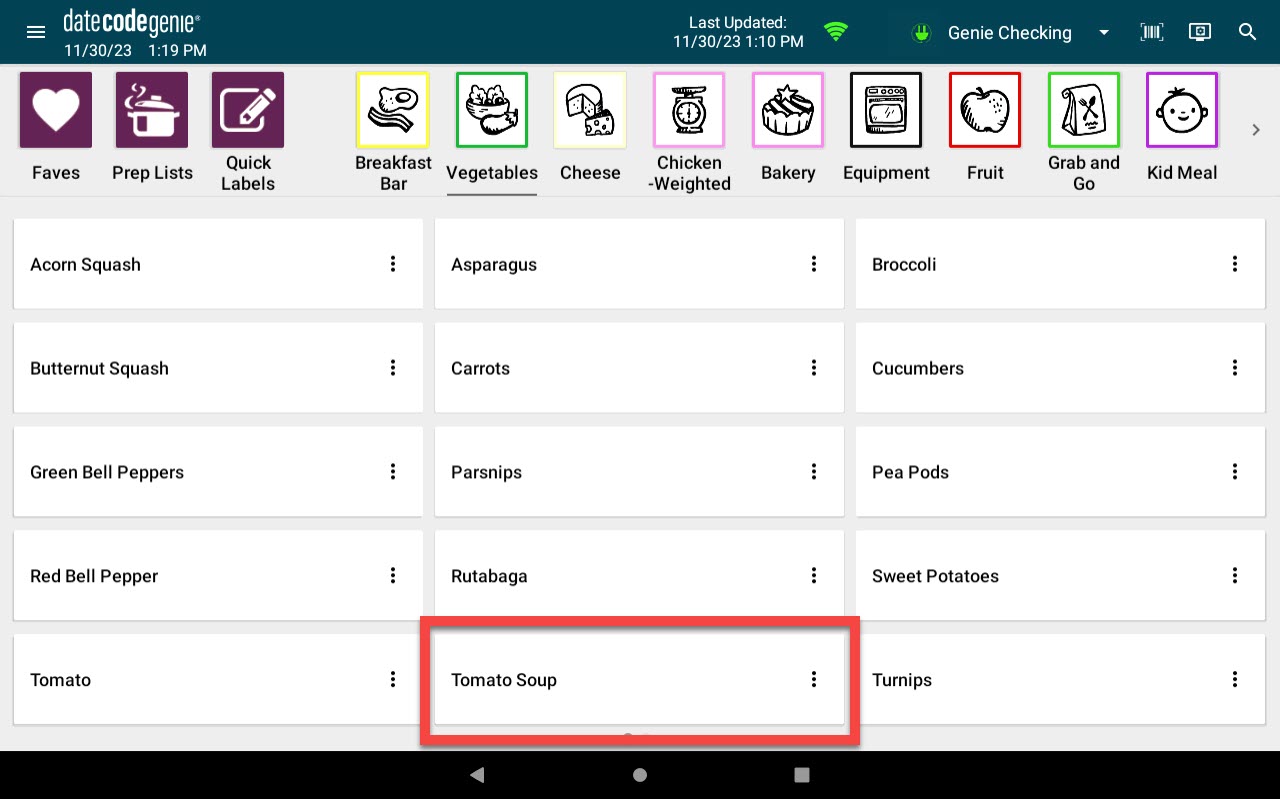
2. Tap a menu item from App Dashboard to track prep.
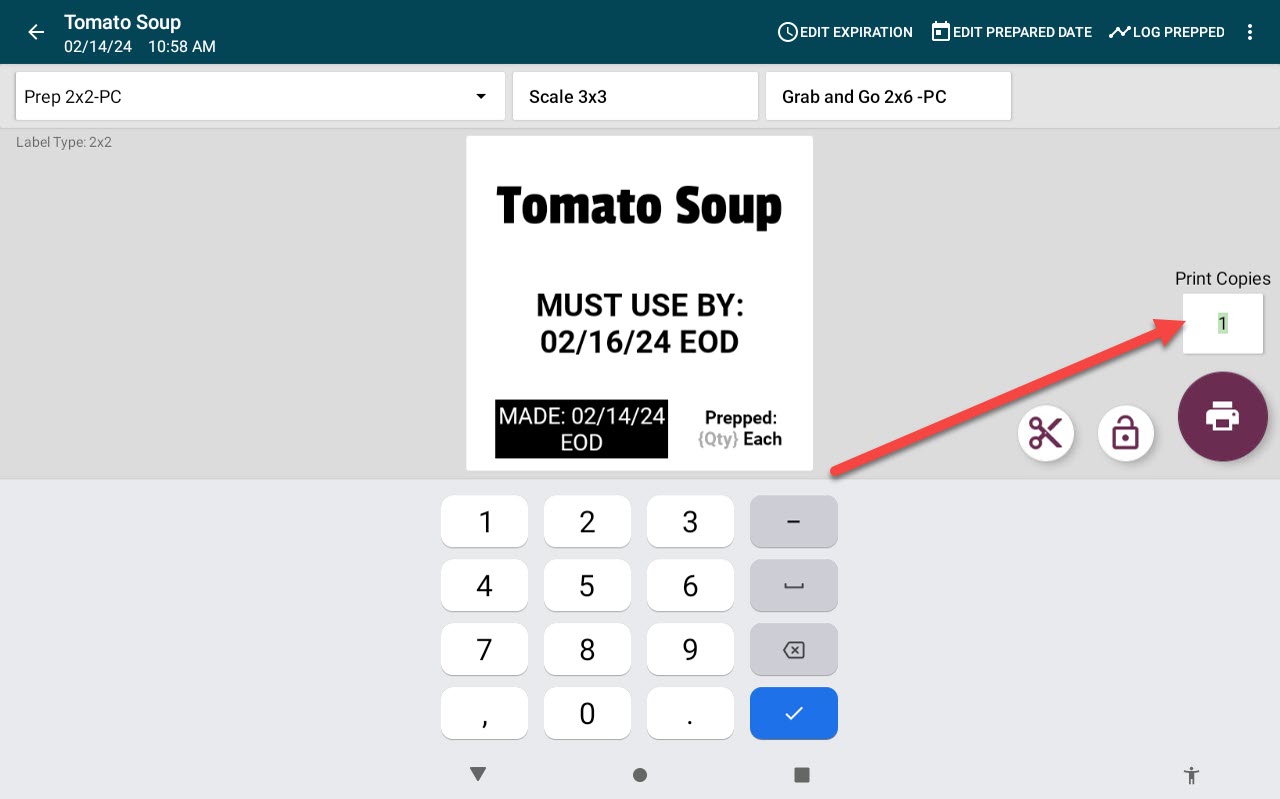
3. Enter the number of labels to print in the Print Copy Box.
NOTE
Menu items that are set to print 1 label and log 1 prepped item will display Log Prepped toggle. Toggle with default to log prep turned on, displaying green.
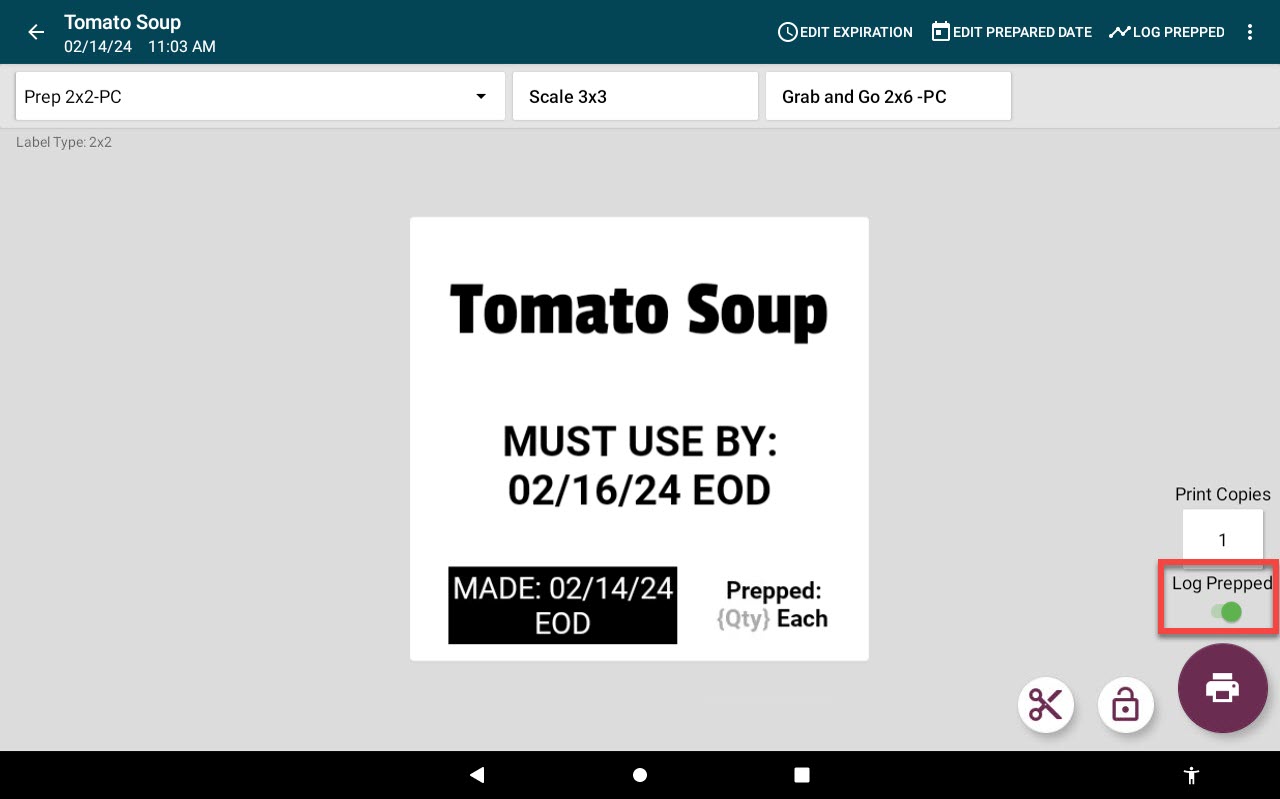
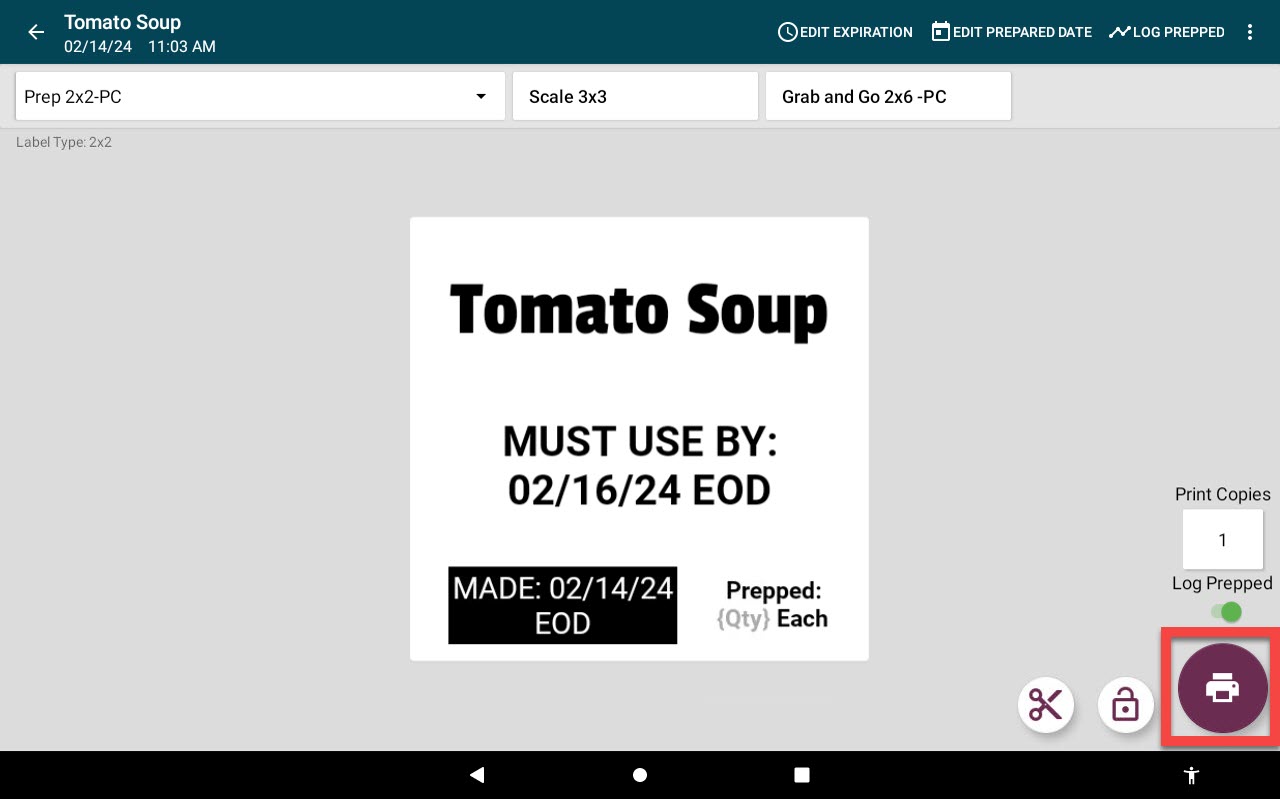
4. Tap the Print Button to print.
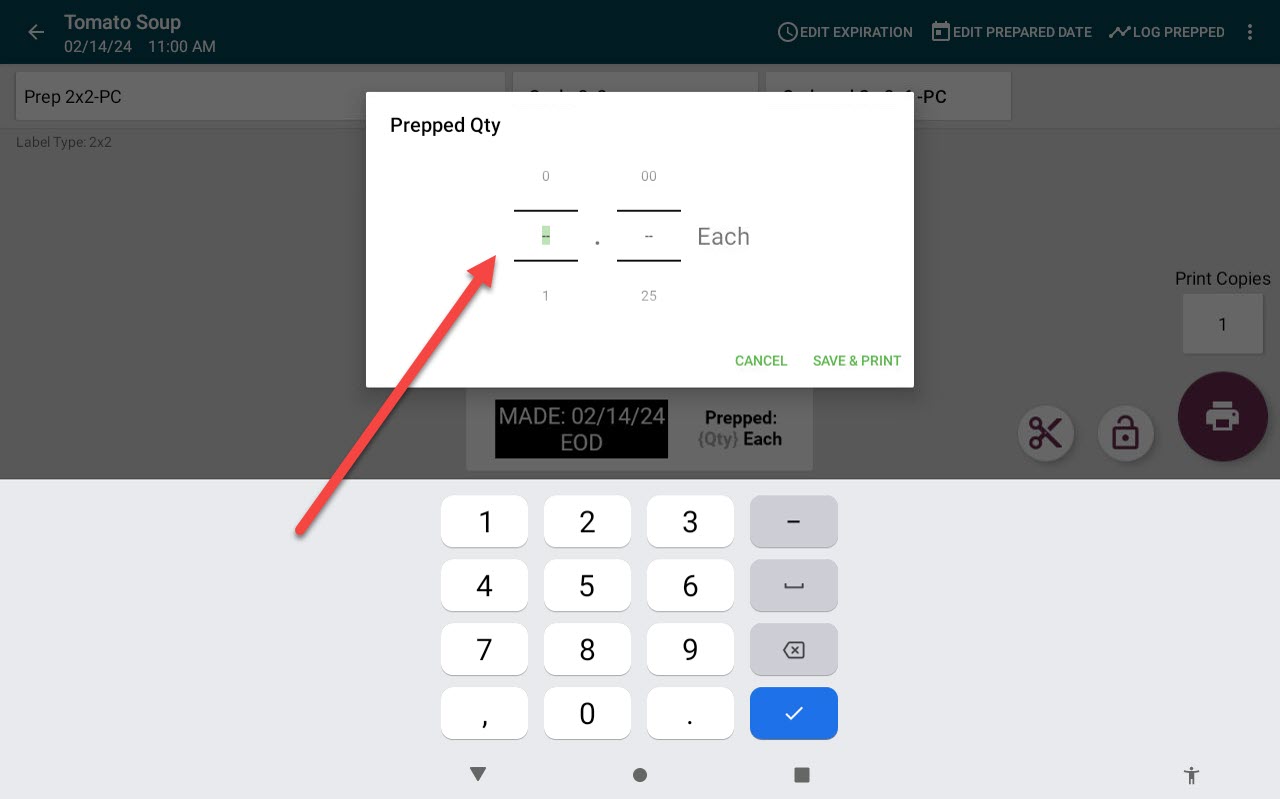
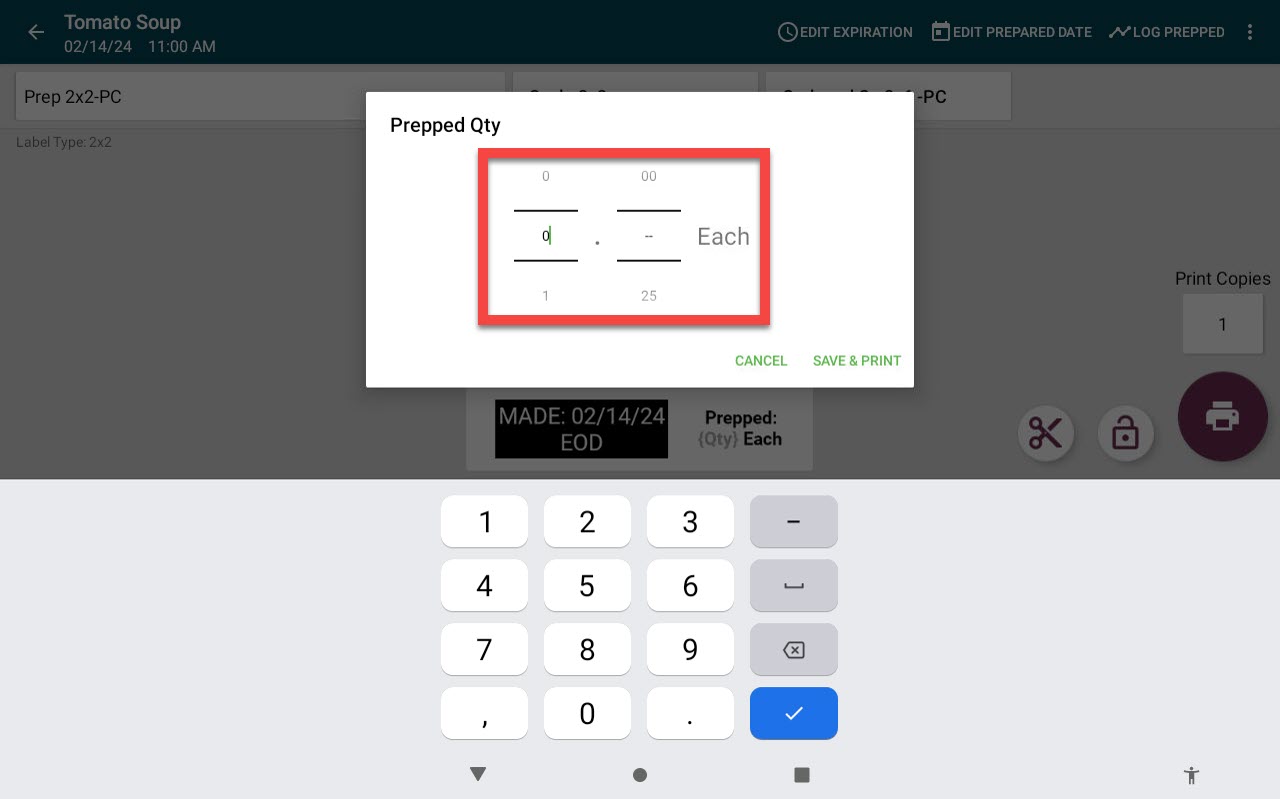
5. For an item that is not set as one label per item, a pop up will appear before printing. Enter the amount prepped per label in the Prepped Qty box, then tap Save & Print.
The prepped quantity will be logged, indicated by the Prep Quantity Saved message.
2. Print Without Logging Menu Item Prepped
There are two ways to print labels without logging prep:
- Log Prep toggle
- Enter amount prepped as zero
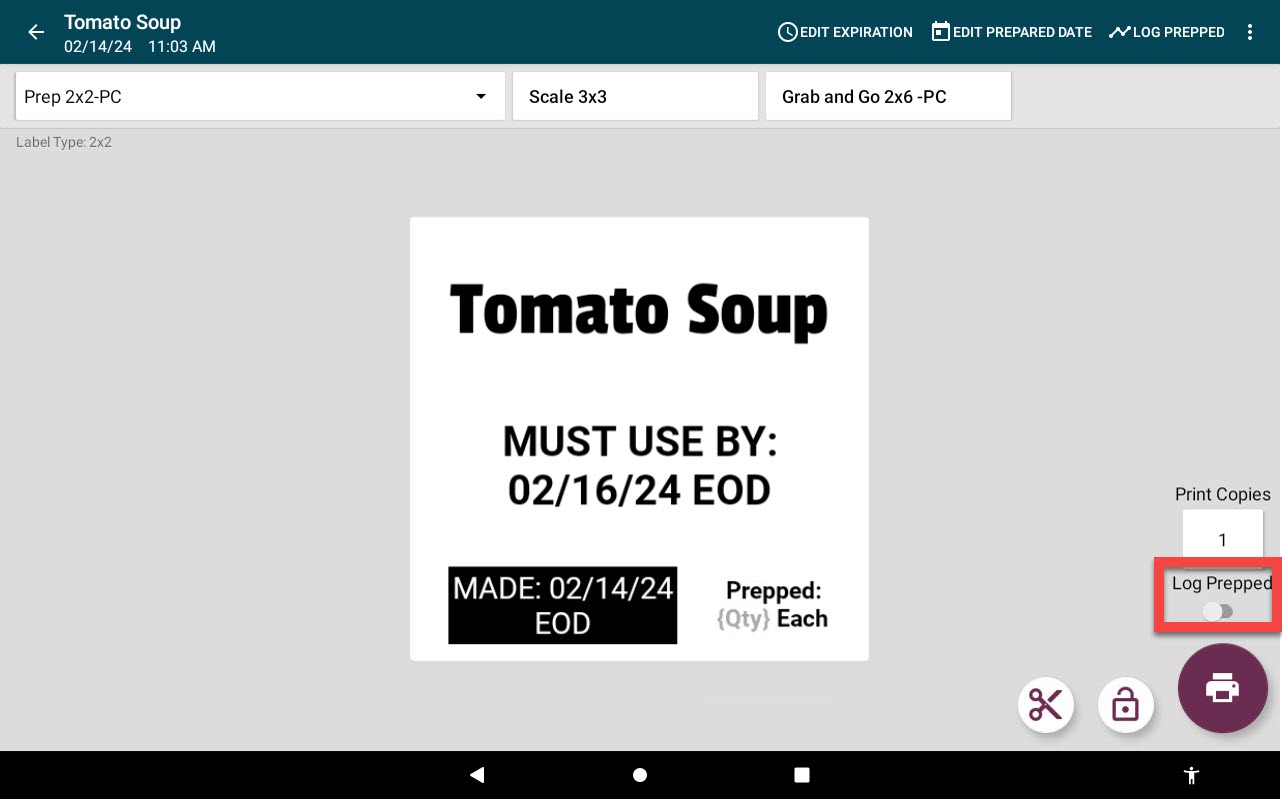
1. If the menu item has the Log Prepped toggle, select the toggle so it turns white to bypass logging.
TIPS & TRICKS
Not seeing the Log Prepped toggle? Ask your portal administrator to turn on the Allowed Prep Quantity Override Permission.
2. If the menu item does not have the Log Prepped toggle, hit the Print button. When the pop-up appears, enter 0 as the Prepped Qty. Tap Save & Print.
3. Record Menu Items Wasted Manually (without a scanner)
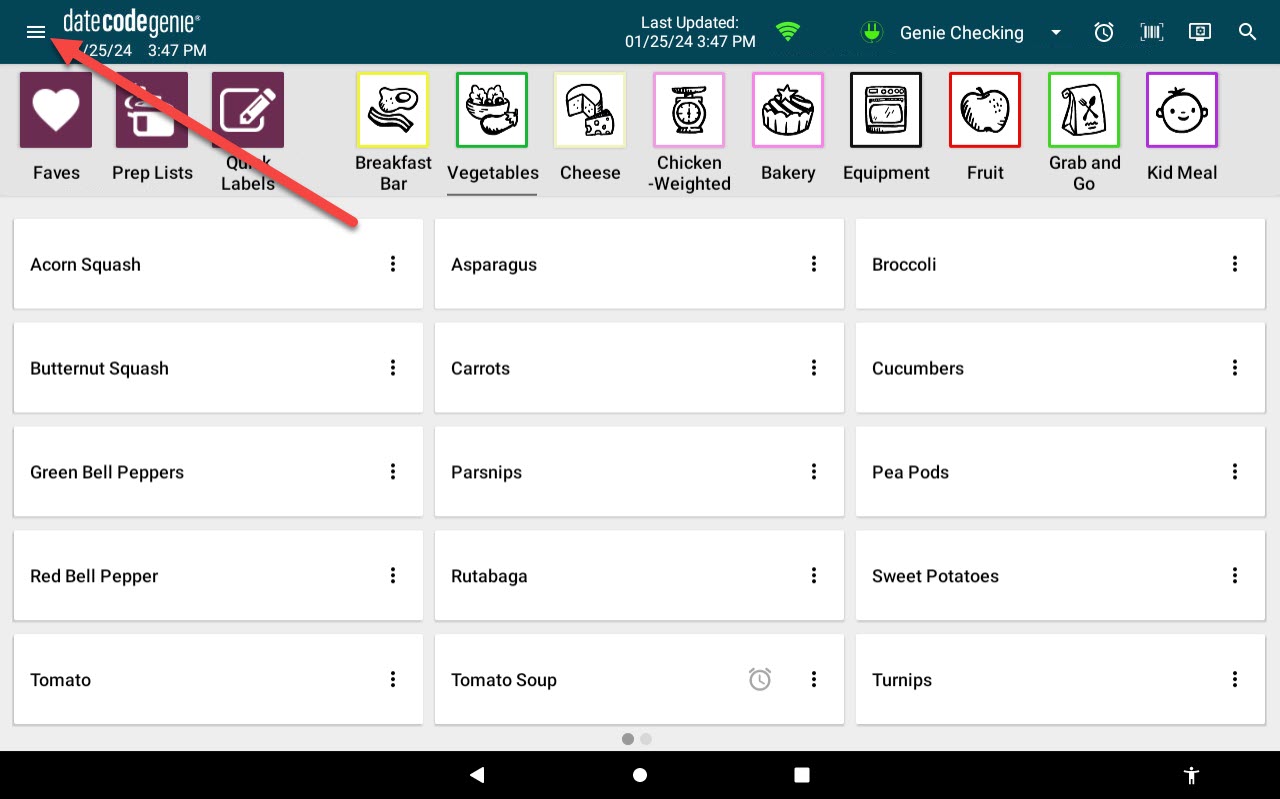
1. Tap the Navigation Button (3-line icon).
2. Tap Product Control Tracking.
![]()
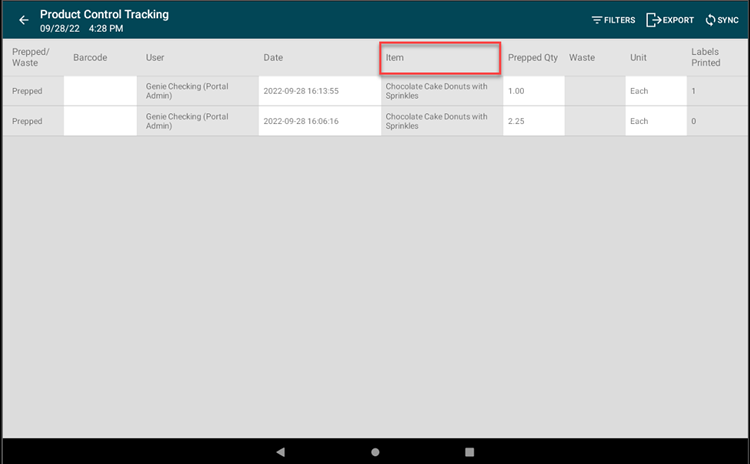
3. Scroll to locate a menu item name from the Item column.
NOTE
For multiple of the same menu item, select the date and time from the Date column.
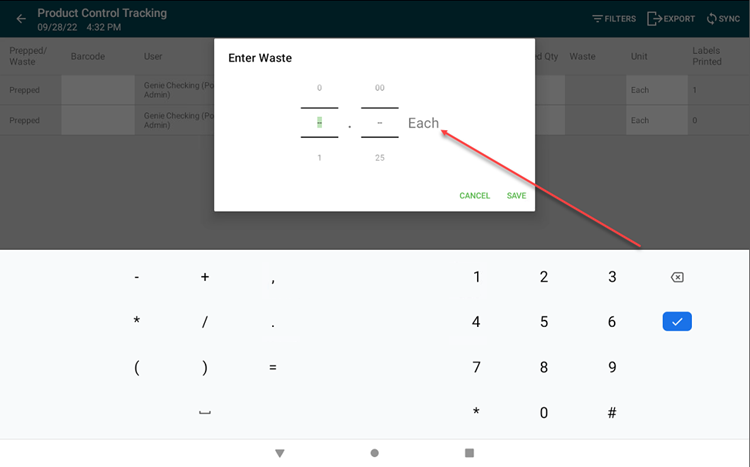
4. Tap the Waste column and enter the amount of the menu item wasted. Tap SAVE and repeat for all items wasted.
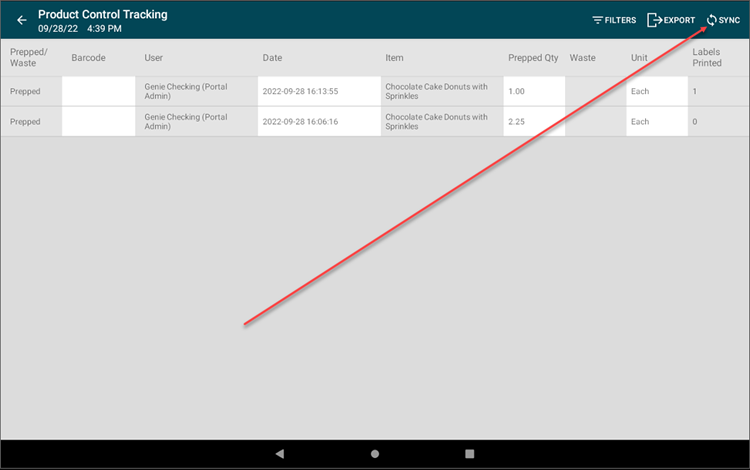
5. Tap SYNC from the app navigation bar. Sync complete will display and the data is sent to your portal.
4. Record Menu Items Wasted with Scanner
There are two different scanning methods for recording waste.
- Barcode
- QR Code (Print ID)
1. Tap the Navigation Button (3-line icon).

2. Tap Product Control Tracking.
![]()
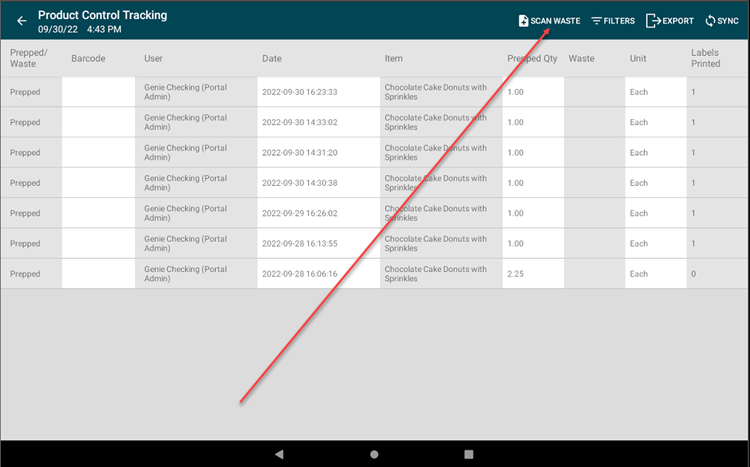
3. Tap Scan Waste from the app navigation bar.
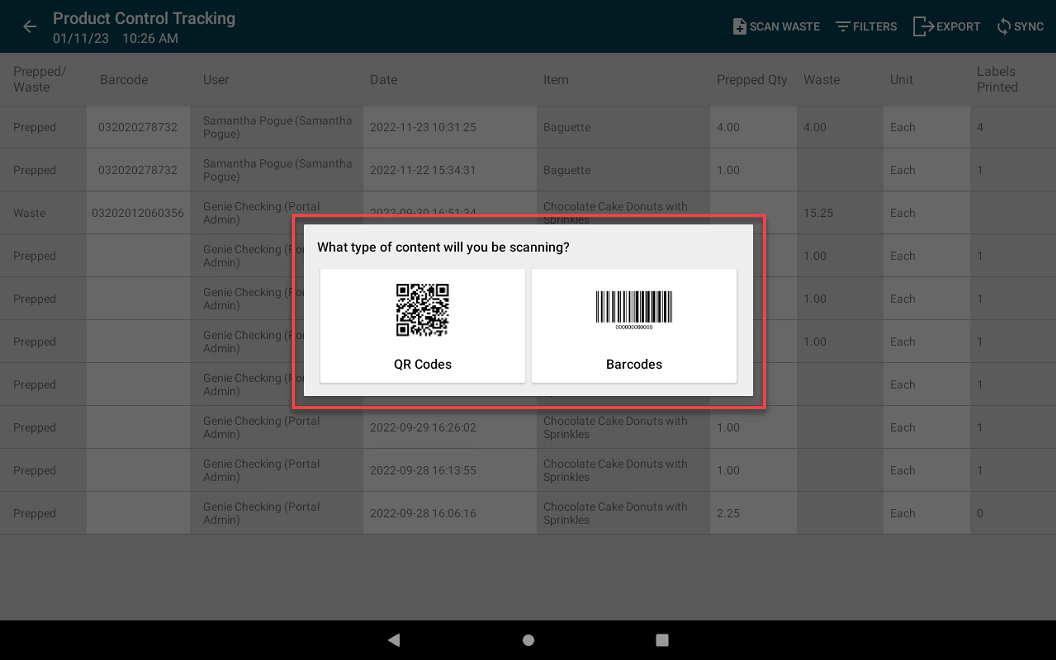
4. A pop-up box may appear if scanning method is not already set. If so, tap the scanning method you are going to use.
5. Continue to scan waste.
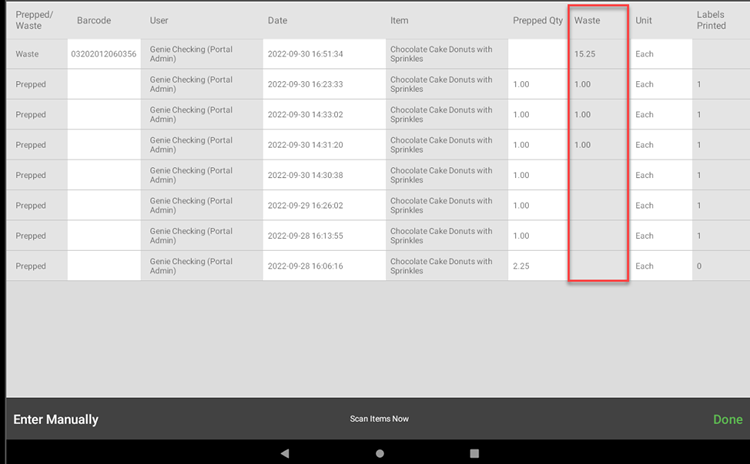
- Barcode
- Scan each item and the quantity will appear in the Waste column.
NOTE
Each scan increases the waste quantity by 1.
- QR Code (Print ID)
- Scan QR code on each item to have your device automatically locate the exact menu item including the exact date, time printed and logged to record the wasted quantity.
NOTE
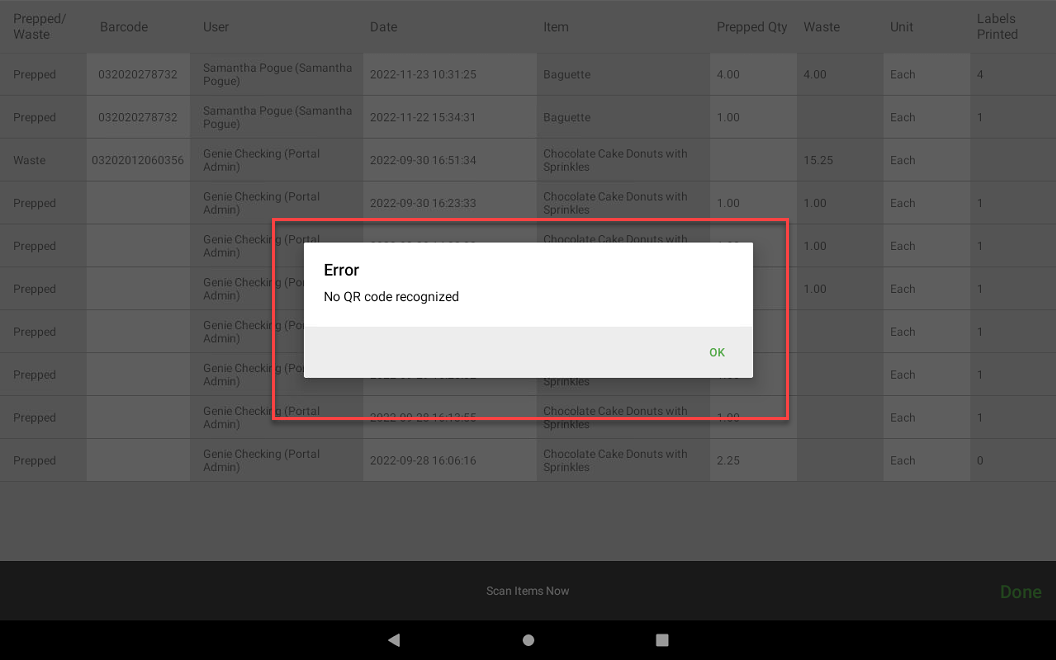
If error message "No QR code recognized" appears, the wrong type of QR code has been scanned. Try to scan another QR code, or see QR Codes on Labels.
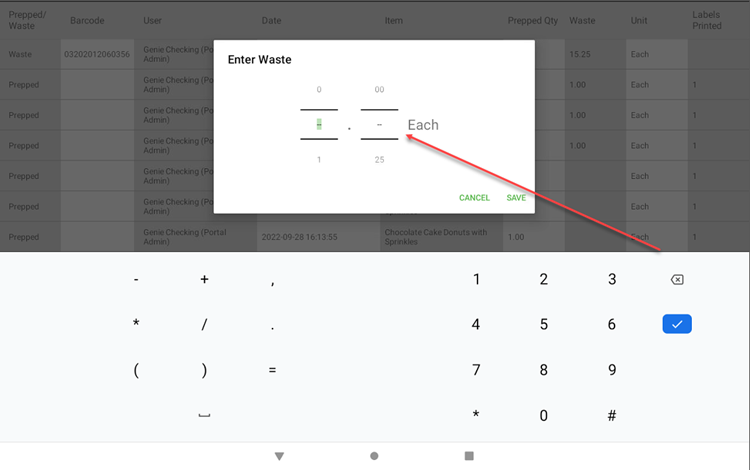
6. Enter the amount to the Enter Waste pop-up to track waste from a reprint using a scanned QR code and tap Save.
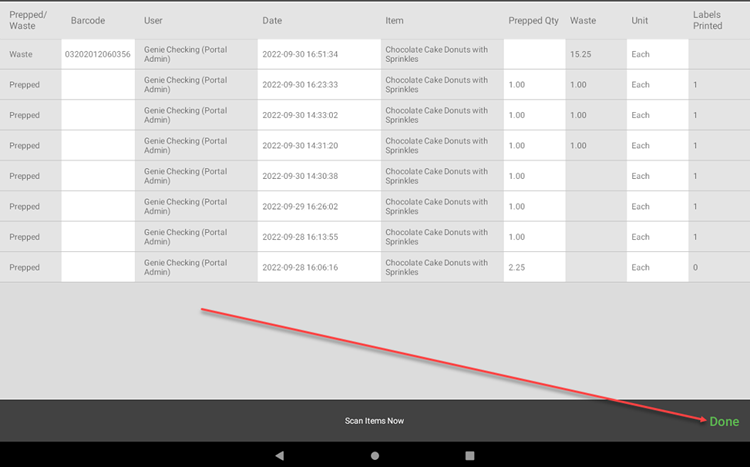
7. Tap Done when finished scanning items. Sync complete will display and the data is sent to your portal.
