Connect DateCodeGenie Devices to RightBytes
Table of Contents
DateCodeGenie devices can be connected to RightBytes modules from EatSuite. Once added, the DateCodeGenie will be available in all modules.
DateCodeGenies devices are managed by individual store. Always make sure to set the correct store before making any changes.
Add a DateCodeGenie device
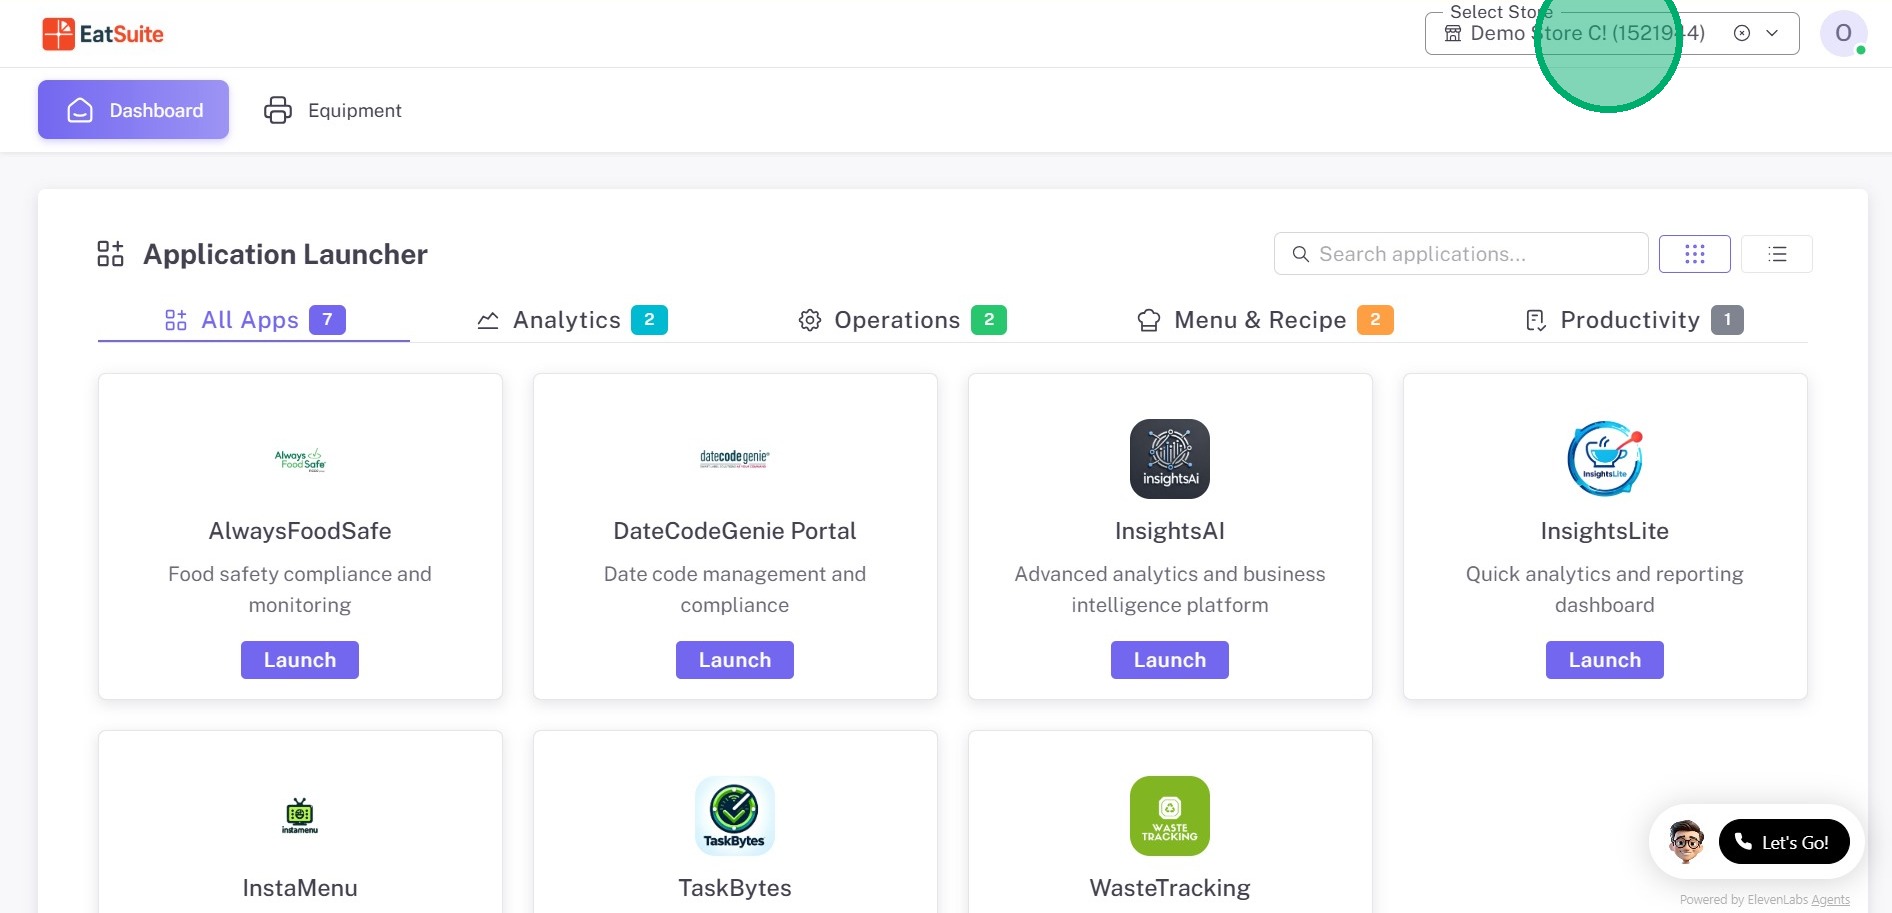
1. Log in to EatSuite at eatsuite.com
2. Select Store from the dropdown.
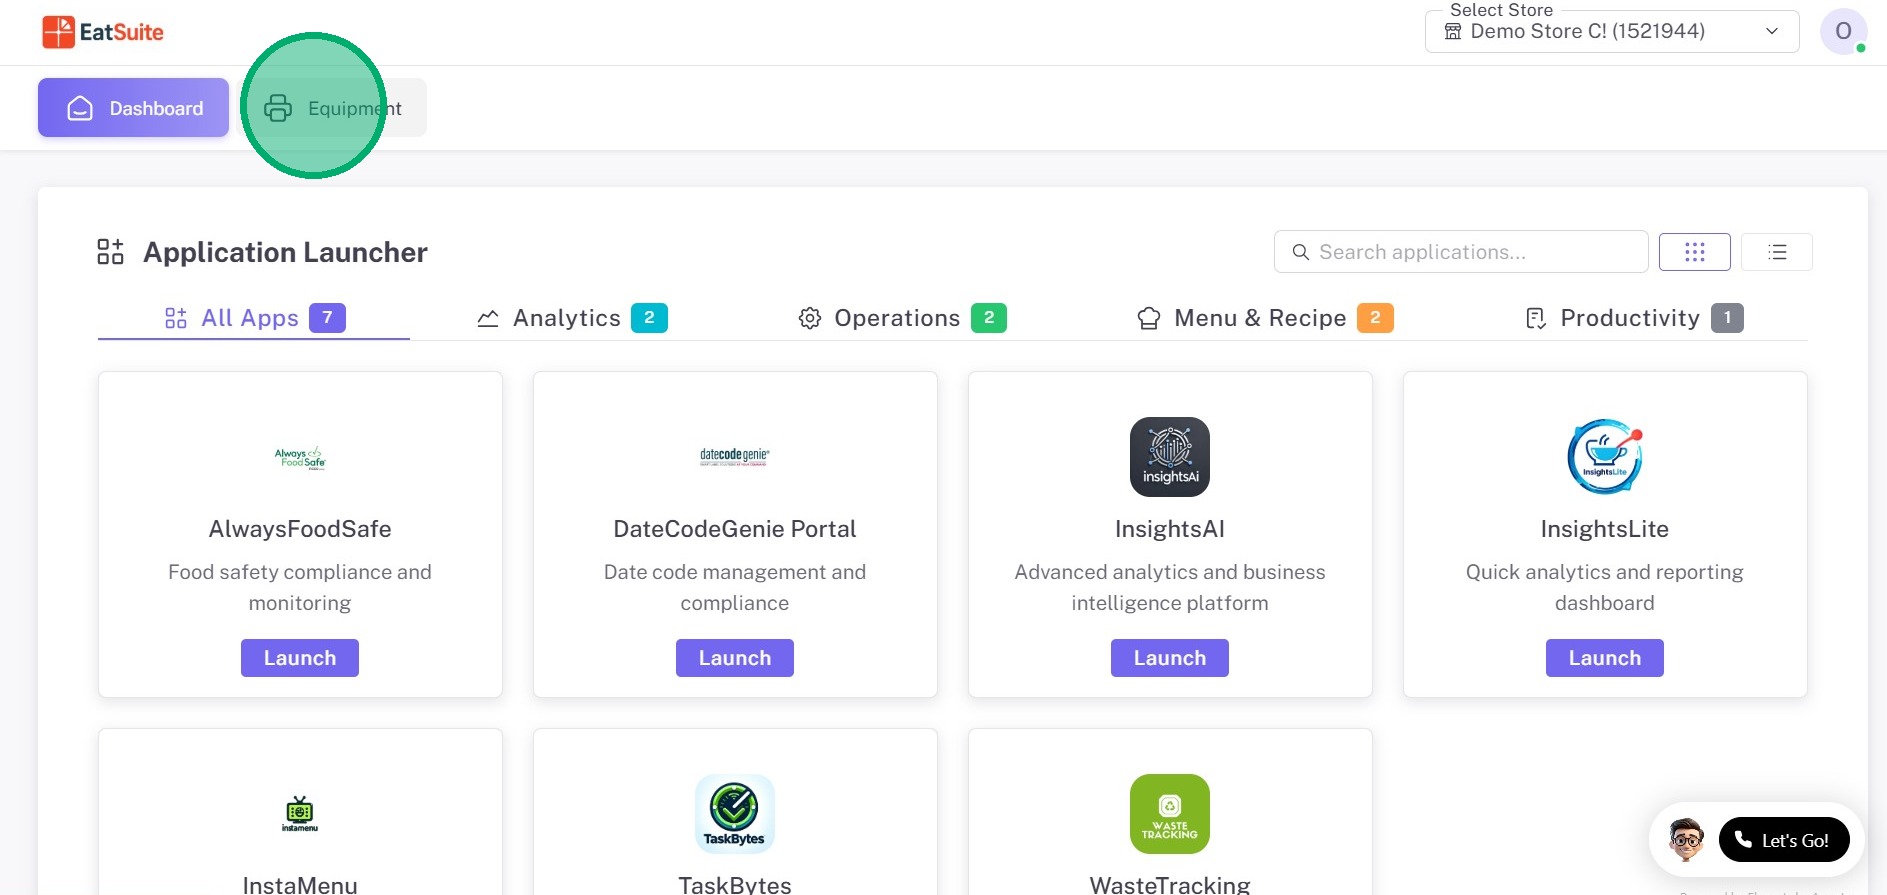
3. Click Equipment.
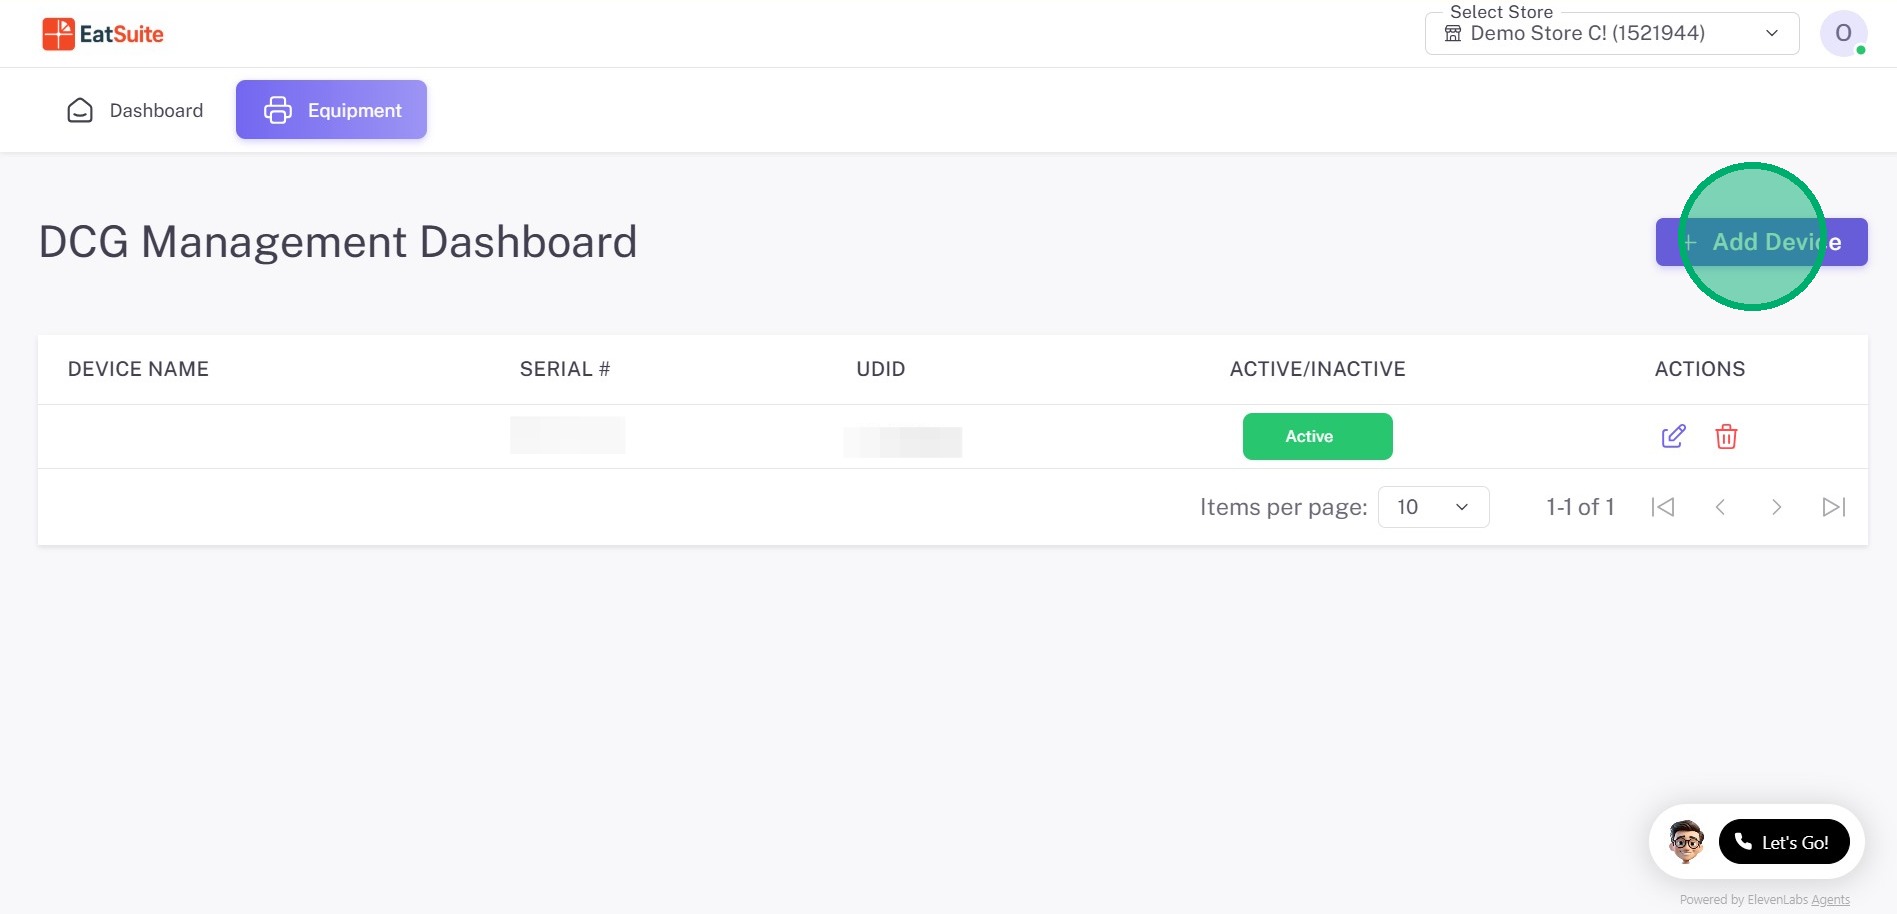
4. Click + Add Device.
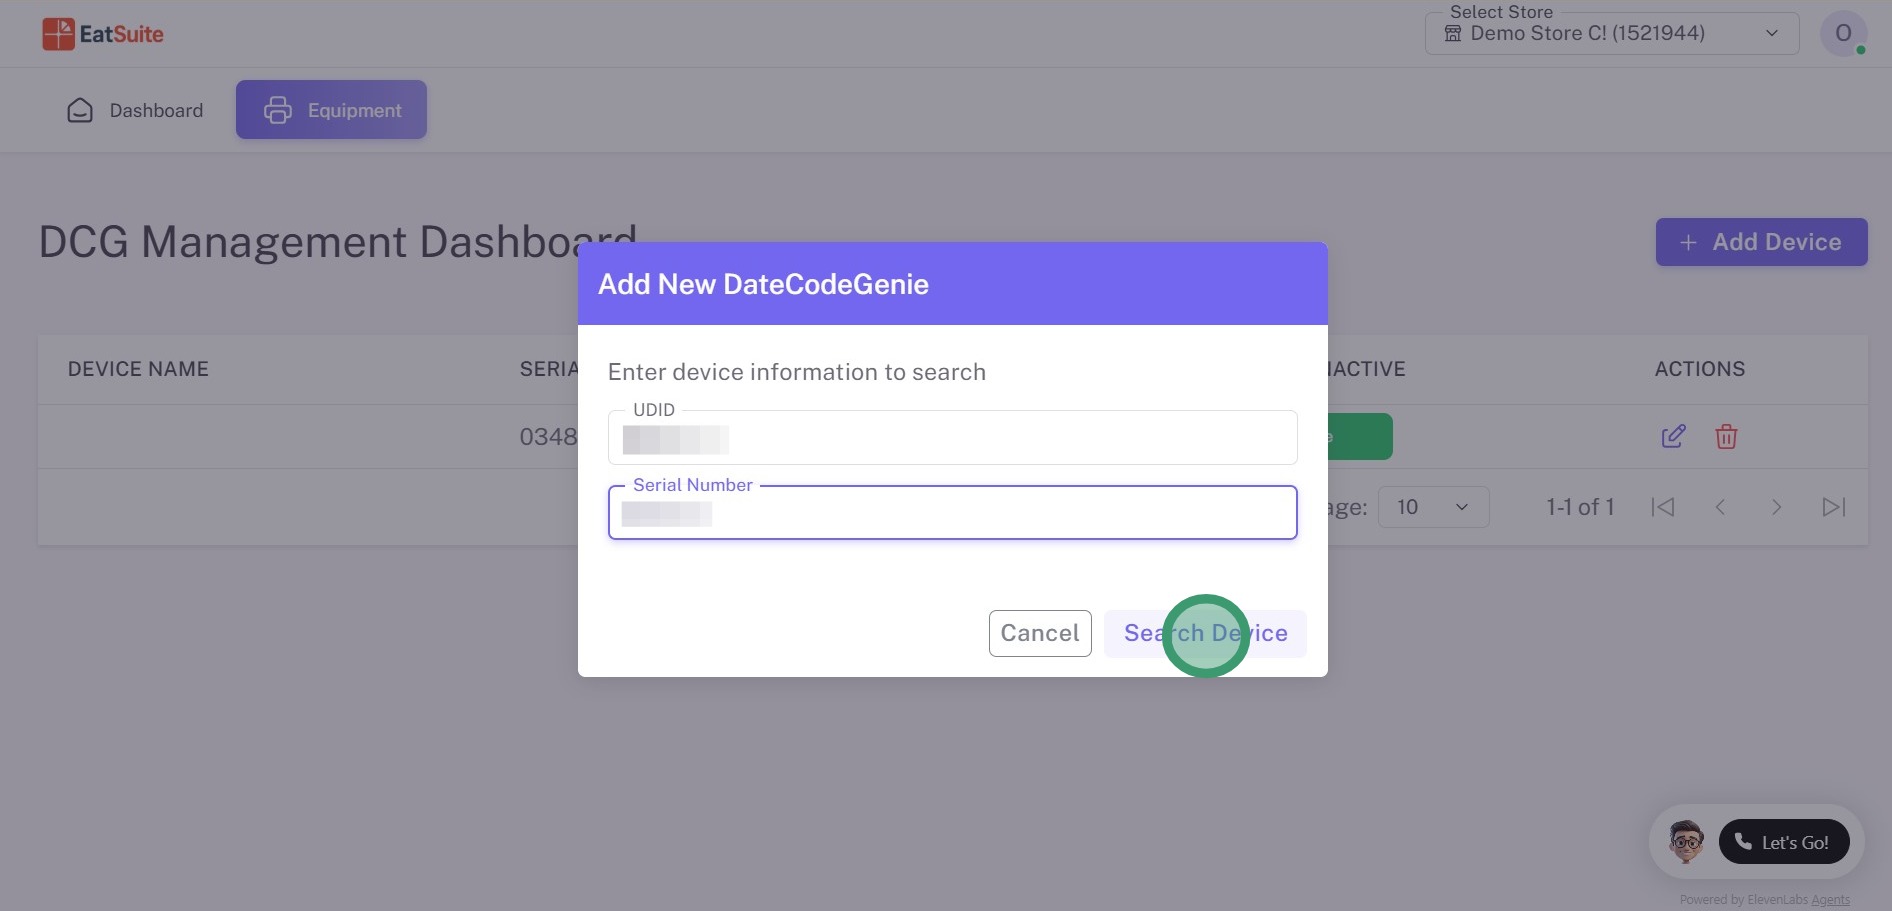
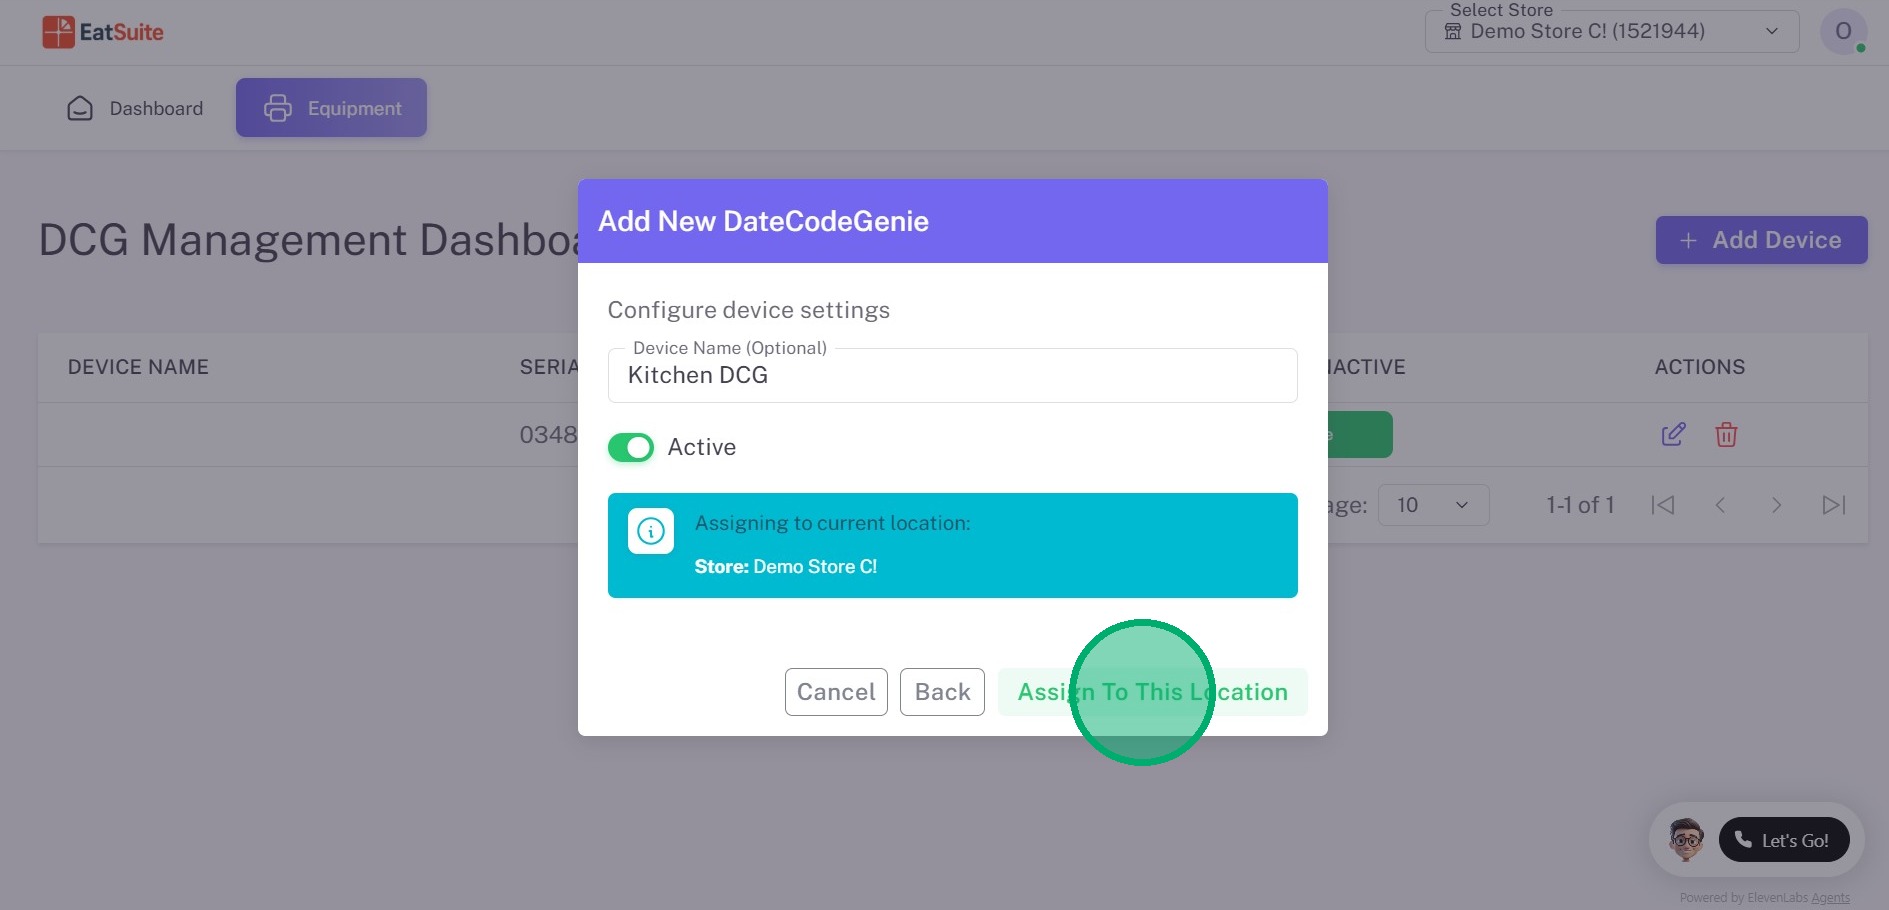
5. Type the DateCodeGenie's UDID and Serial Number.
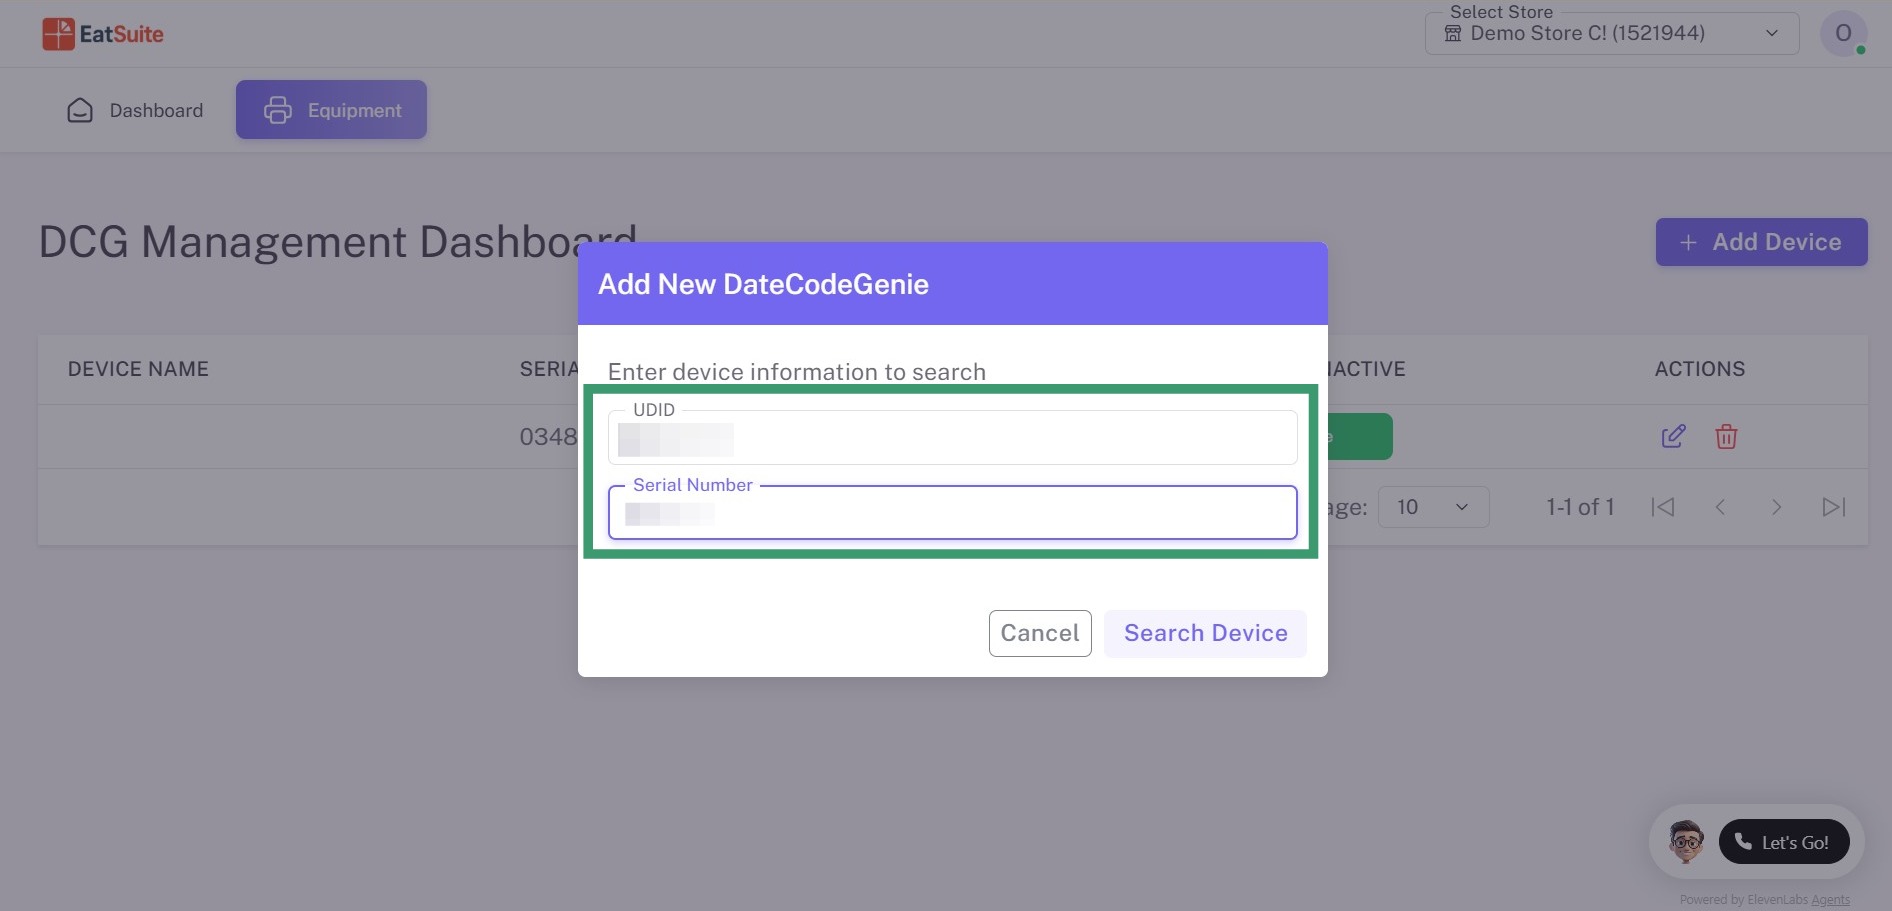
6. Click Search Device.
7. OPTIONAL: Type a Device Name to help you quickly identify your DateCodeGenies.
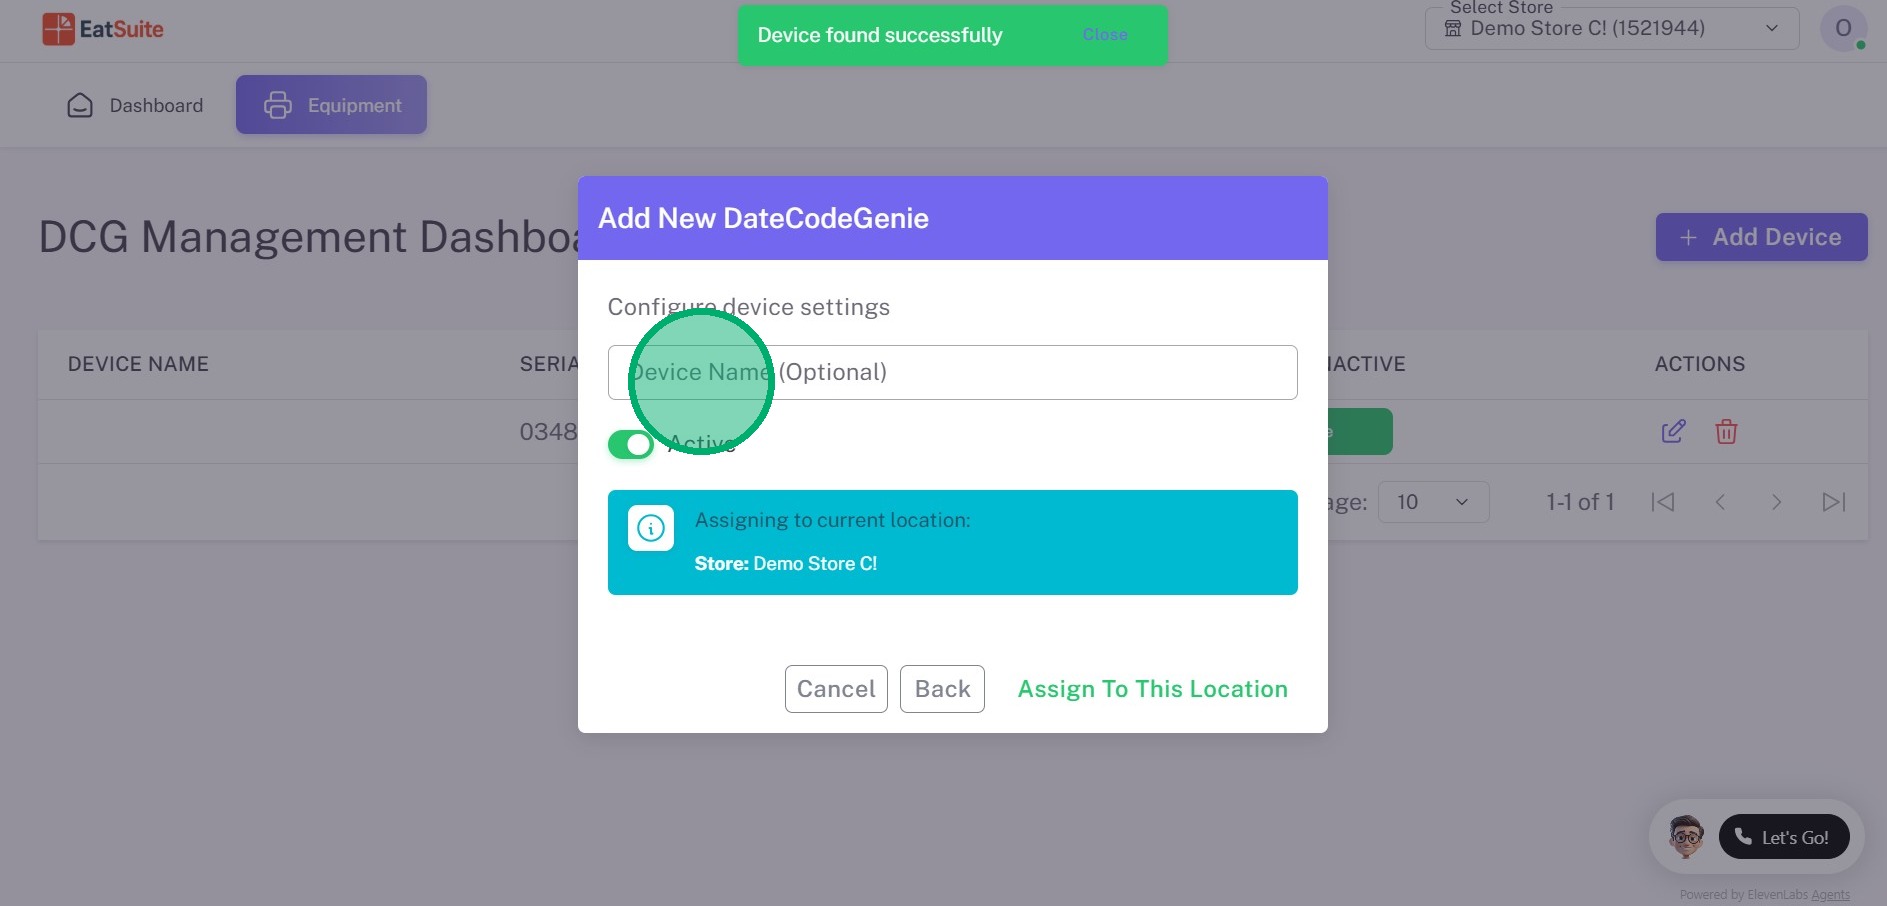
8. DateCodeGenies are automatically set to Active to print. To set to Inactive, click the toggle.
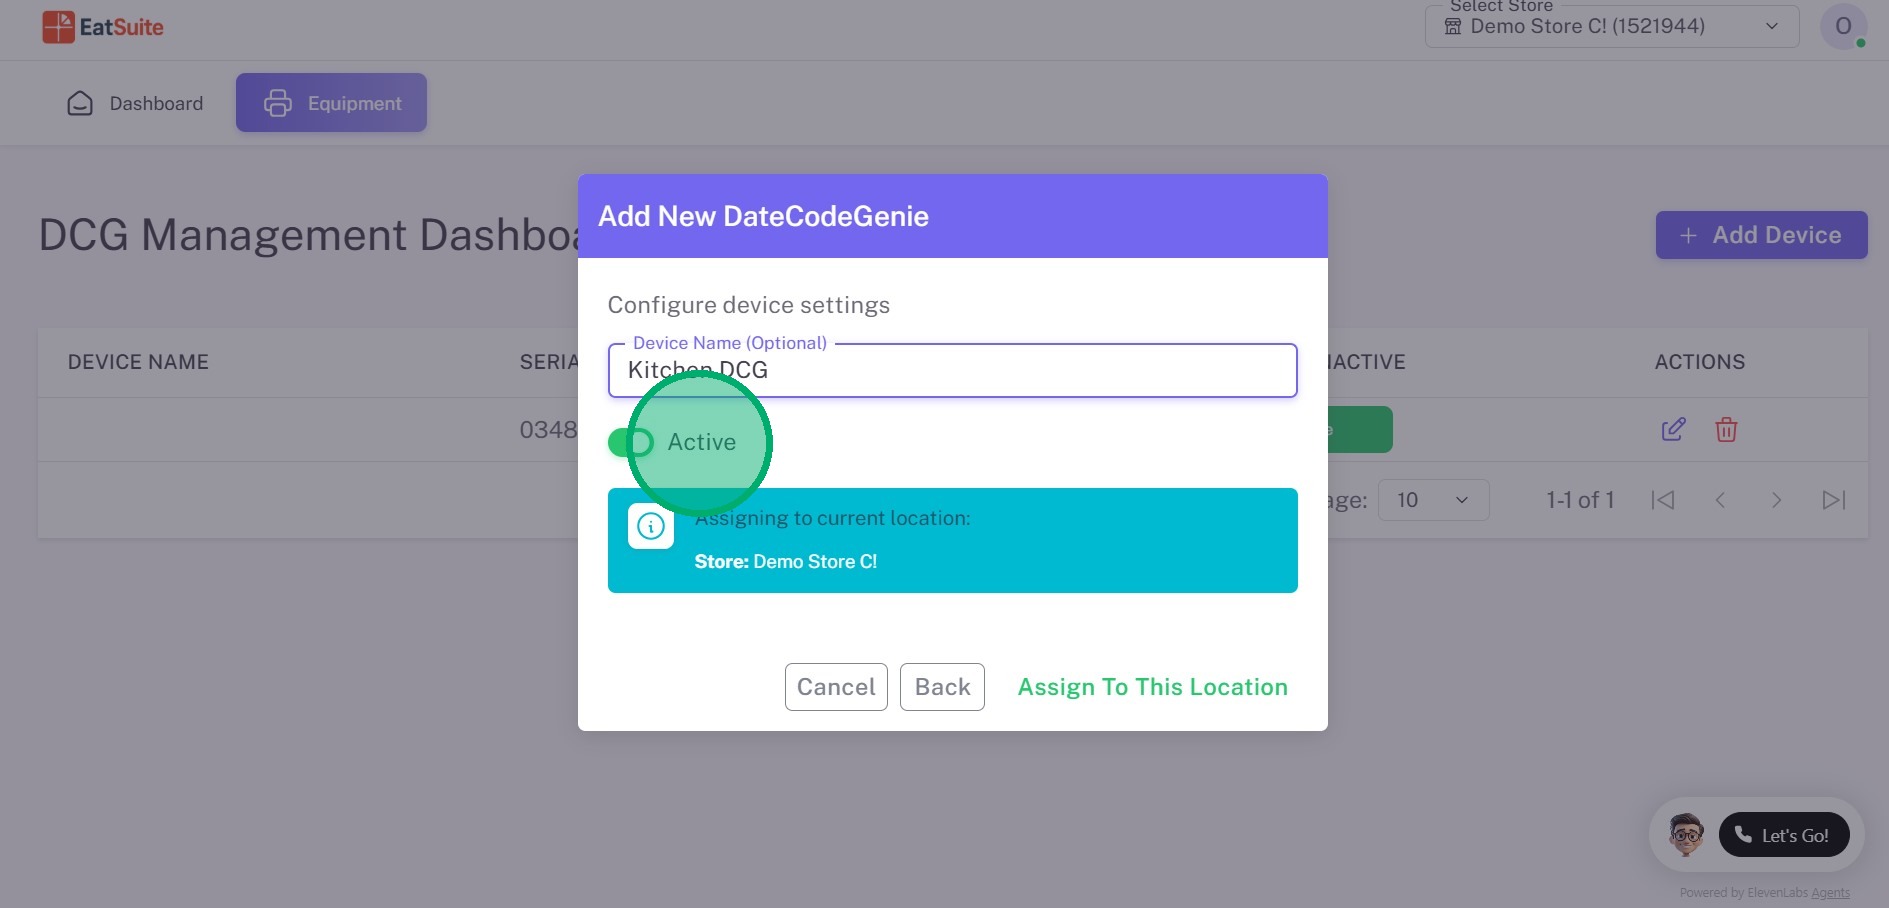
9. Click Assign To This Location.
Switch between active and inactive
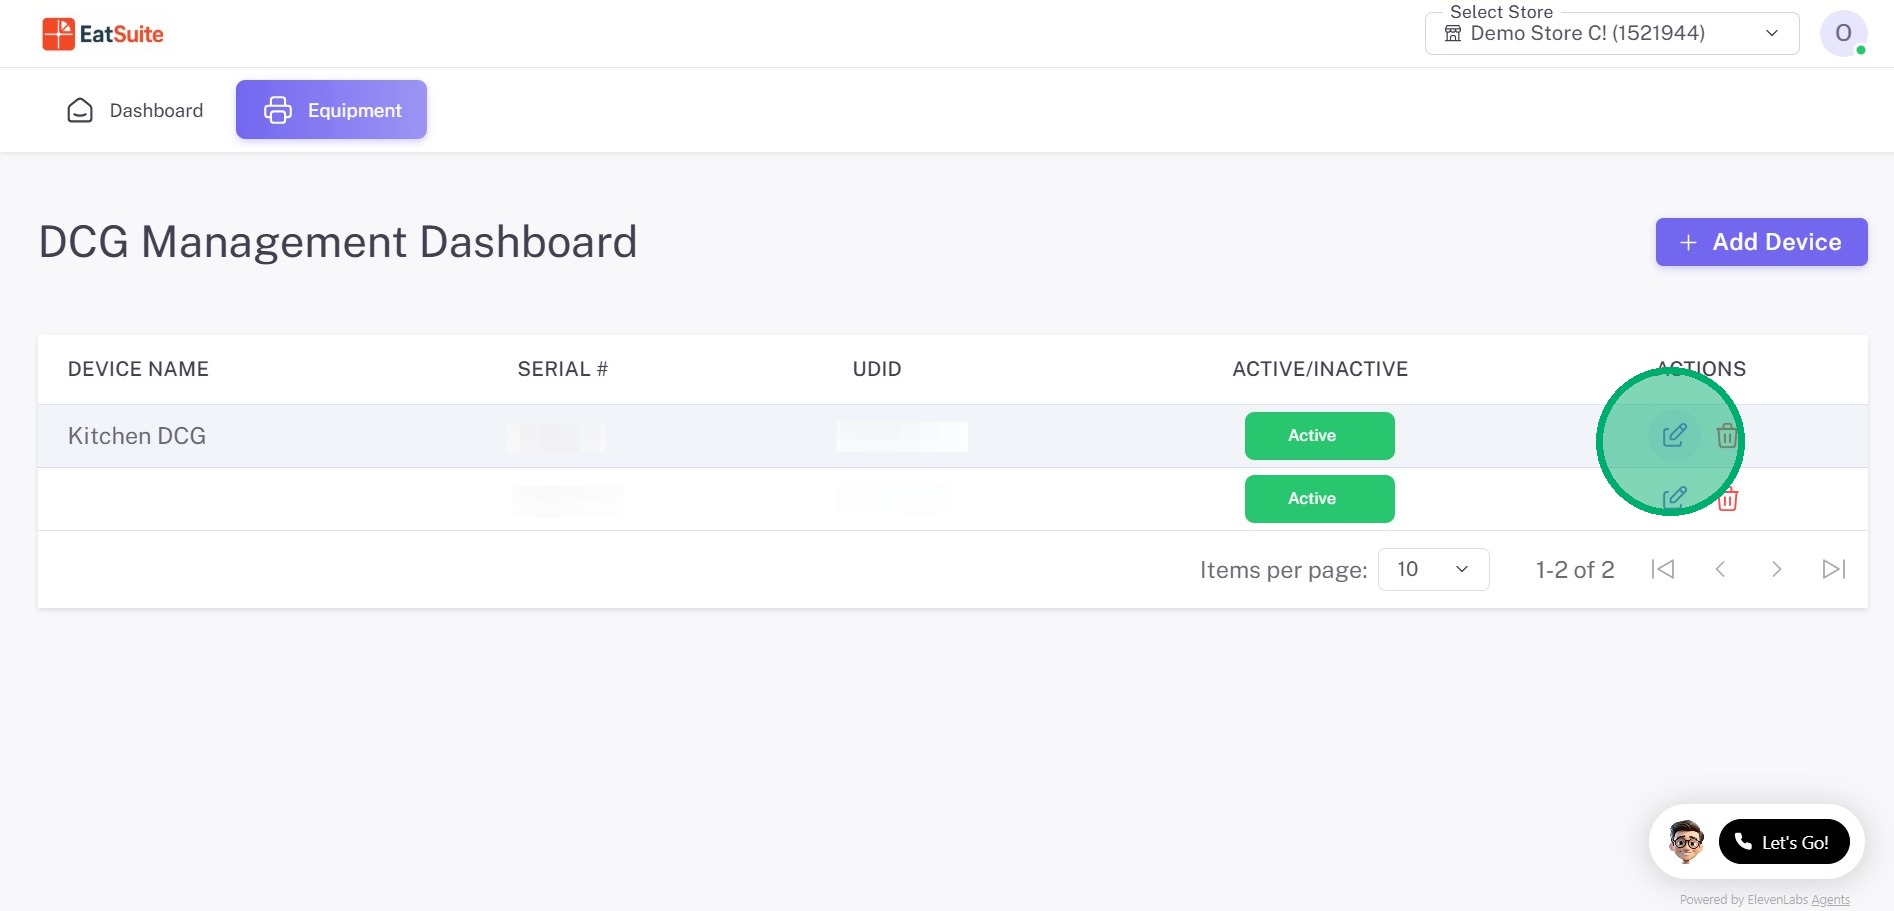
Click toggle to switch DateCodeGenies between Active and Inactive.

Edit DateCodeGenie device name
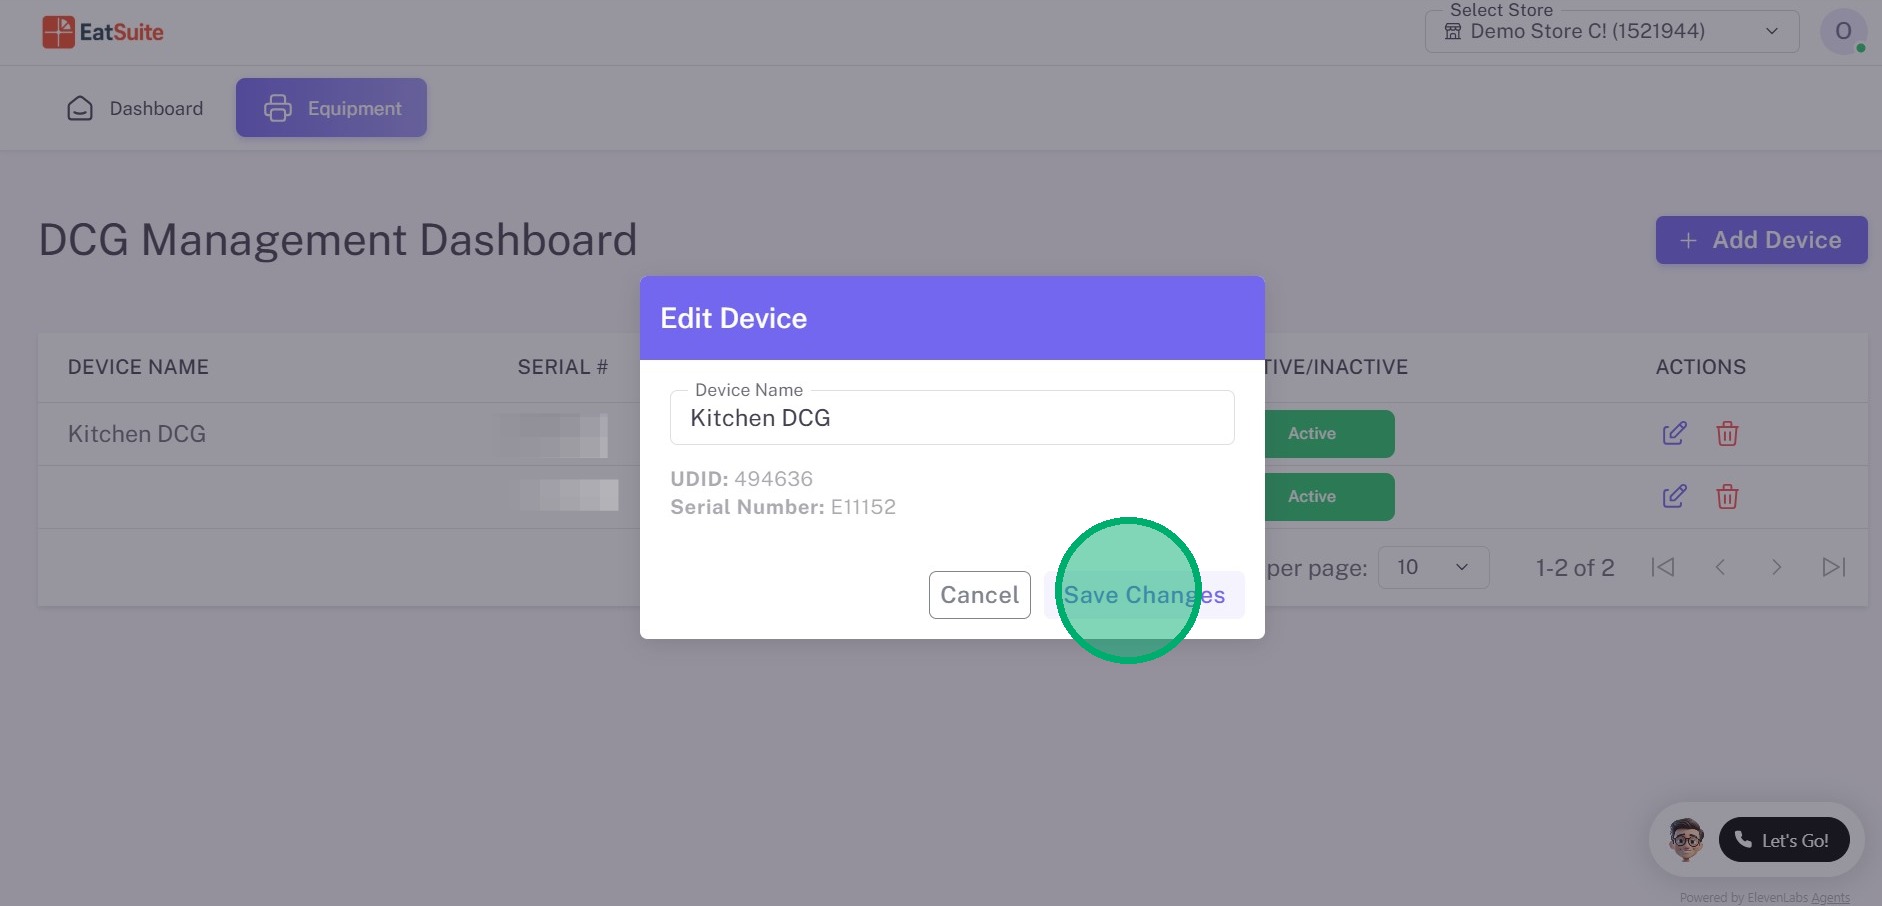
1. Click the edit button (pencil icon) next to the device.
2. Click Save Changes.
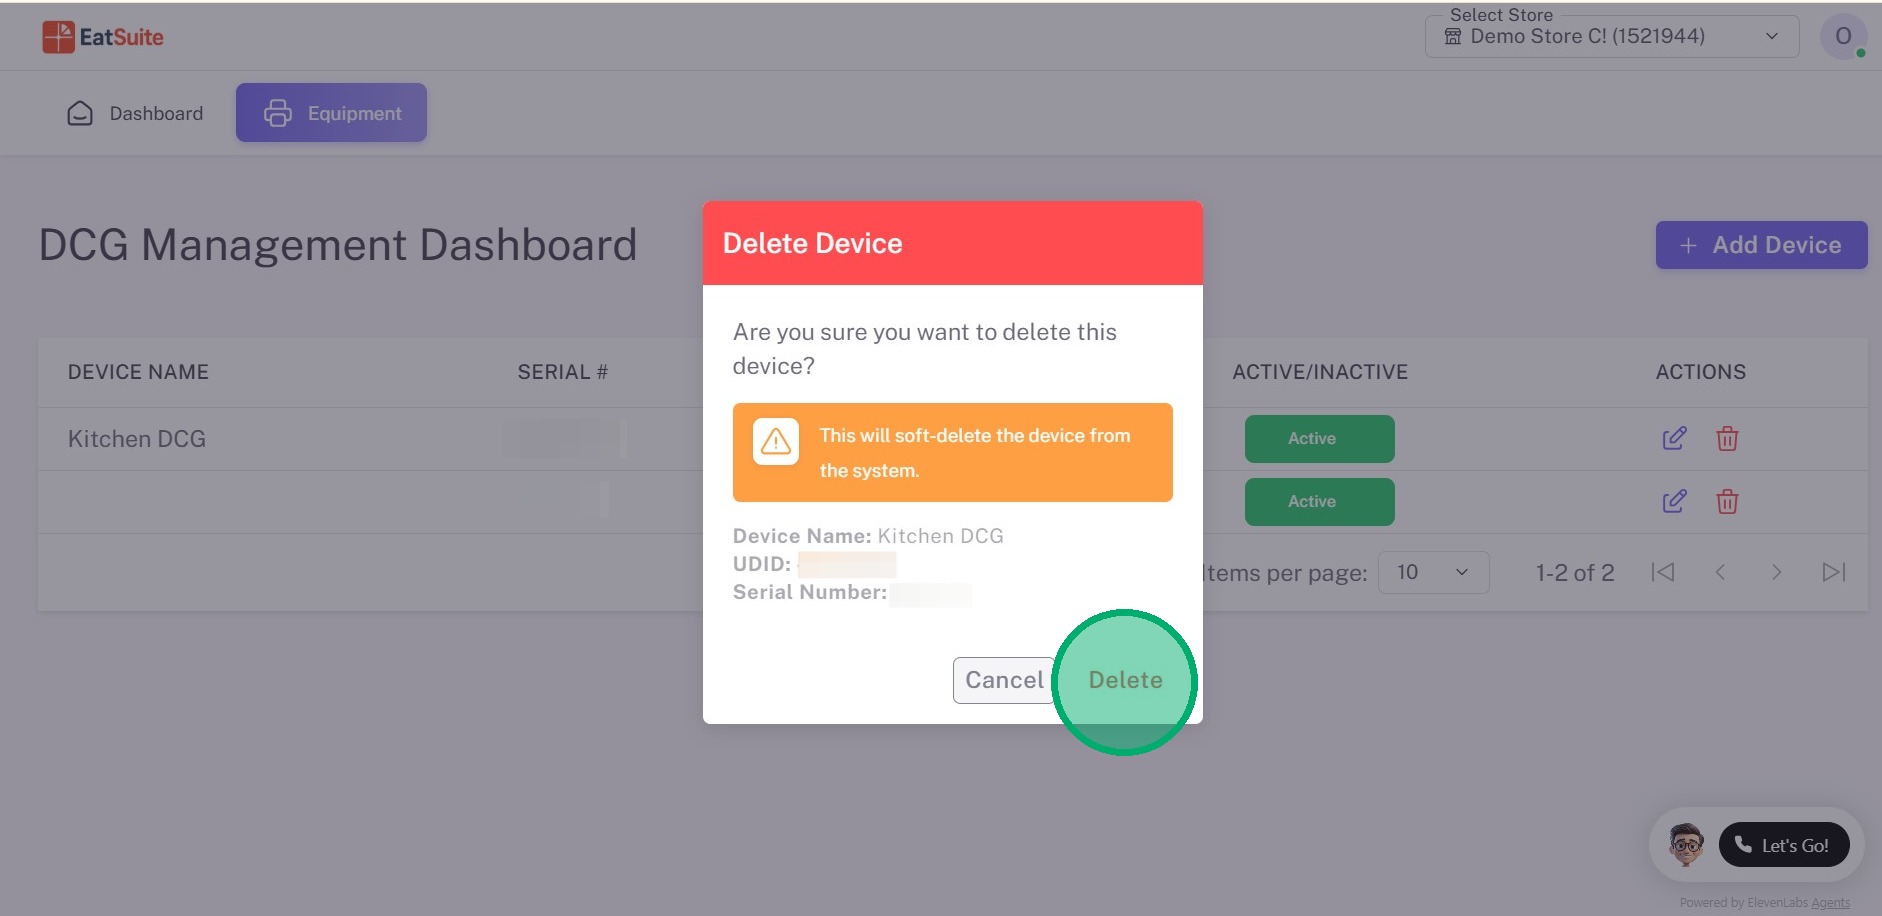
Delete a DateCodeGenie device from RightBytes
1. Click the delete button (trash icon) next to the device.
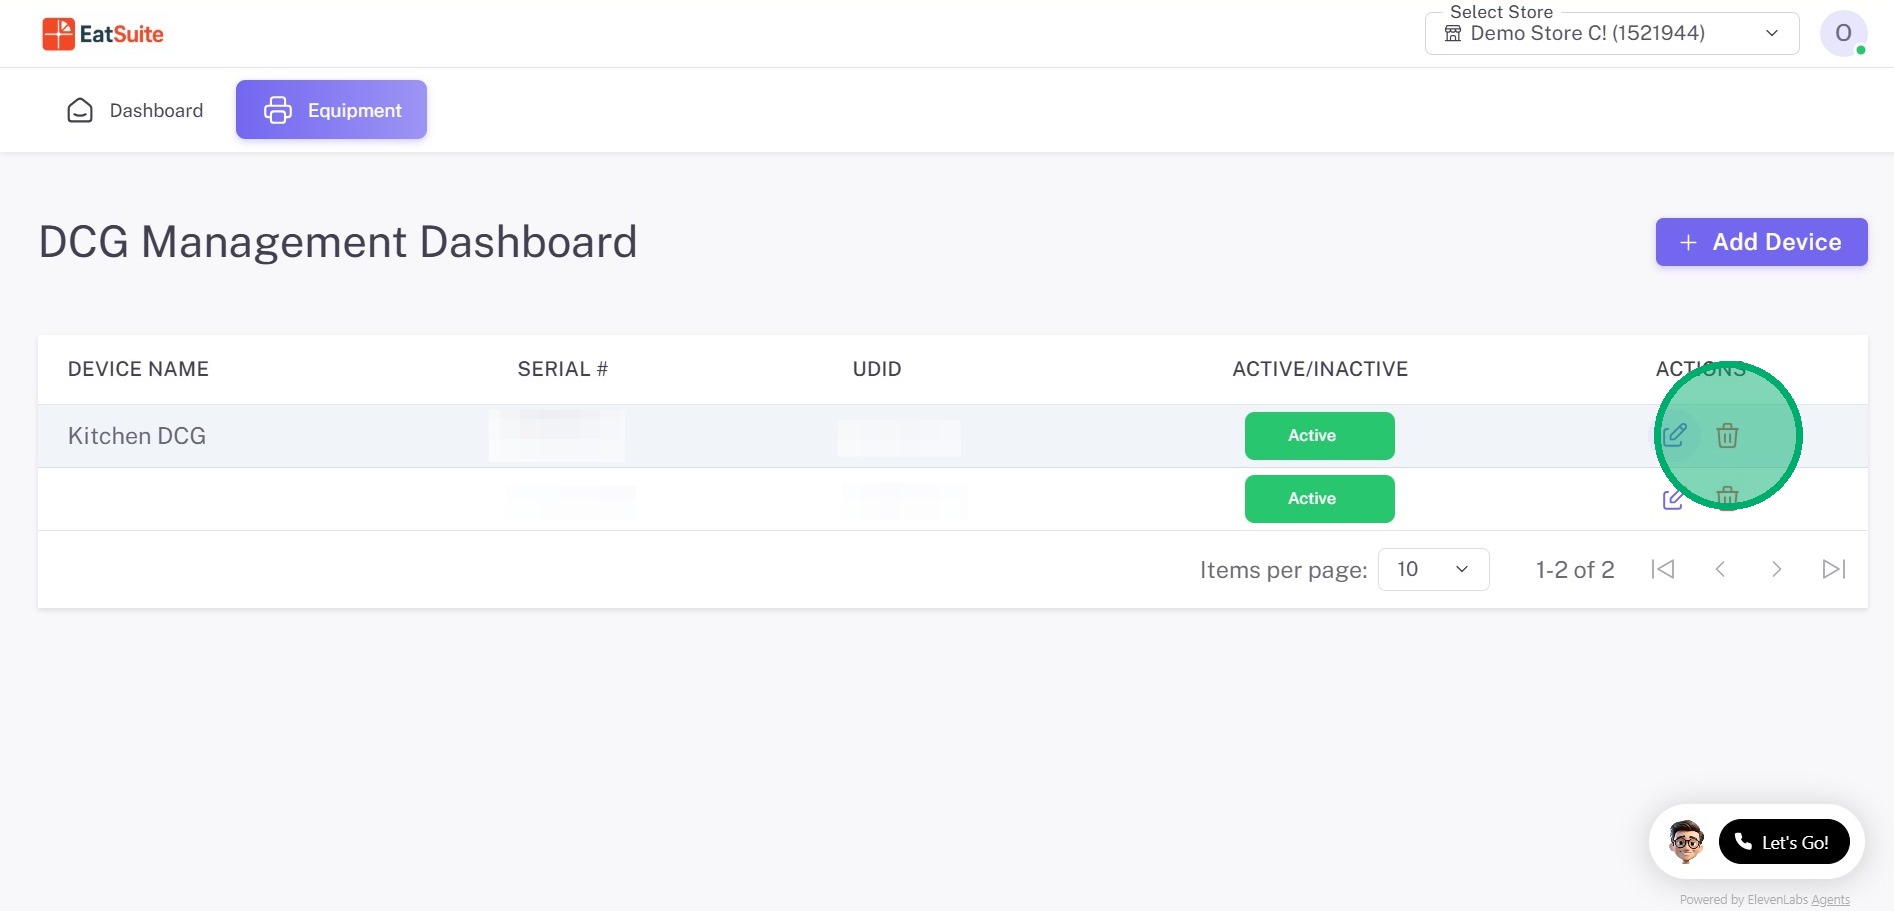
2. Click Delete.