Configurar el seguimiento del control de productos en el portal
El seguimiento del control de productos requiere tres pestañas para configurarse y usarse:
1. Configurar elementos del menú
Cada elemento del menú debe configurarse para el seguimiento del control del producto utilizando los campos de control del producto obligatorios y opcionales.
1. Inicie sesión en el portal en www.datecodegenie.com utilizando el navegador recomendado. Vea ¿Qué navegador de Internet debo utilizar para acceder a mi portal DateCodeGenie®?
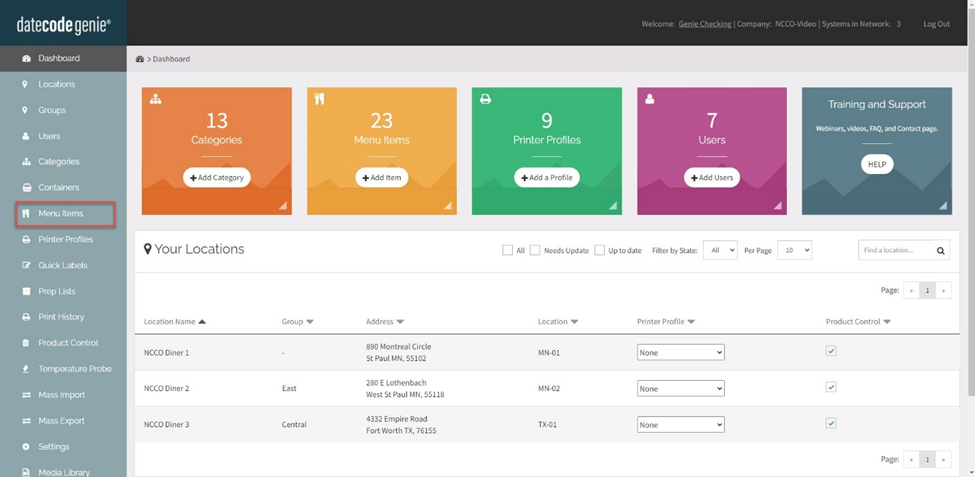
2. Haga clic en la pestaña Elementos del menú en la barra lateral.
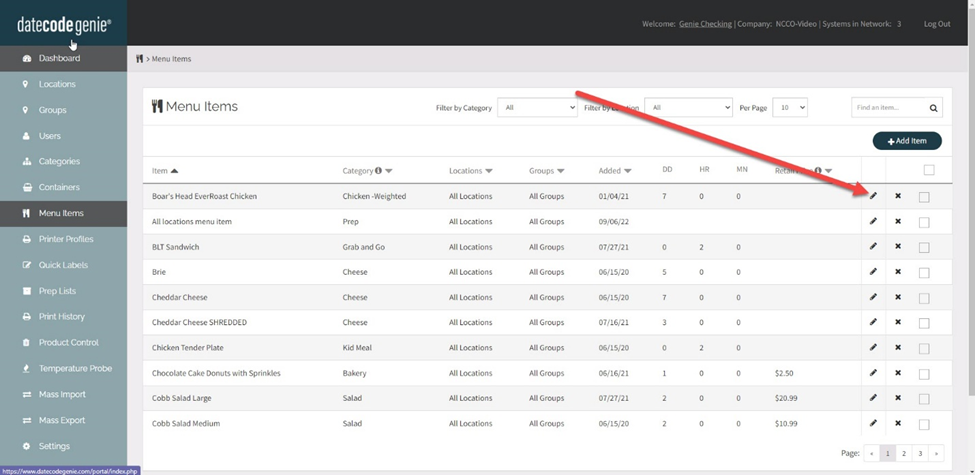
3. Haga clic en el botón Editar (icono de lápiz) para un elemento del menú o cree un elemento nuevo; consulte ¿Qué es un elemento de menú y cómo lo agrego o edito?
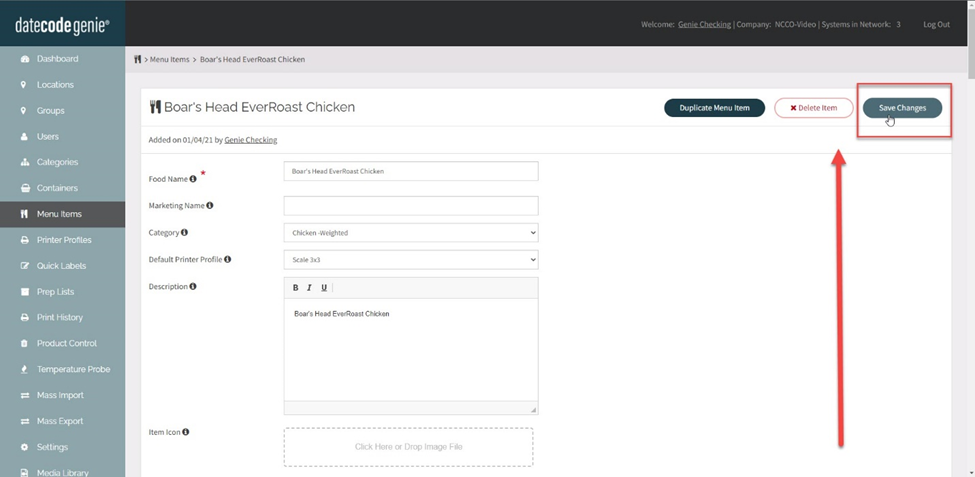
4. Desplácese hacia abajo y haga clic en la casilla de verificación Control de producto para configurar el artículo para realizar un seguimiento y ver las configuraciones adicionales.
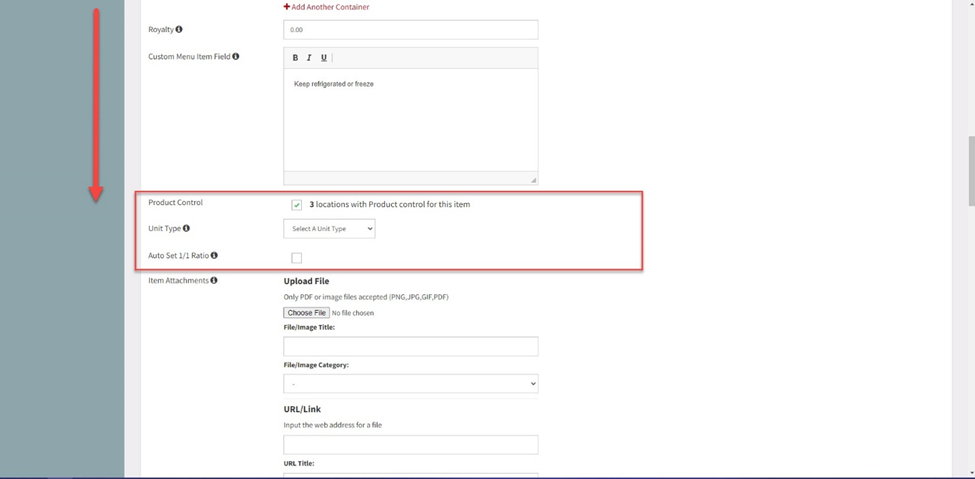
5. Seleccione el tipo de unidad de la lista desplegable para la medición del elemento del menú.
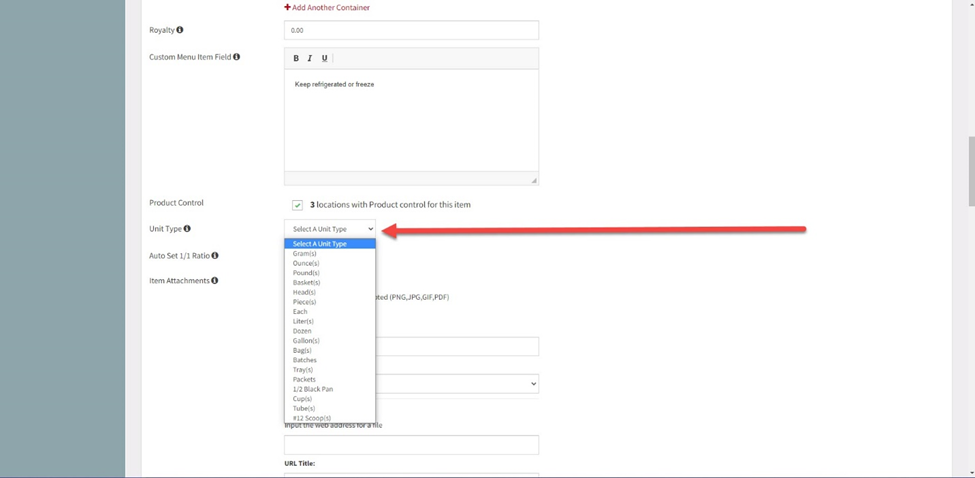
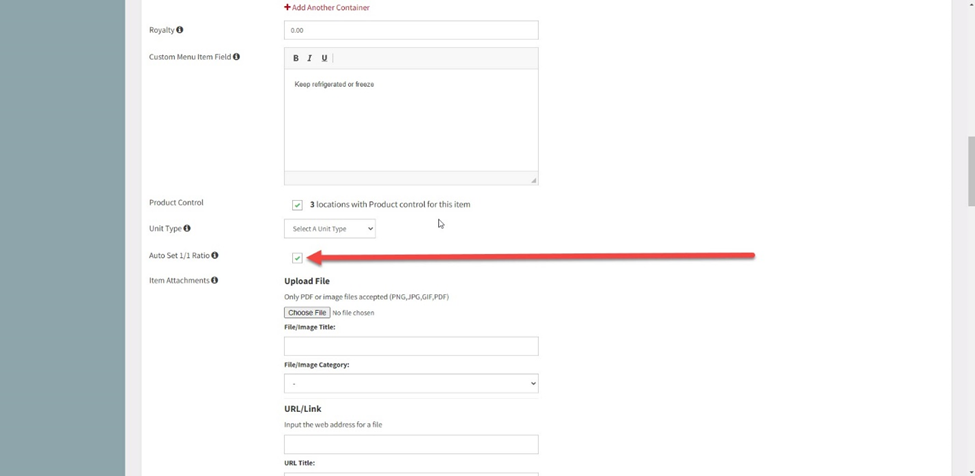
6. Haga clic en la casilla de verificación Establecer automáticamente proporción 1/1 si se realizará un seguimiento del elemento del menú imprimiendo 1 etiqueta para 1 elemento preparado. Déjelo sin marcar si se realizará un seguimiento del elemento del menú imprimiendo 1 etiqueta y la cantidad de preparación variará.
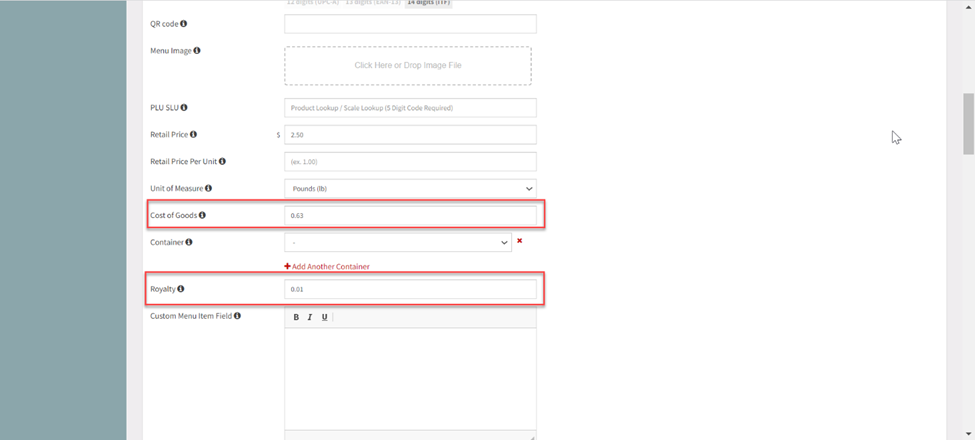
7. Agregue un valor monetario (no se requiere símbolo de moneda) al campo Costo de bienes y un porcentaje al campo Regalías si es necesario.
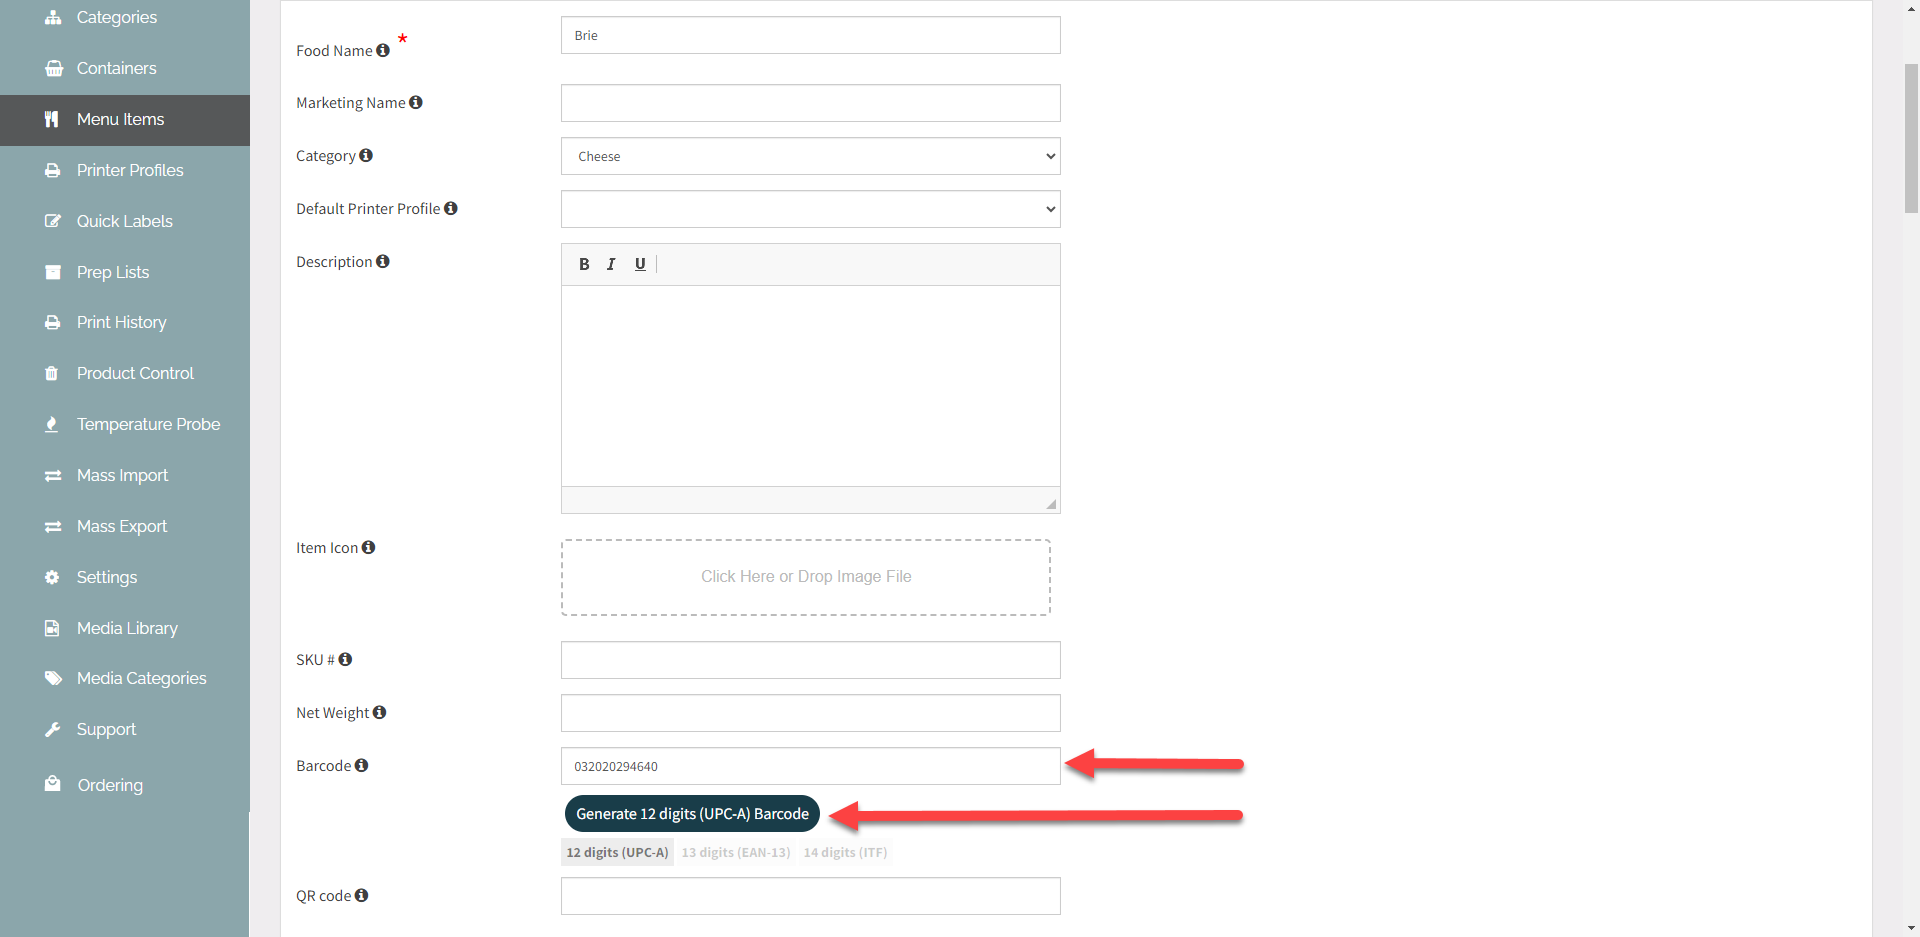
8. OPCIONAL: Configure el código de barras; si utiliza un código de barras para realizar un seguimiento de los residuos, consulte Agregar un código de barras .
9. Haga clic en Guardar cambios .
2. Establecer el método de escaneo predeterminado
Si utiliza un código de barras o una ID de impresión para escanear residuos, establezca cómo se realizará el seguimiento de los residuos en la pestaña de configuración.
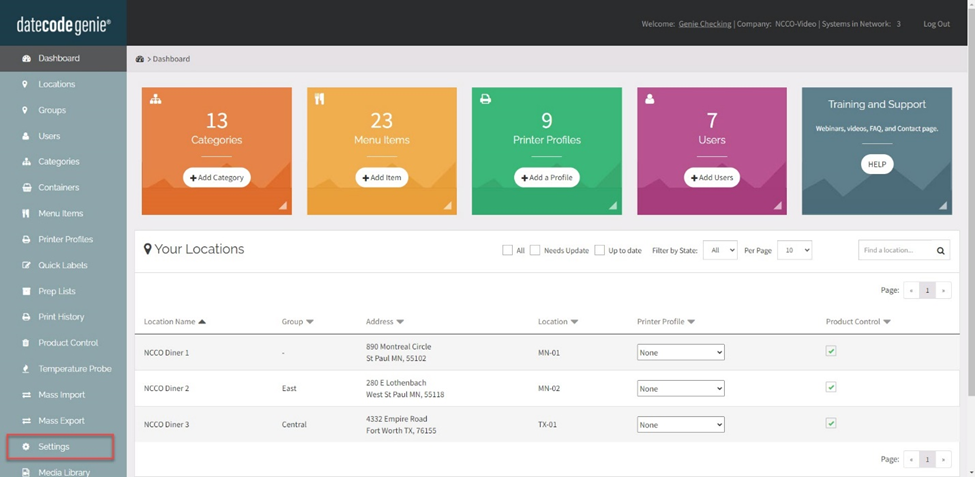
1. Vaya a la pestaña Configuración en la barra lateral.
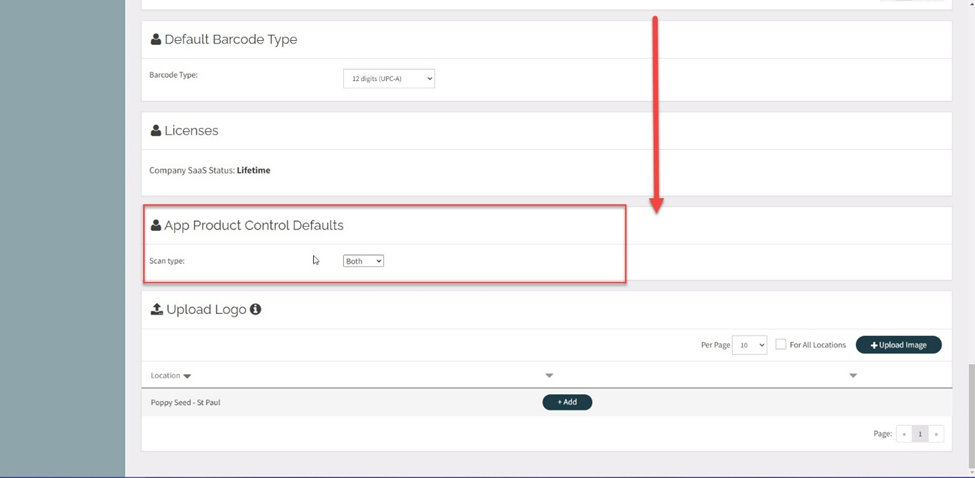
2. Desplácese hacia abajo hasta Valores predeterminados de control de productos de la aplicación y seleccione su método de escaneo preferido en el menú desplegable, código de barras o código QR (ID de impresión).
NOTA
Al seleccionar Ambos en la lista desplegable, el personal deberá seleccionar Código de barras o Código QR en la aplicación para escanear los desechos.
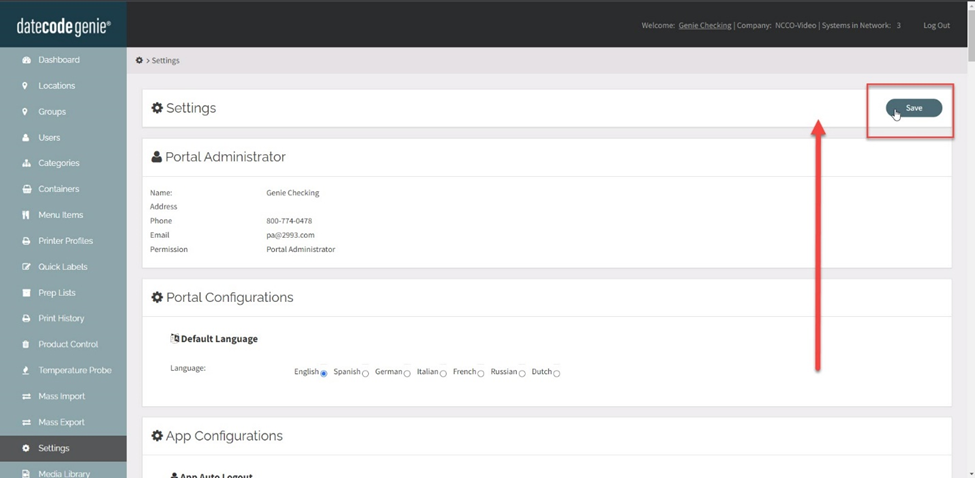
3. Desplácese hasta la parte superior de la página y haga clic en Guardar.
3. Configurar el perfil de la impresora
Agregue funciones para imprimir en etiquetas desde Layout Designer para el registro de preparación y residuos.
1. Haga clic en la pestaña Perfil de impresora en la barra lateral.
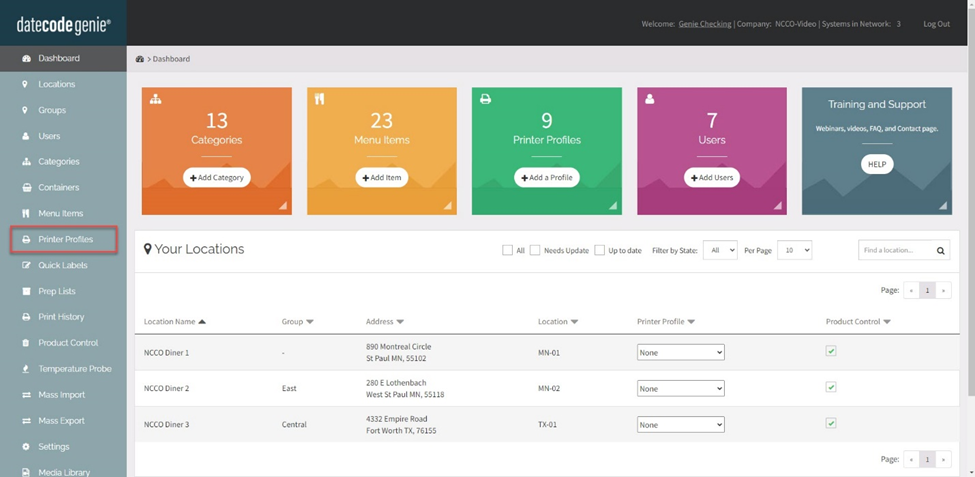
2. Haga clic en el botón Editar (icono de lápiz) de un perfil de impresora para editar o agregar un nuevo perfil de impresora. Consulte Cómo agregar etiquetas mediante perfiles de impresora .
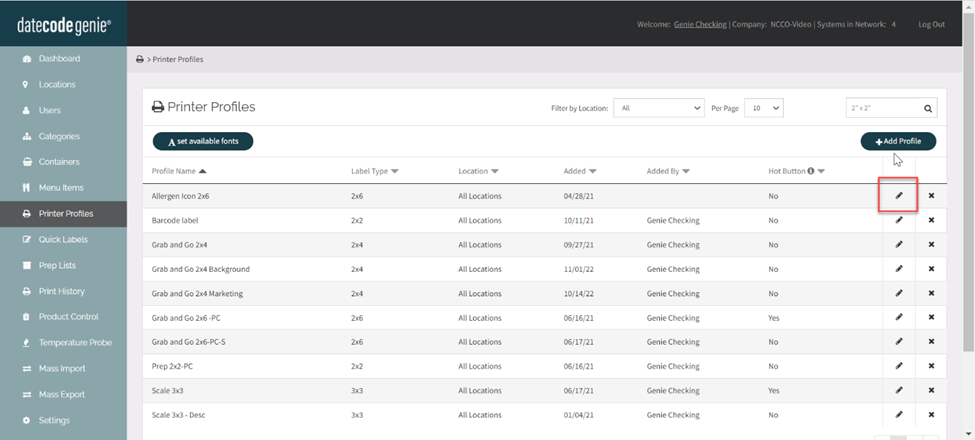
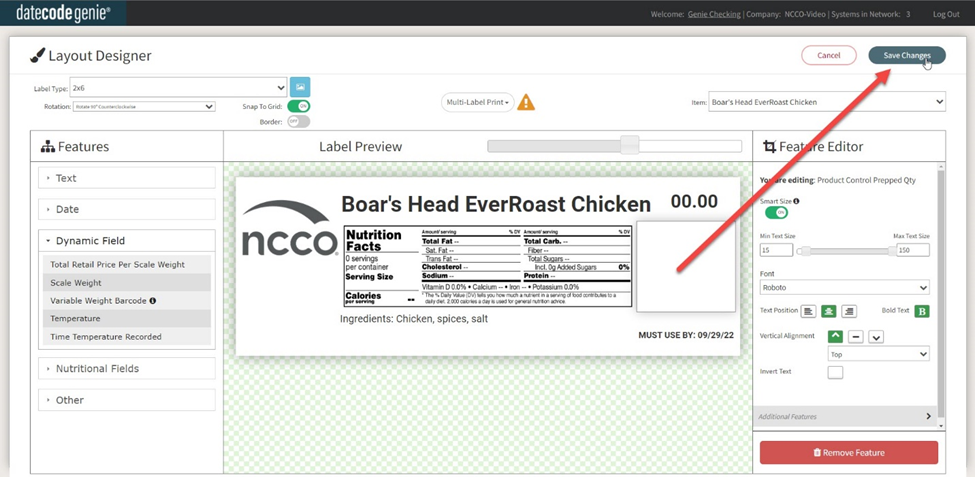
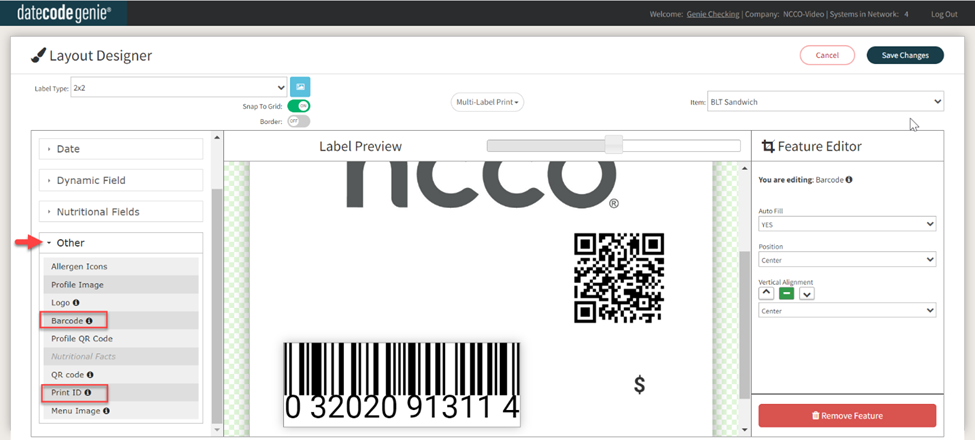
3. Desplácese hacia abajo y haga clic en el botón Diseñador de diseño para abrir la ventana Diseñador de diseño.
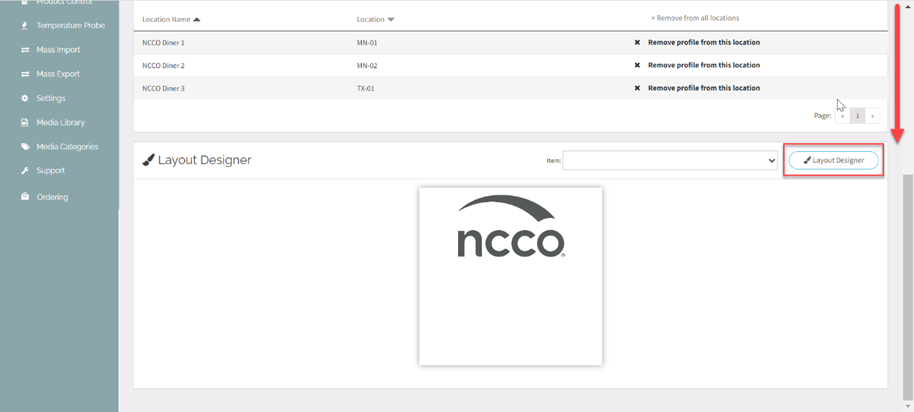
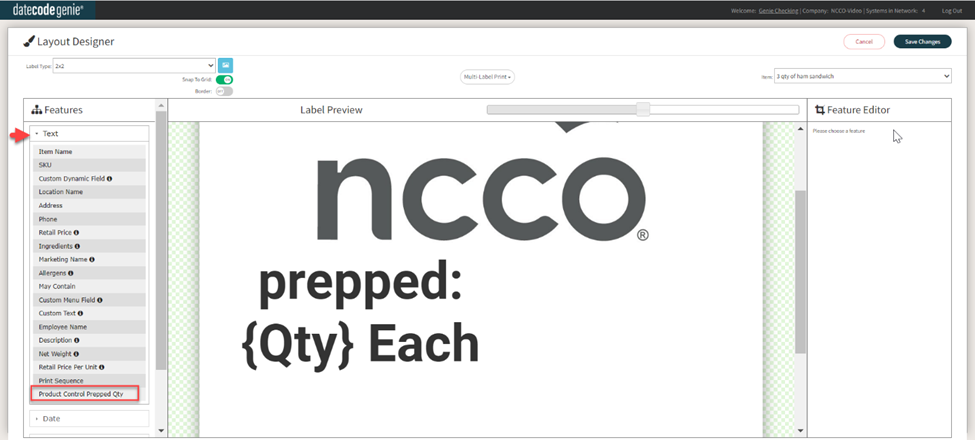
4. Ubique las funciones necesarias en la sección Funciones, en el lado izquierdo, y arrástrelas y suéltelas en la etiqueta en la sección de vista previa de la etiqueta central.
a. Grupo de texto: Control de producto Cantidad preparada
CONSEJOS Y TRUCOS
Agregue a las etiquetas de preparación cuando los elementos del menú no estén registrados con una proporción de uno a uno para obtener una imagen en la etiqueta de la cantidad total preparada.
b. Otro grupo: código de barras o ID de impresión
ADVERTENCIA
Asegúrese de seleccionar la función Imprimir ID si utiliza un código QR generado automáticamente para realizar un seguimiento de los residuos.
NOTA
- Al colocar más de una característica escaneable en una etiqueta, como código de barras, códigos QR o ID de impresión, deje suficiente espacio entre cada característica para escanear correctamente.
- El tamaño del área de la función Imprimir ID en la vista previa de la etiqueta no se puede reducir debido a la capacidad constante de escaneo.
5. Haga clic en el botón Guardar cambios .
