
Initial Product Import in StockSmart
Table of Contents
The initial product import lets you pull in your existing products and quantities to get you started with StockSmart.
You will be ready to start managing stock in StockSmart once the initial product import is complete for each supplier in your store.
Before starting an initial product import:
- Connect the supplier to StockSmart, see Set Up Supplier Connections in StockSmart.
- Add units of measure and storage locations.
- OPTIONAL: Add brands and categories.
Start an Initial Product Import
1. Launch StockSmart from the EatSuite dashboard.
2. Select your store from the dropdown.

3. Click Stock Management, then Initial Product Upload.

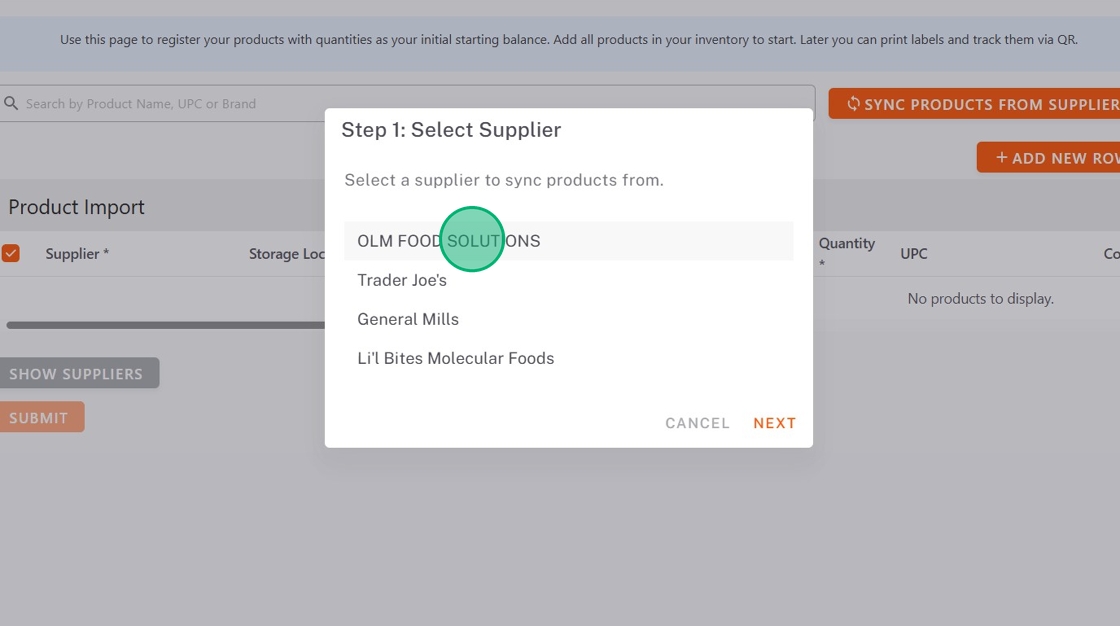
4. Click Sync Products from Suppliers.

5. Click the supplier, then click Next.
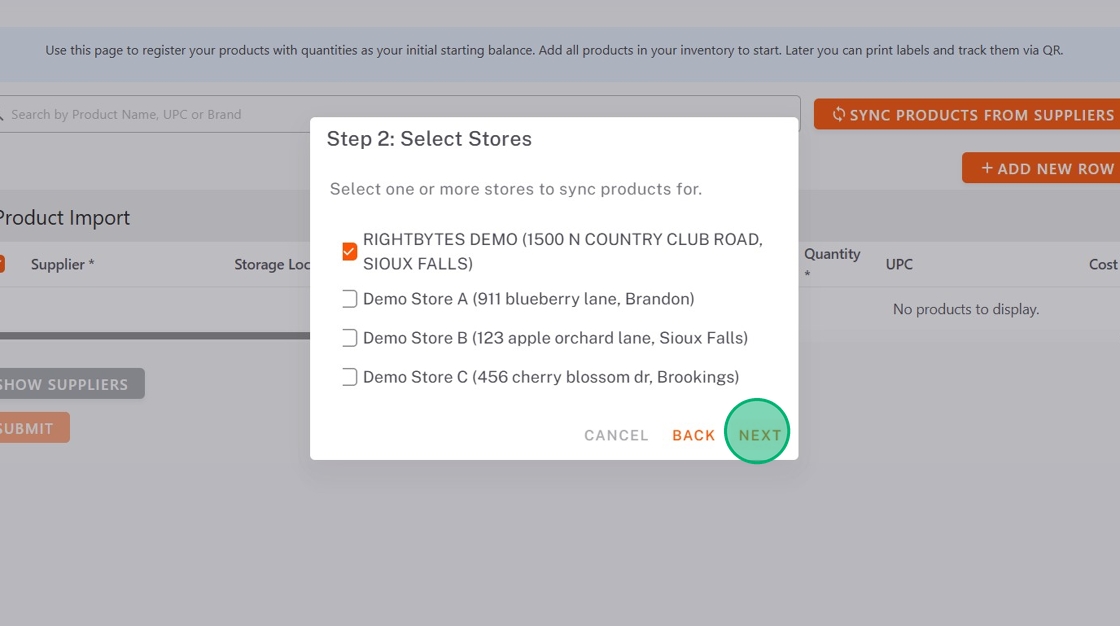
6. Select the store you are syncing products for, then click Next.
7. Click the date range for how far back you want to get products from, then click Submit.

Save and Access Drafts
1. Click Save Draft at any time to save your current progress.
2. Access saved drafts by clicking Load.

3. Click Update Draft at any time to save your progress.

Set Up and Navigate the Product Import Table
Setup how the product import table appears based on your preferences and learn to navigate the table.

a. Columns: Click Columns to select which columns show on the page.
TIPS & TRICKS
Deselect optional columns you will not be completing to shorten the length of the product import table.
b. Horizontal scroll bar: Slide the scroll bar to move left and right within the table.
c. Rows per page: Select the number of rows shown per page.
d. Page buttons: Click PREV or NEXT to move between pages.
Review Product List
Go through the product list and decide what to import in and what to leave out.
NOTE
There are two options for non-product expenses such as services and fees:
- Check Exclude from inventory to track the costs without including them in your inventory.
- Remove them from your import.
- Click the check box next to products to track in StockSmart

- Click Remove for any unwanted products.

Enter Product Data
Add all required product data and any optional fields desired.
- Product Nickname (optional): The common name your staff would know this product by for easy identification.
- Quantity: The amount of product currently at the store.
-
Storage Location: Where the current product quantity is located within the store. Select one storage location from the dropdown, or allocate between multiple storage locations.
Allocate Product to Storage Locations
a. Click ALLOCATE.

b. Click Add Location for each additional location.
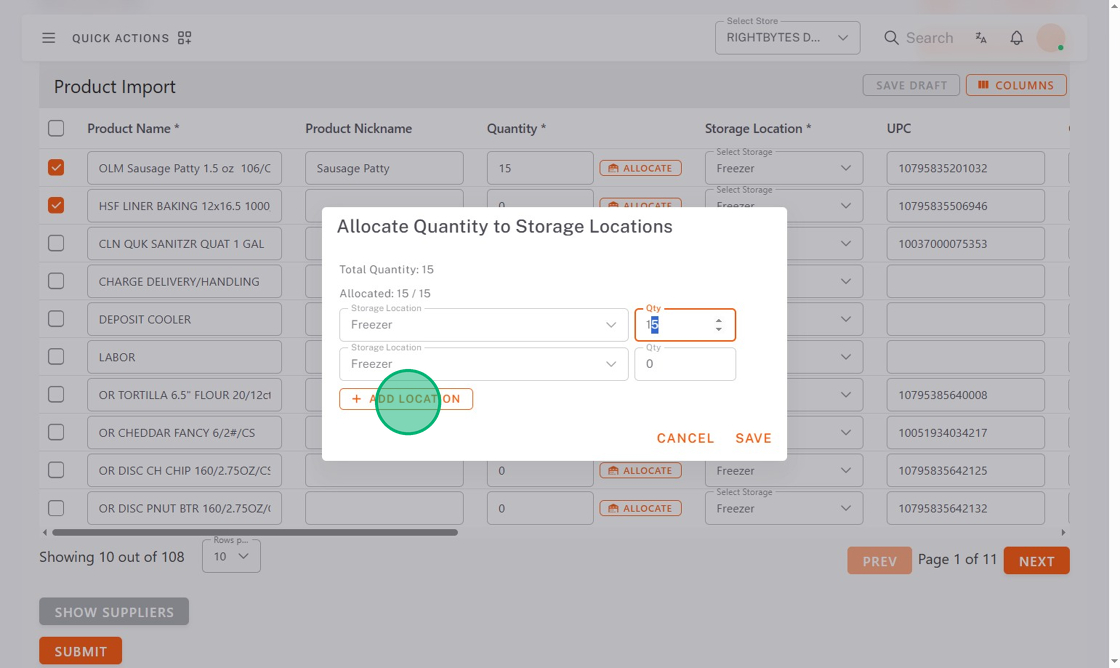
c. Select Storage Locations from the dropdown.

d. Type the Quantity in each storage location, equal to the total quantity.
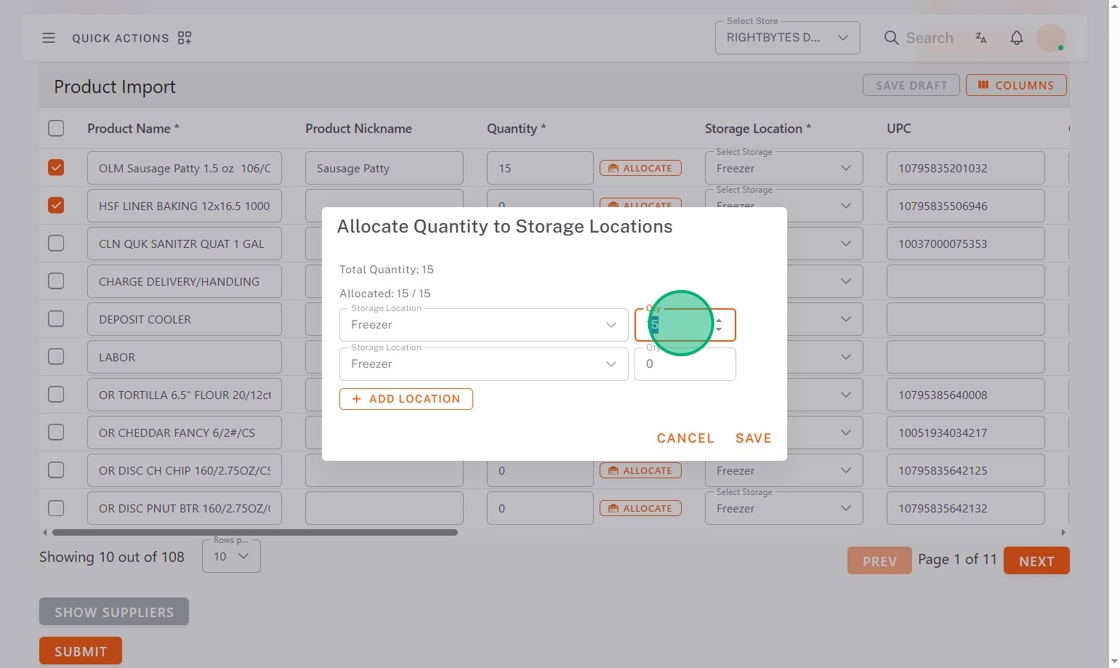
e. Click Save when finished.

- Brand (optional): The brand that product is from.
- Category (optional): Groups of products to help organize products and get better reporting.
- Unit: The unit of measure the product quantity is in.
- Lot tracking: Check the box if you want to use lot tracking for this product.
-
Breakdown (Optional): Set up a product breakdown if the product is separated into smaller units when received.
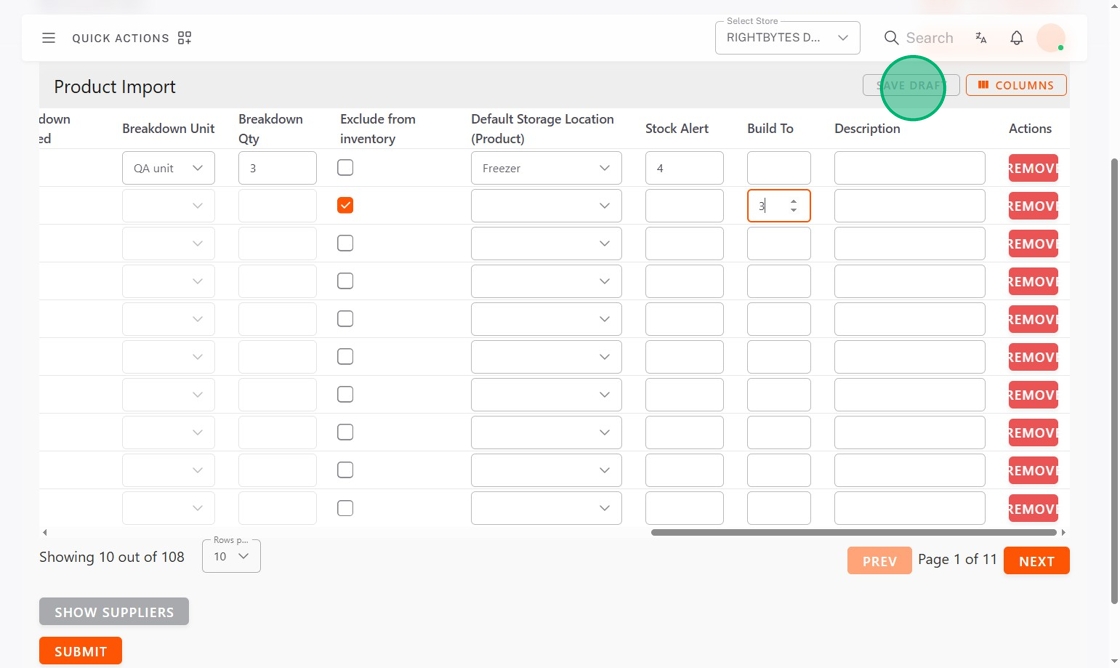
Set Up Product Breakdown
a. Click the Breakdown Needed checkbox.

b. Select the Breakdown Unit from the dropdown.

c. Type the Breakdown Qty.

- Exclude from inventory: Check this box for services or fees that you want to track the cost of, but not include as inventory.
- Default Storage Location: The storage location the product goes when received.
- Stock Alert (optional): The lowest quantity of the product before you need to reorder. You can check for stock alerts in the Quantity Alert under the Reports tab, see Reports in StockSmart.
- Build to (optional): The quantity of the product your should have ready. You can check your build to alerts under the Reports tab, see Reports in StockSmart.
- Description (optional): A short explanation of what this product is.
Submit to Complete the Import
Click SUBMIT once finished entering product data to complete the initial product import.

