Dienstpläne im Portal einrichten
„Rosters“ ist eine Software-Zusatzoption zum Erstellen von Mitgliederlisten mit spezifischen Mitgliederinformationen, die auf einem Etikett gedruckt werden können.
Dienstpläne können für verschiedene Szenarien verwendet werden, beispielsweise:
- Unterrichtsräume
- Teams
- Seiten
- Verpackte Mahlzeiten
- Kunden
- Routen
Für jedes hinzugefügte Mitglied stehen mehrere Felder zur Verfügung.
Dienstpläne können mit Vorbereitungslisten verwendet werden, um neben dem Namen des Menüpunkts auch das Mitglied und seine spezifischen Mitgliedsinformationen auf dem Etikett zu identifizieren.
Dienstpläne können Ihrem Portal hinzugefügt werden, indem Sie eine Portaländerung anfordern (siehe „Kontakt und Support“) .
Zum Einrichten von Dienstplänen sind drei Teile erforderlich:
1. Liste und Mitglieder hinzufügen
Erstellen Sie Ihre Liste und fügen Sie Mitglieder hinzu.
1. Melden Sie sich mit dem empfohlenen Browser beim Portal unter www.datecodegenie.com an. Siehe „Welchen Internetbrowser sollte ich verwenden, um auf mein DateCodeGenie®- Portal zuzugreifen?“
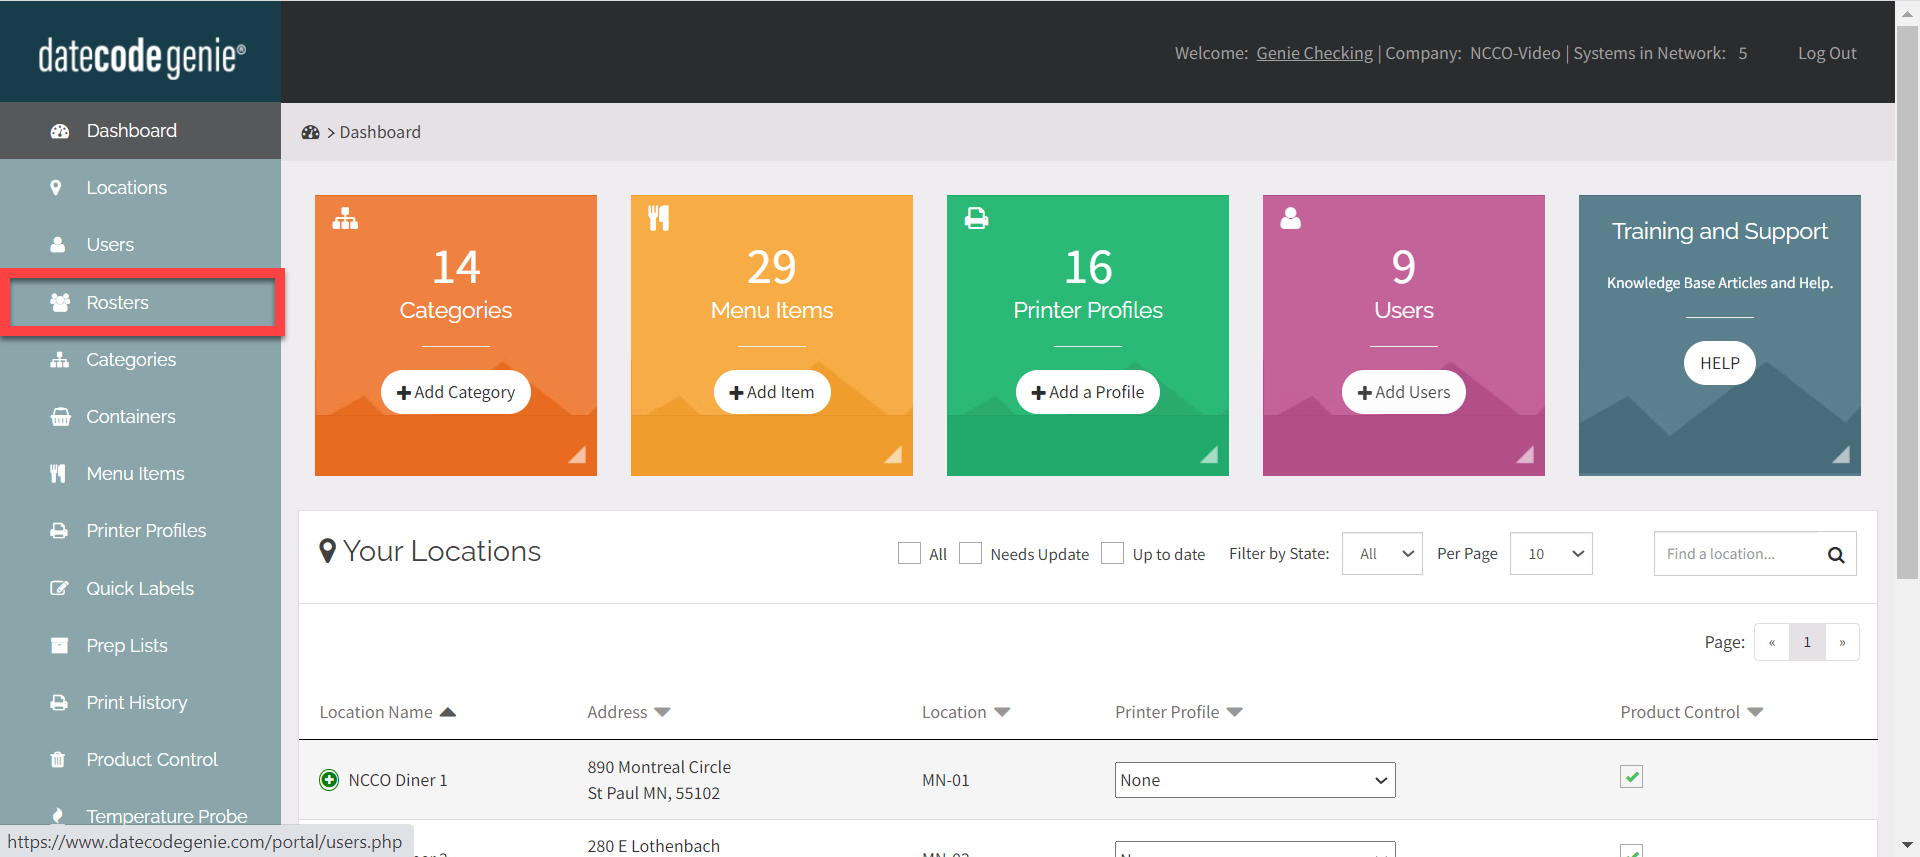
2. Klicken Sie in der Seitenleiste auf die Registerkarte „Dienstpläne“ .
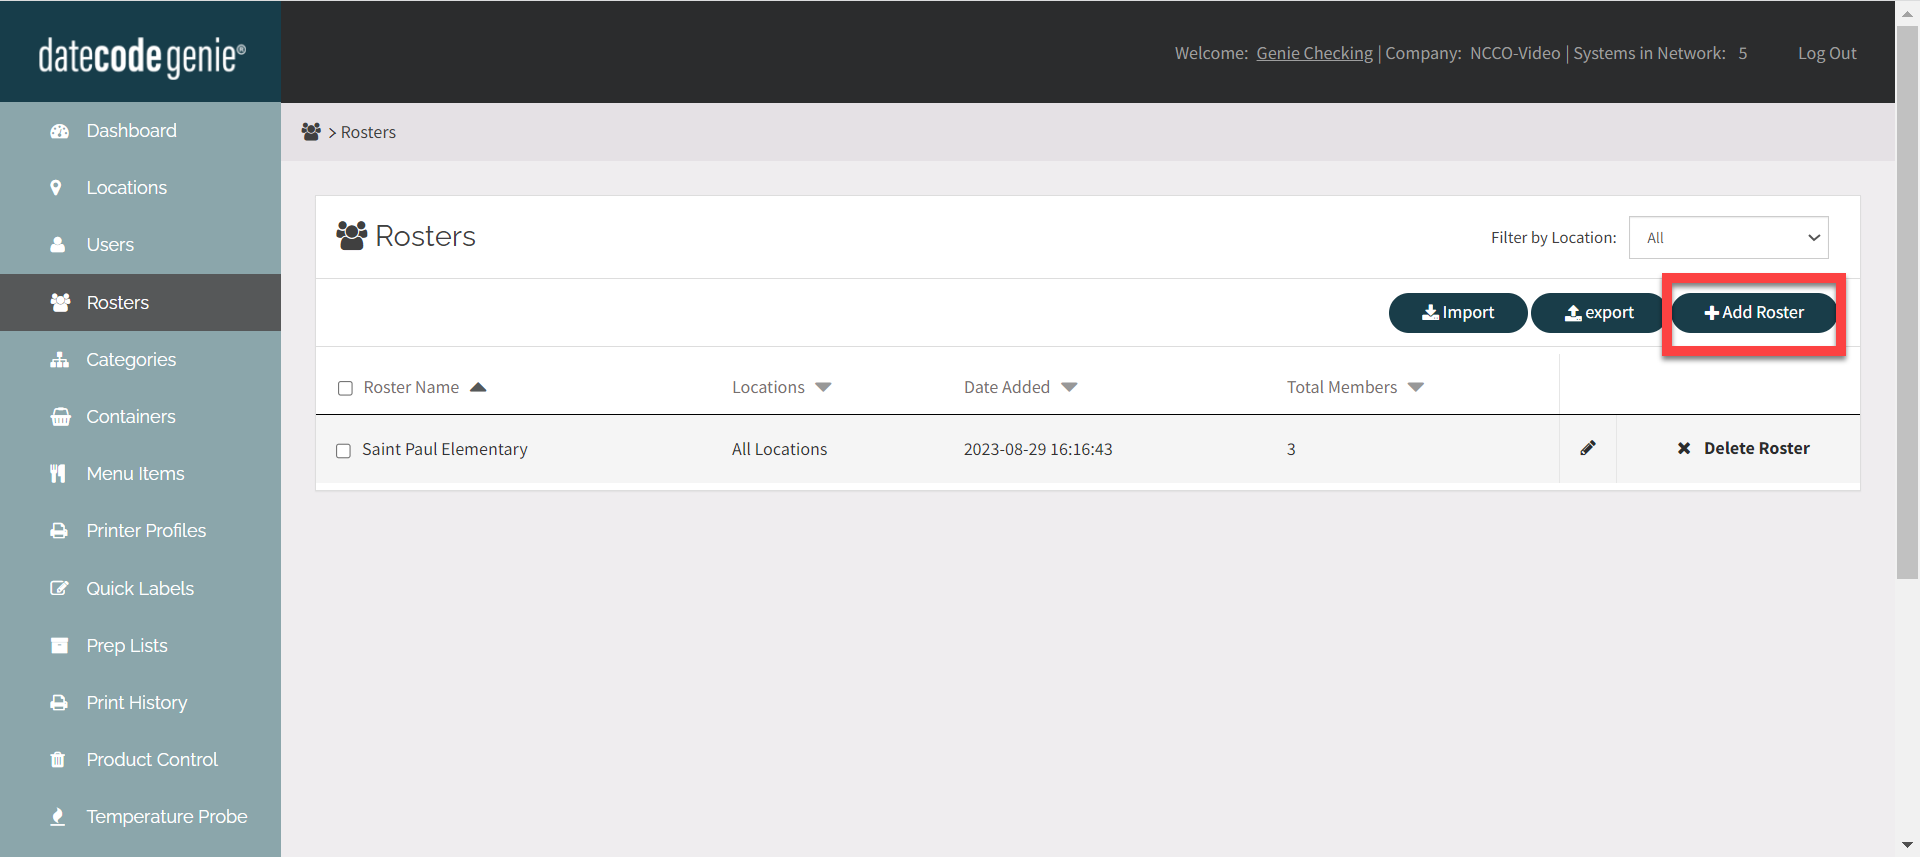
3. Klicken Sie auf die Schaltfläche „+Dienstplan hinzufügen“ .
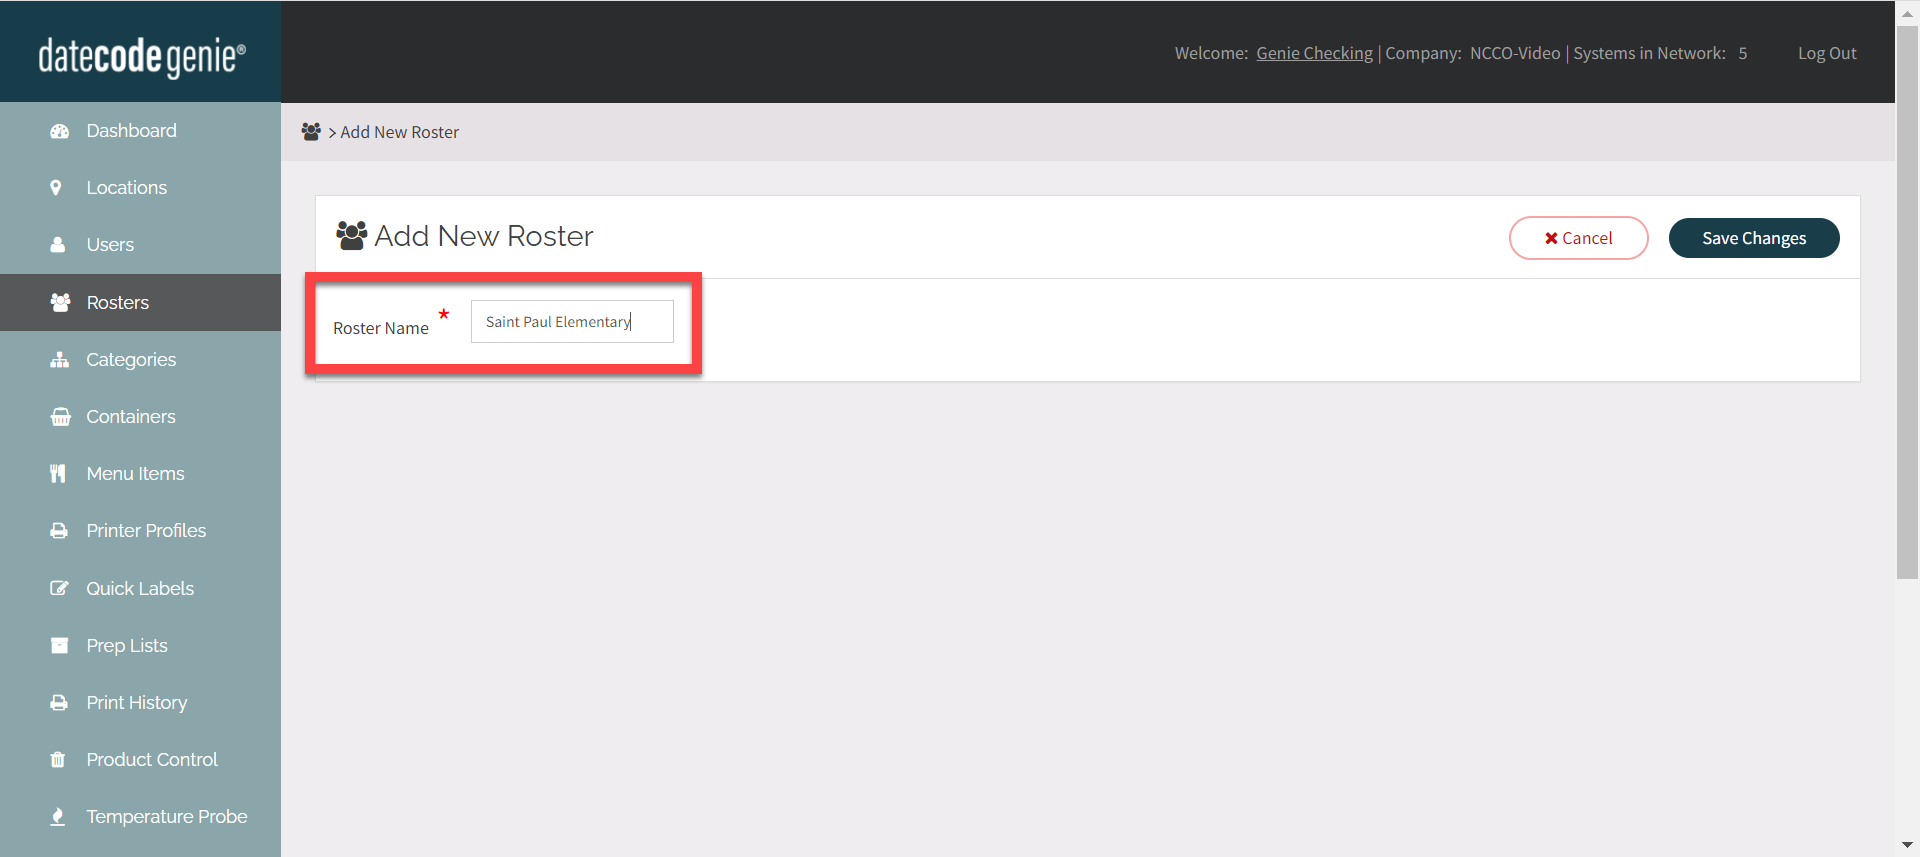
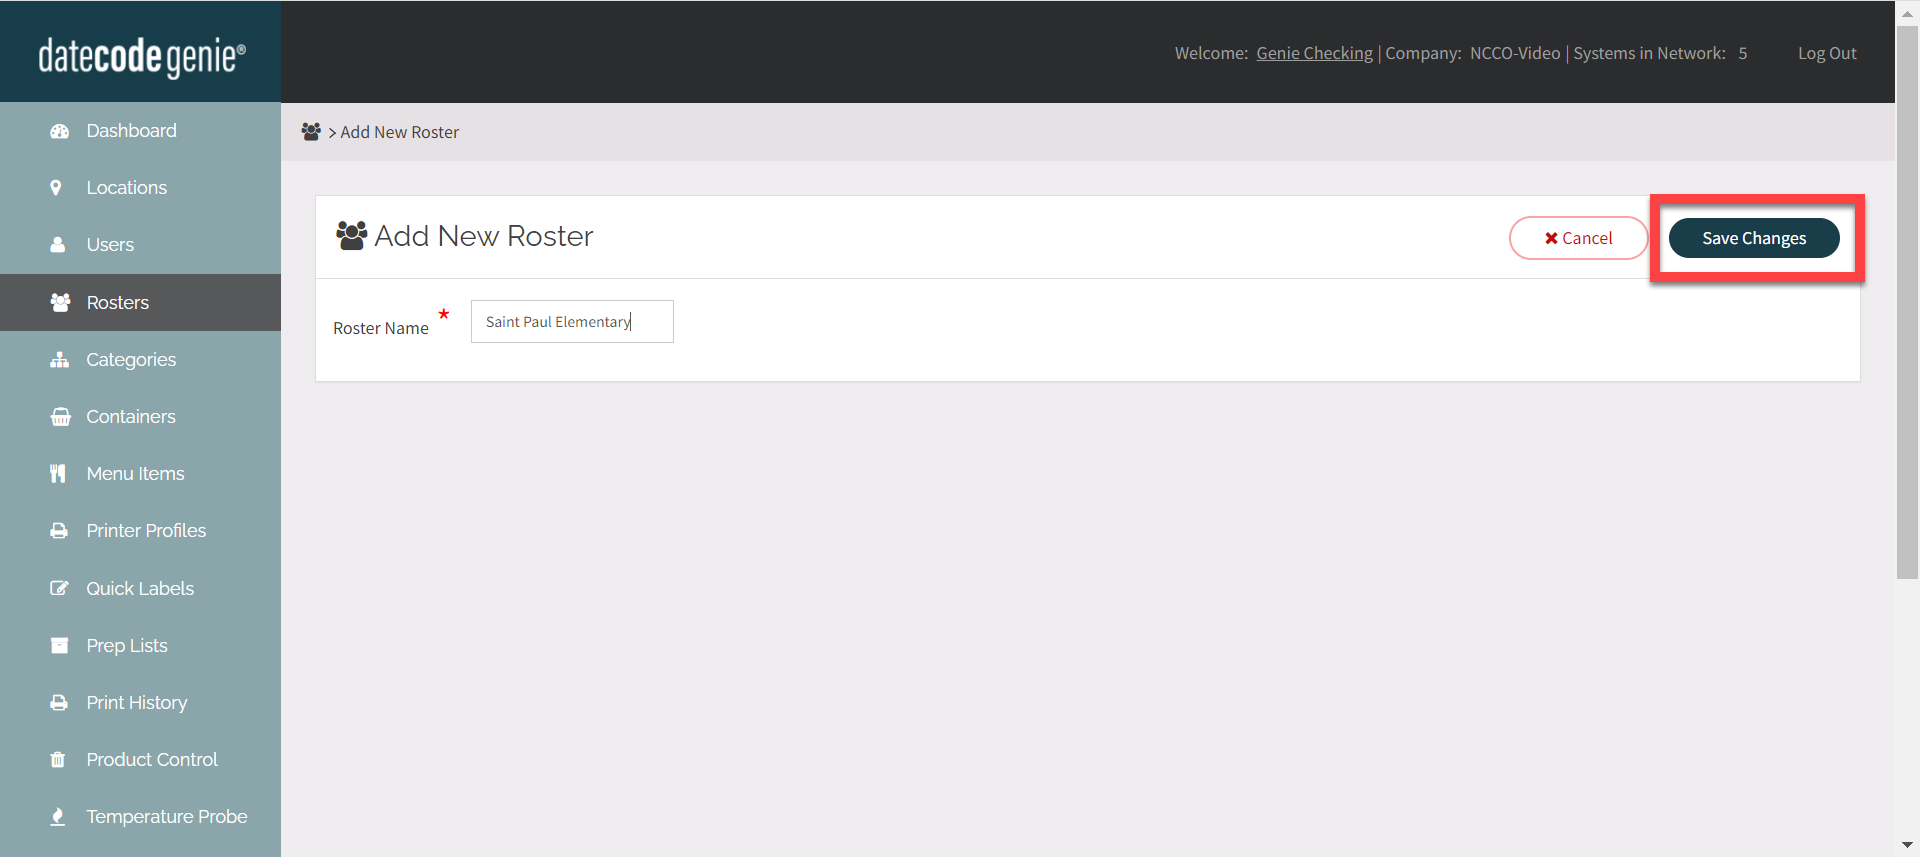
4. Geben Sie den Dienstplannamen ein.
5. Klicken Sie auf die Schaltfläche „Änderungen speichern“ .
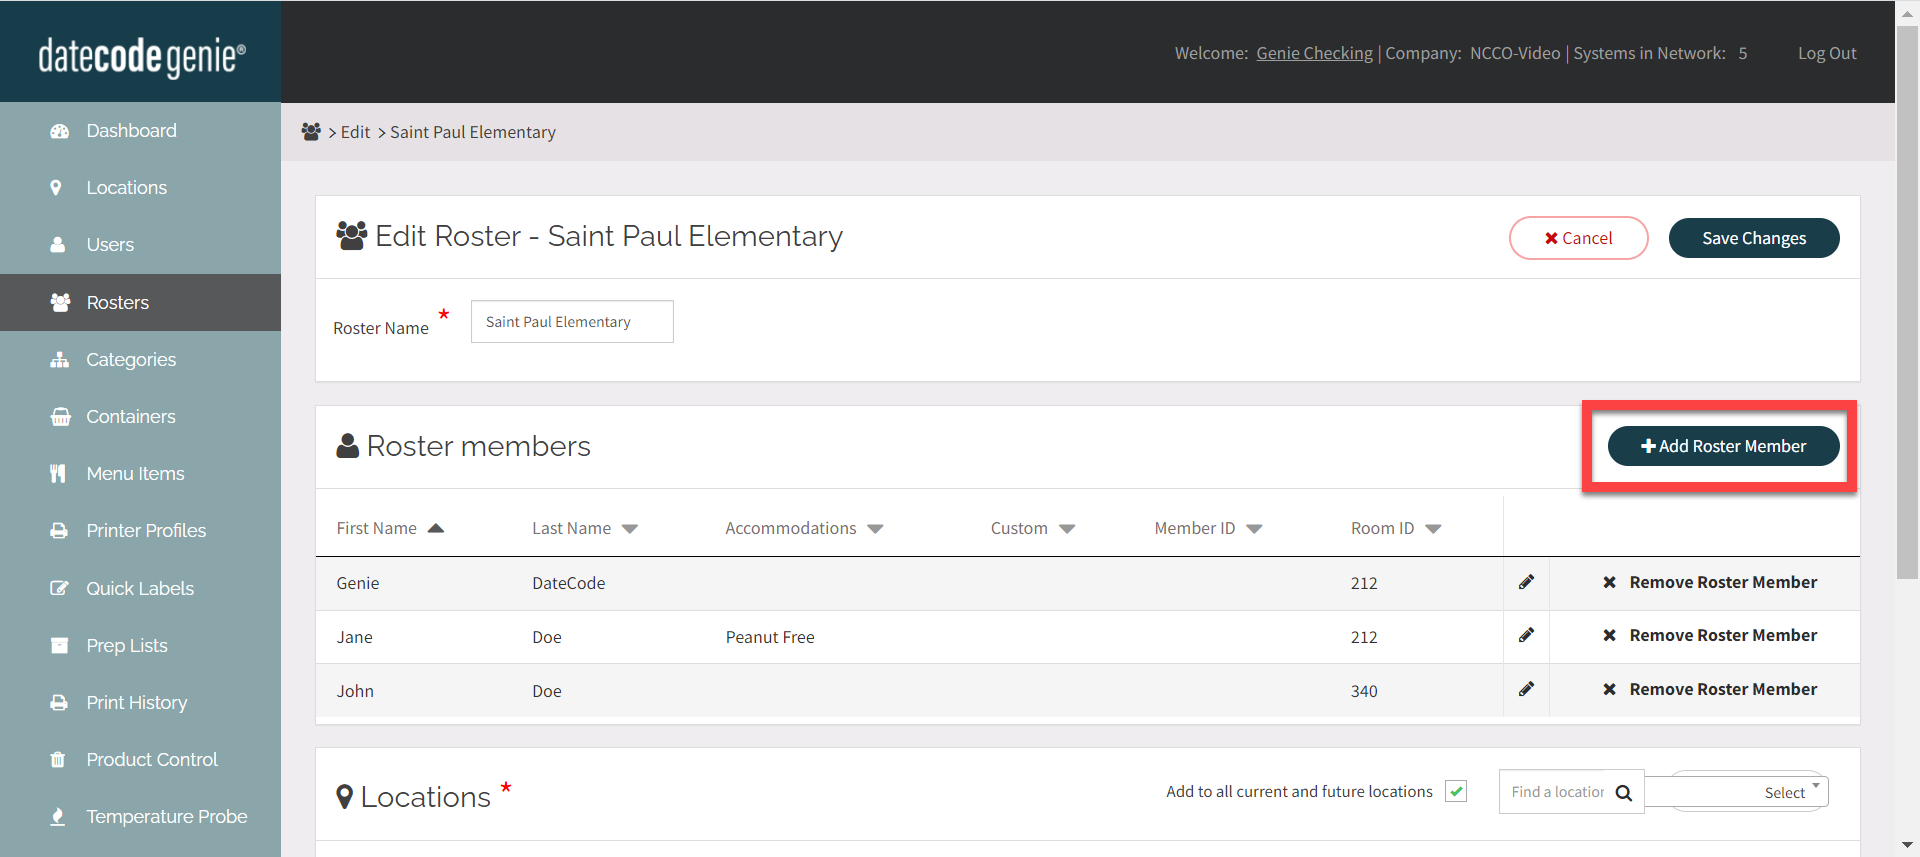
6. Klicken Sie auf die Schaltfläche „Dienstplanmitglied hinzufügen“, um die einzelnen Dienstplanmitglieder hinzuzufügen.
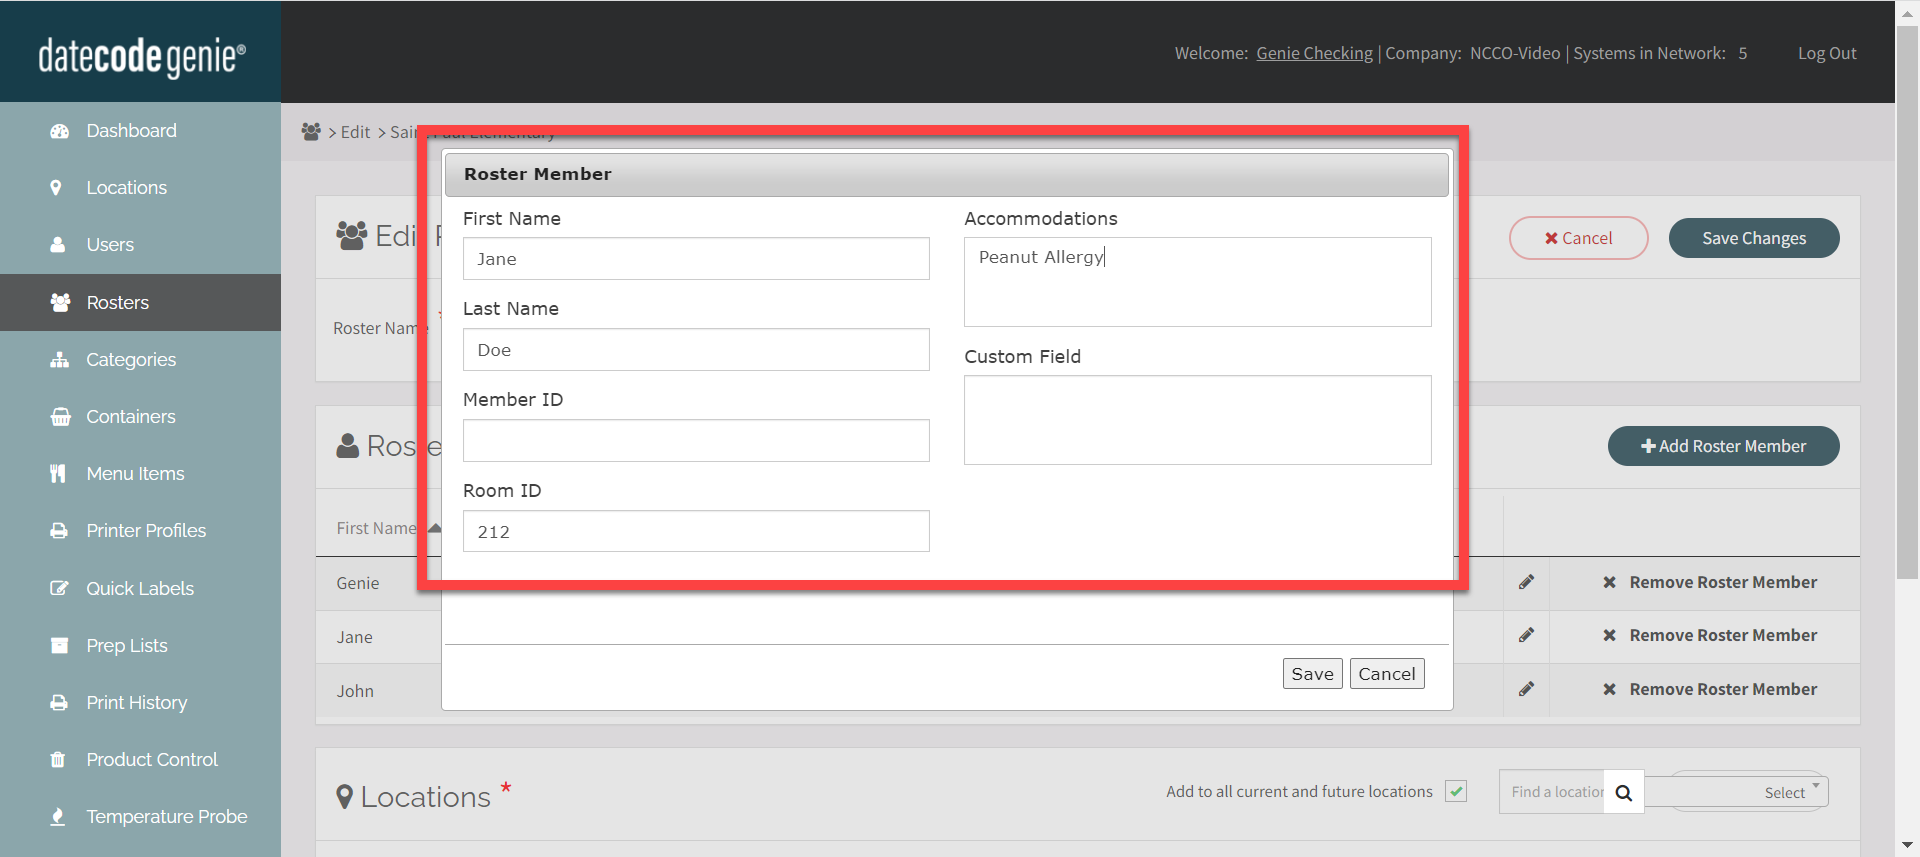
7. Geben Sie den Namen des Dienstplanmitglieds und alle anderen relevanten Informationen ein.
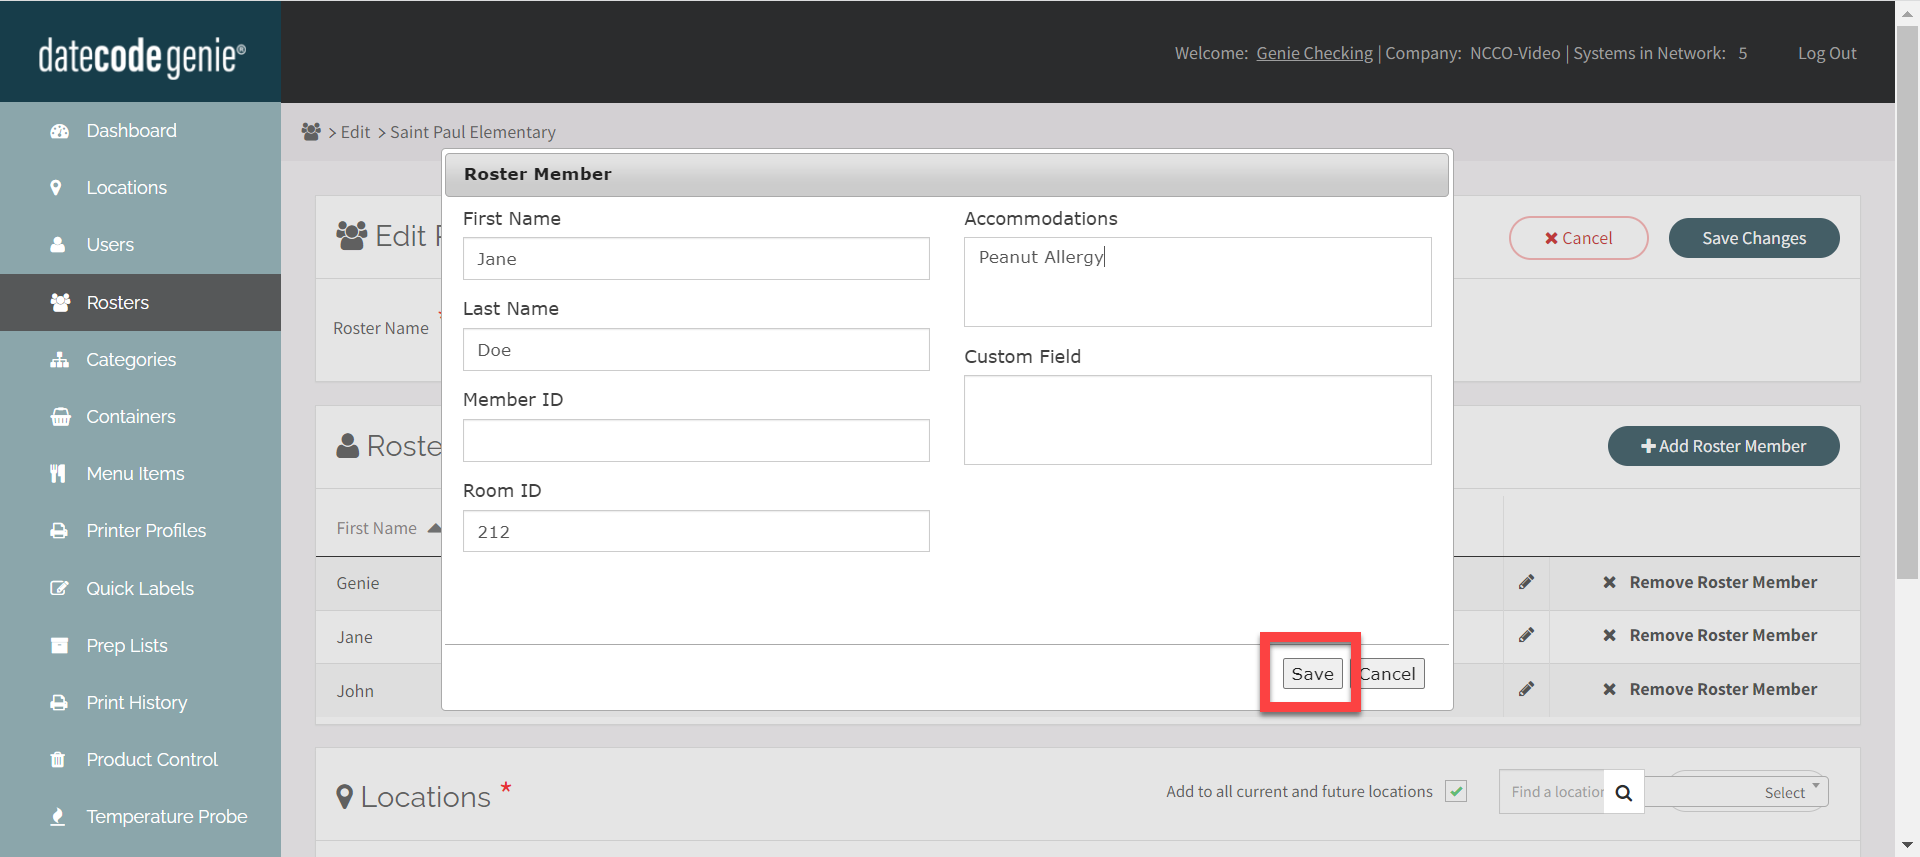
8. Klicken Sie auf Speichern .
9. Fügen Sie unter „Standorte“ Standorte aus der Dropdown-Liste hinzu oder aktivieren Sie das Kontrollkästchen „Zu allen aktuellen und zukünftigen Standorten hinzufügen“.
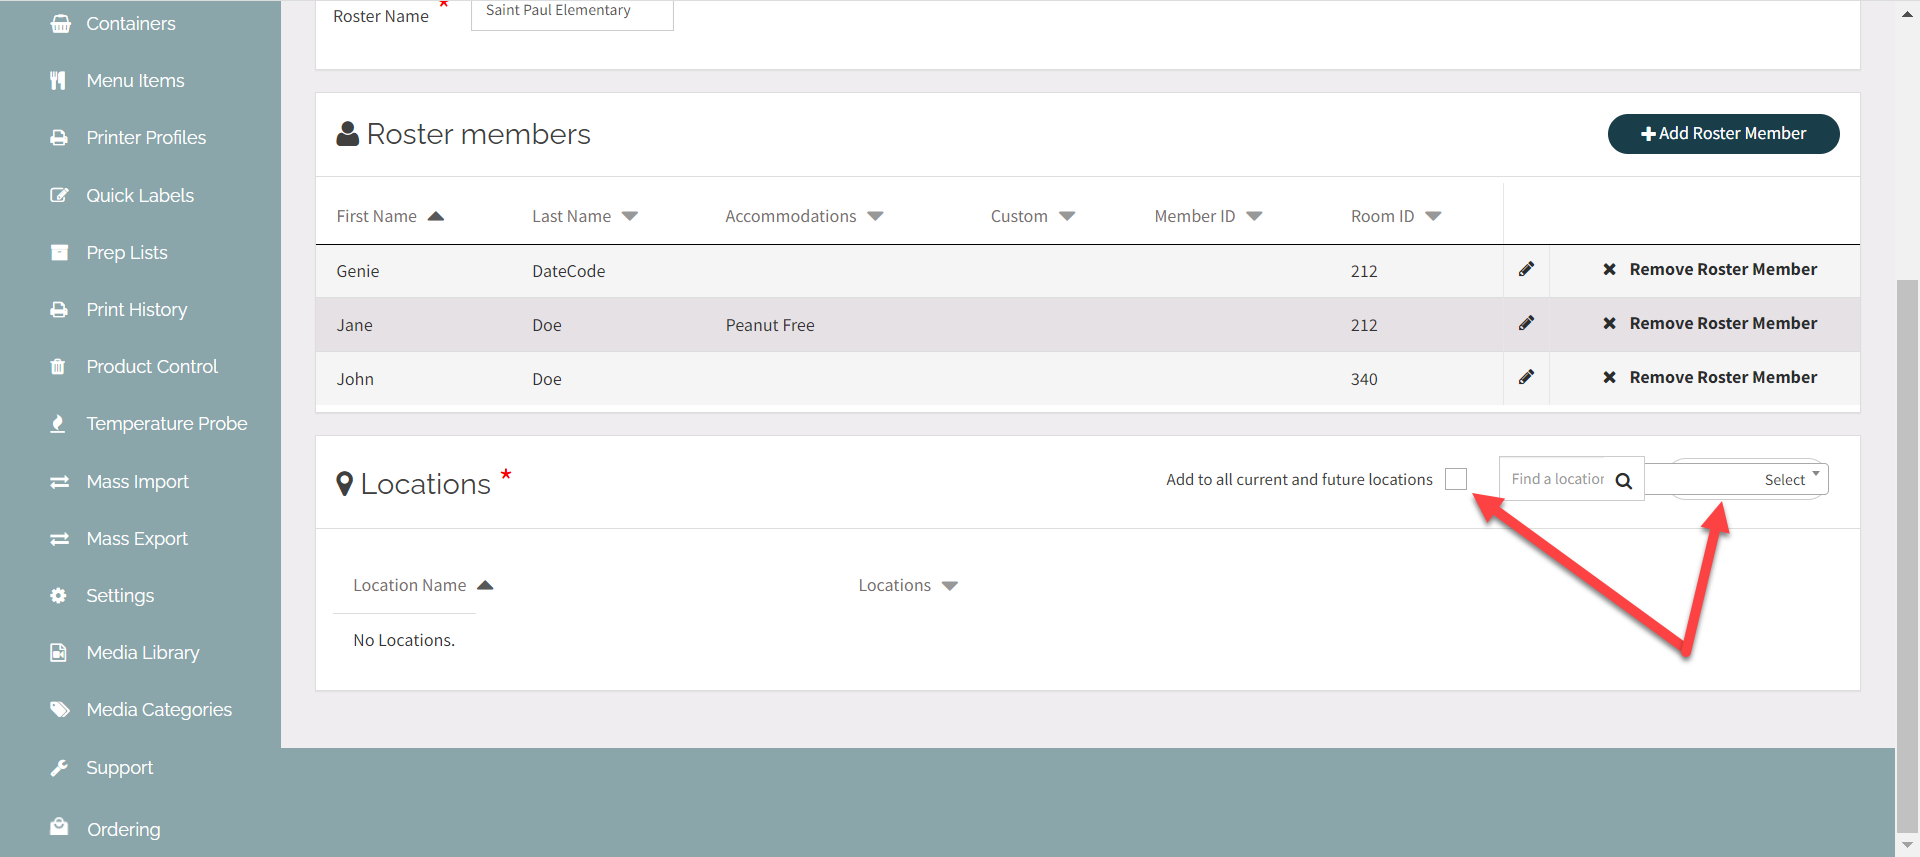
10. Klicken Sie auf die Schaltfläche „Änderungen speichern“ .
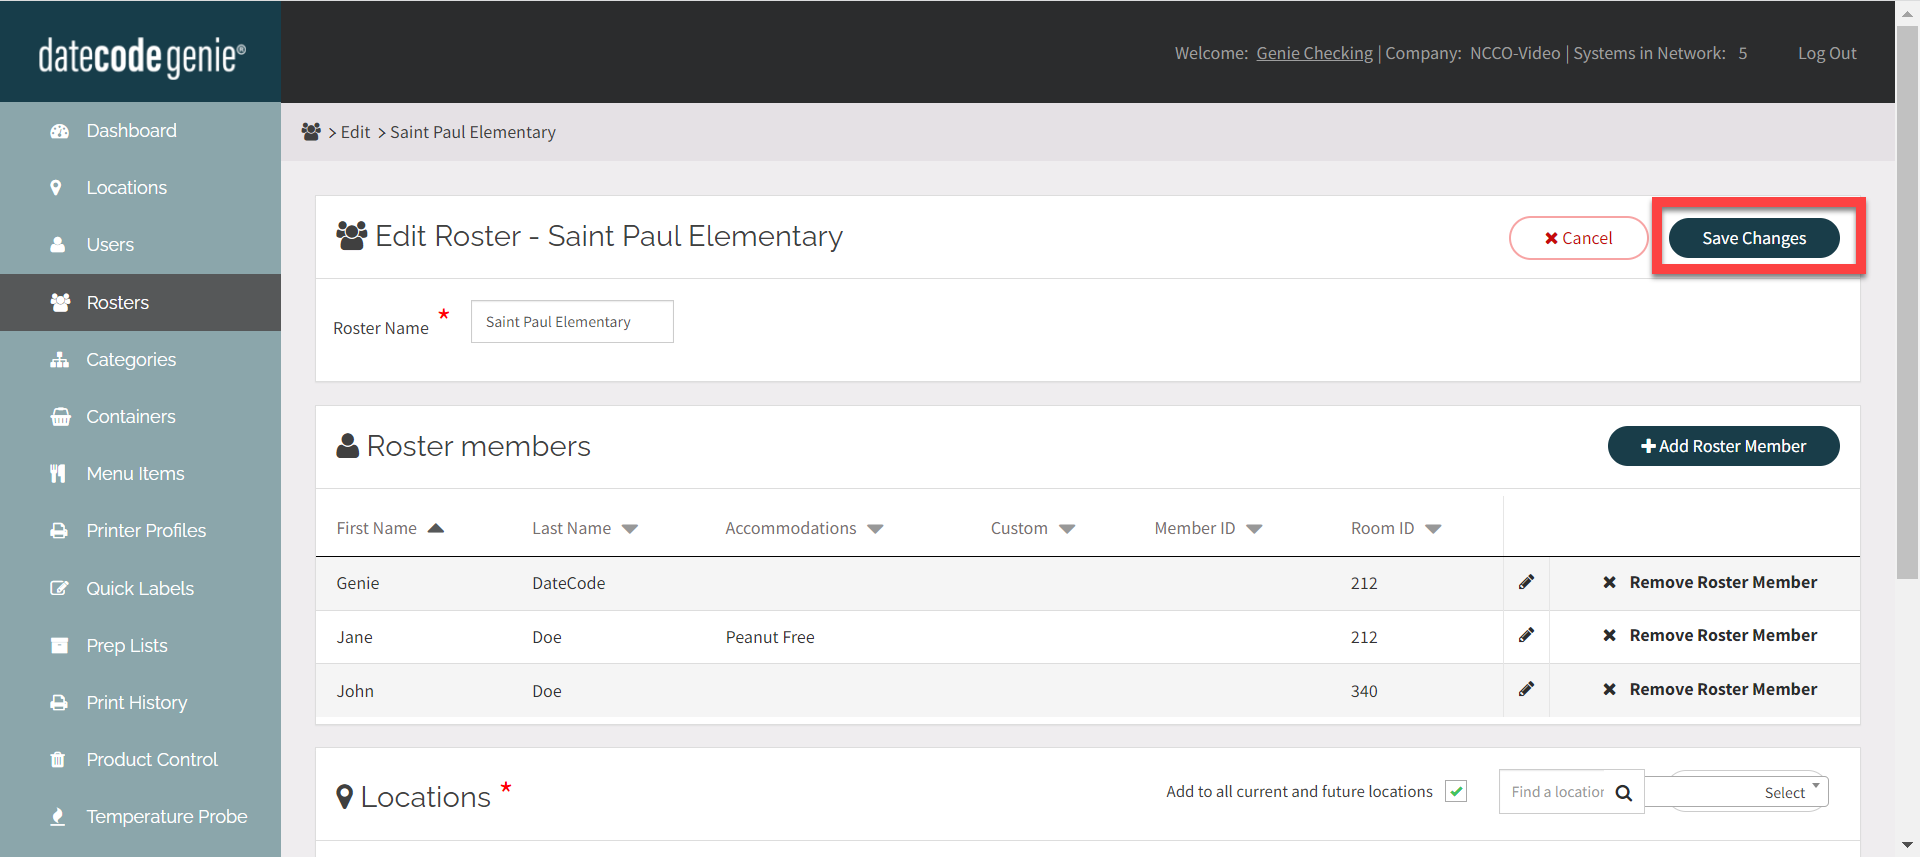
2. Zum Druckerprofil hinzufügen
Fügen Sie ein Druckerprofil hinzu oder bearbeiten Sie es, siehe Druckerprofile verwalten .
Suchen Sie im Layout-Designer unter „Funktionen“ nach „Dienstplanfeldern“ und fügen Sie der Etikettenvorschau die benötigten Funktionen hinzu.

3. OPTIONAL: Auf Prep-Listen anwenden
Dienstpläne und Dienstplanmitglieder können zu jeder Vorbereitungsliste hinzugefügt werden, um schnell Etiketten zu drucken.
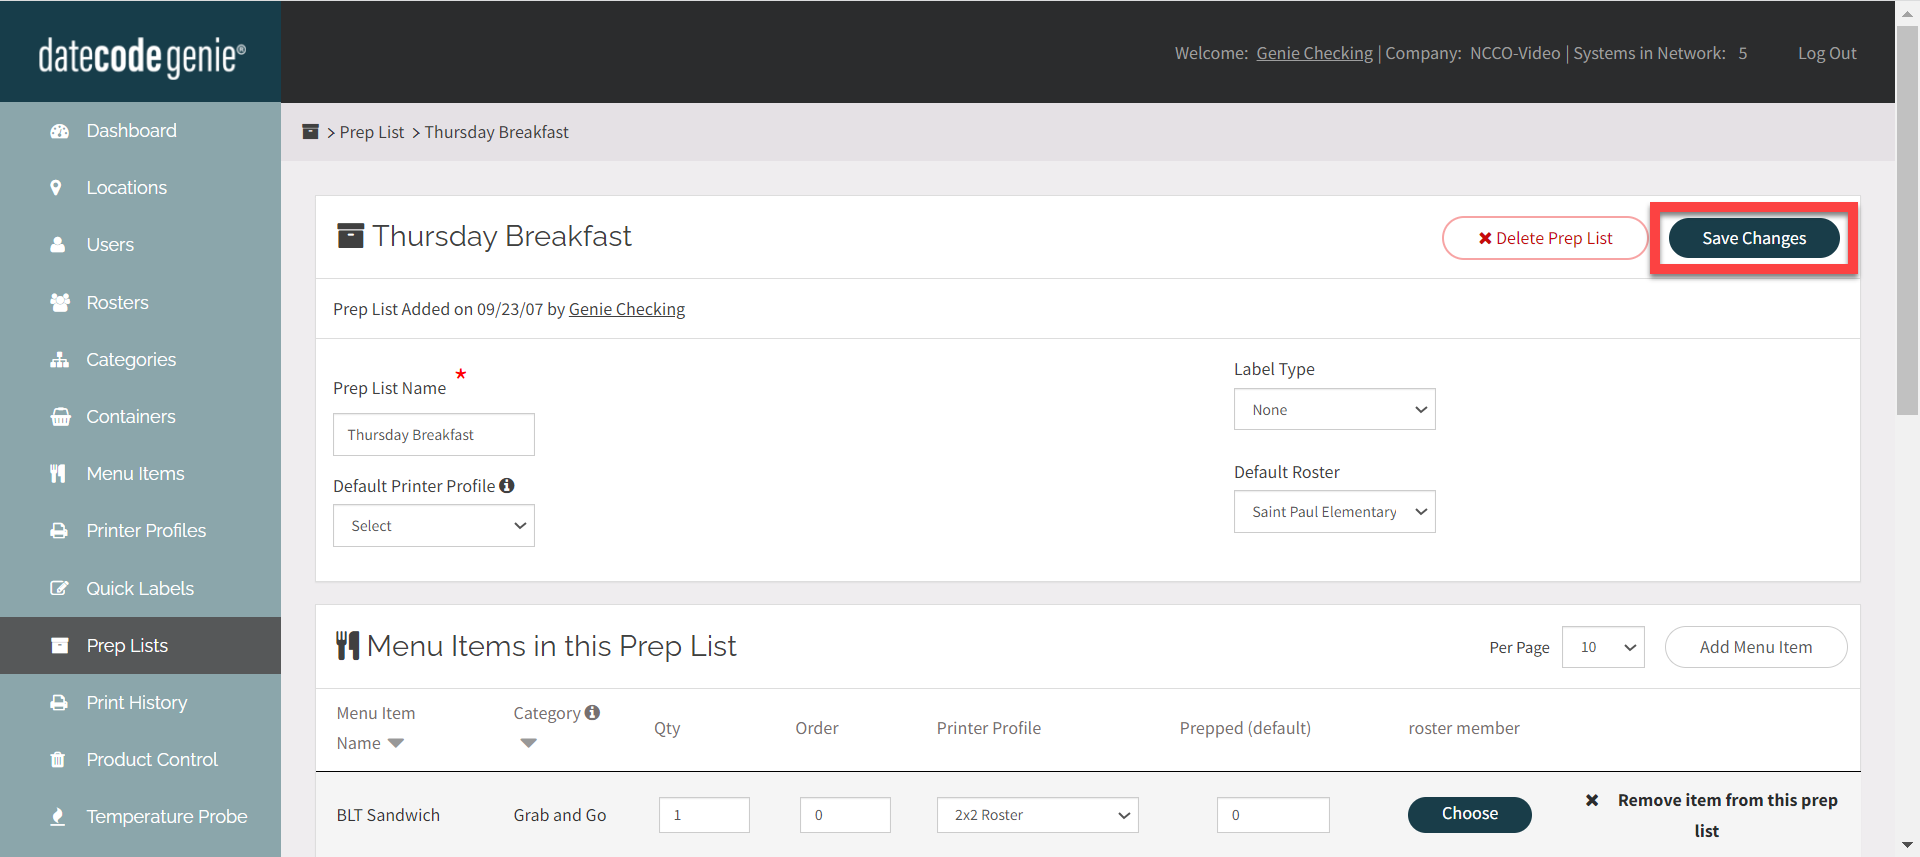
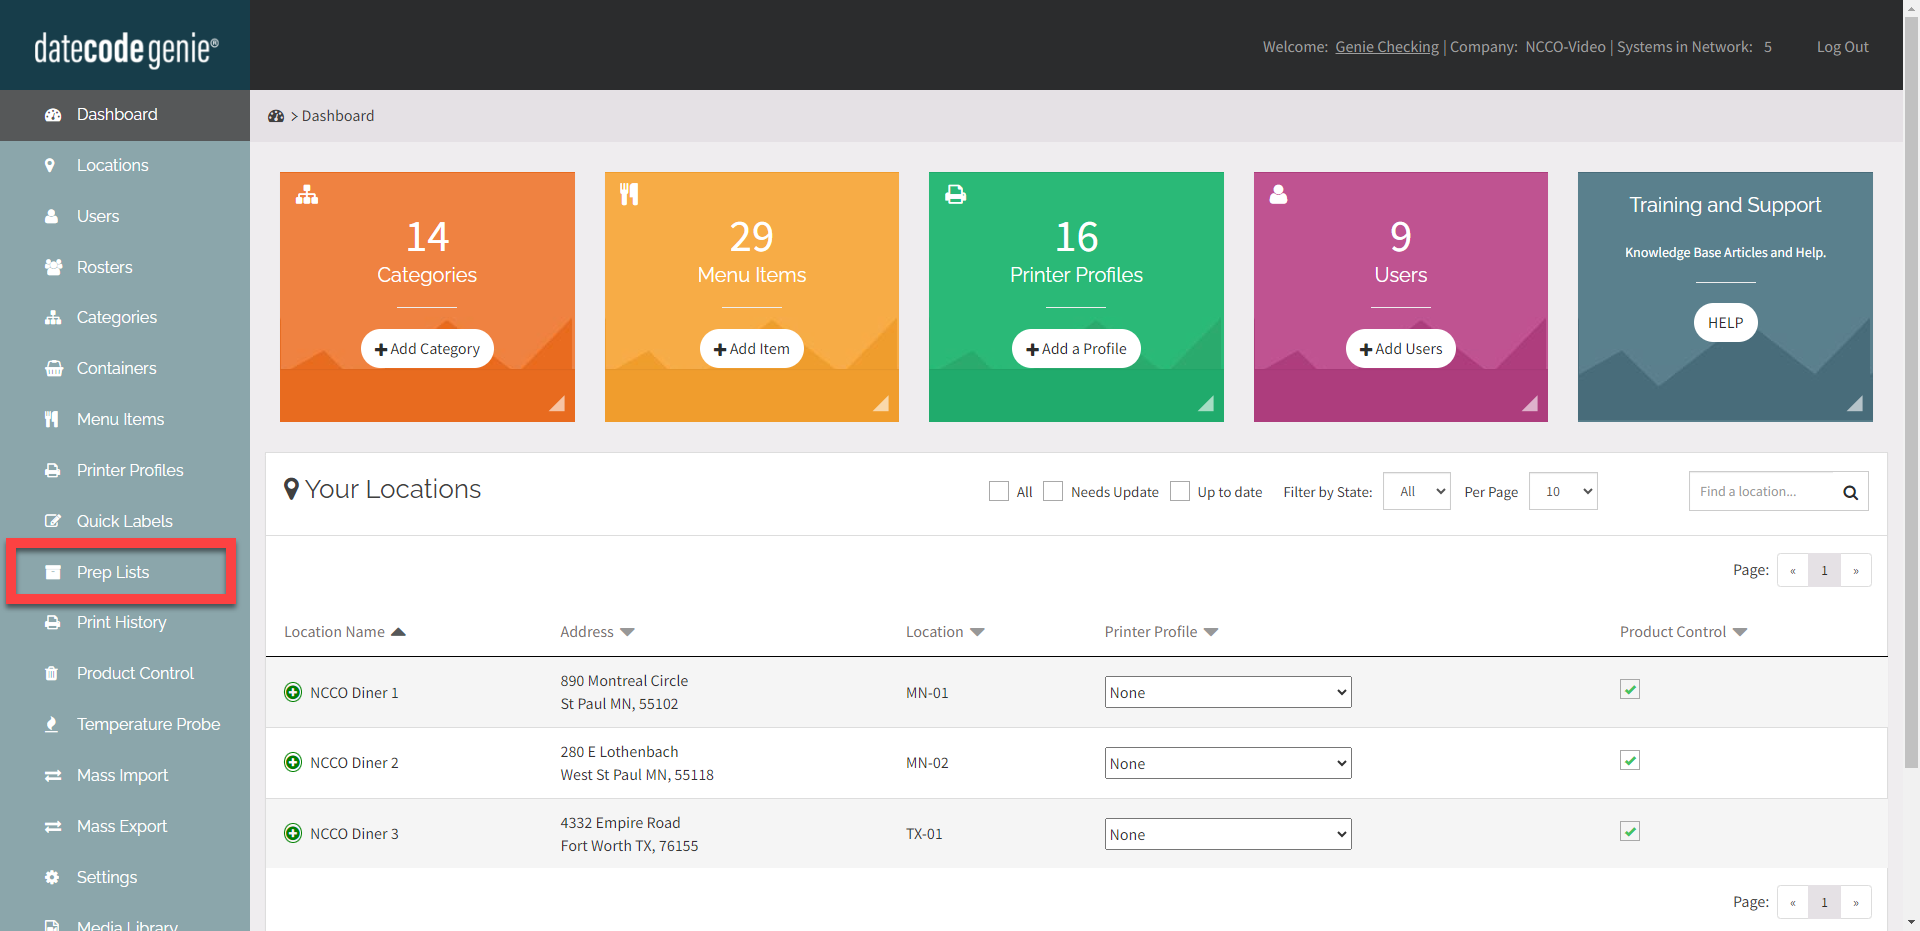
1. Klicken Sie in der Seitenleiste auf die Registerkarte „Vorbereitungslisten“ .
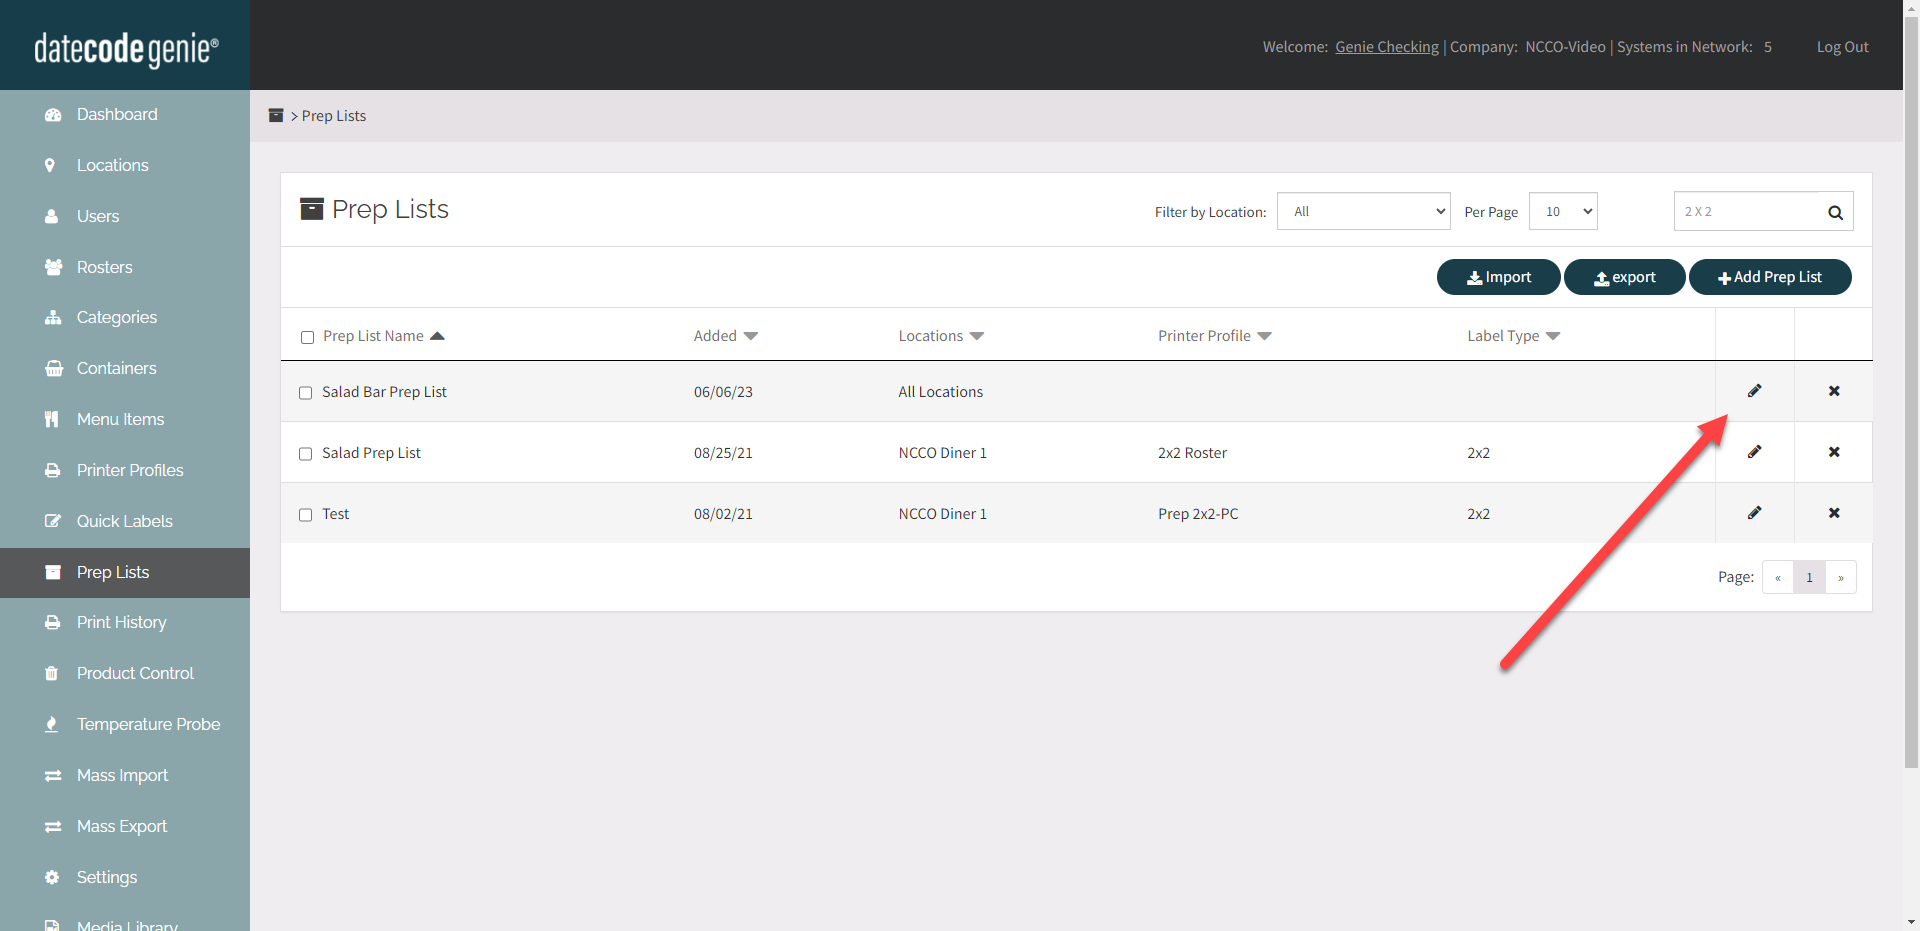
2. Klicken Sie auf die Schaltfläche „Bearbeiten“ (Bleistiftsymbol) für eine Vorbereitungsliste oder erstellen Sie eine neue Liste, siehe „Vorbereitungslisten verwalten“ .
3. OPTIONAL: Klicken Sie auf das Dropdown-Menü „Standardliste“ und wählen Sie den richtigen Listennamen aus, wenn Sie der Vorbereitungsliste Mitglieder aus nur einer Liste hinzufügen.
TIPPS & TRICKS
Lassen Sie das Dropdown-Menü der Standardliste leer, wenn die Vorbereitungsliste Mitglieder aus mehreren Listen enthalten soll.
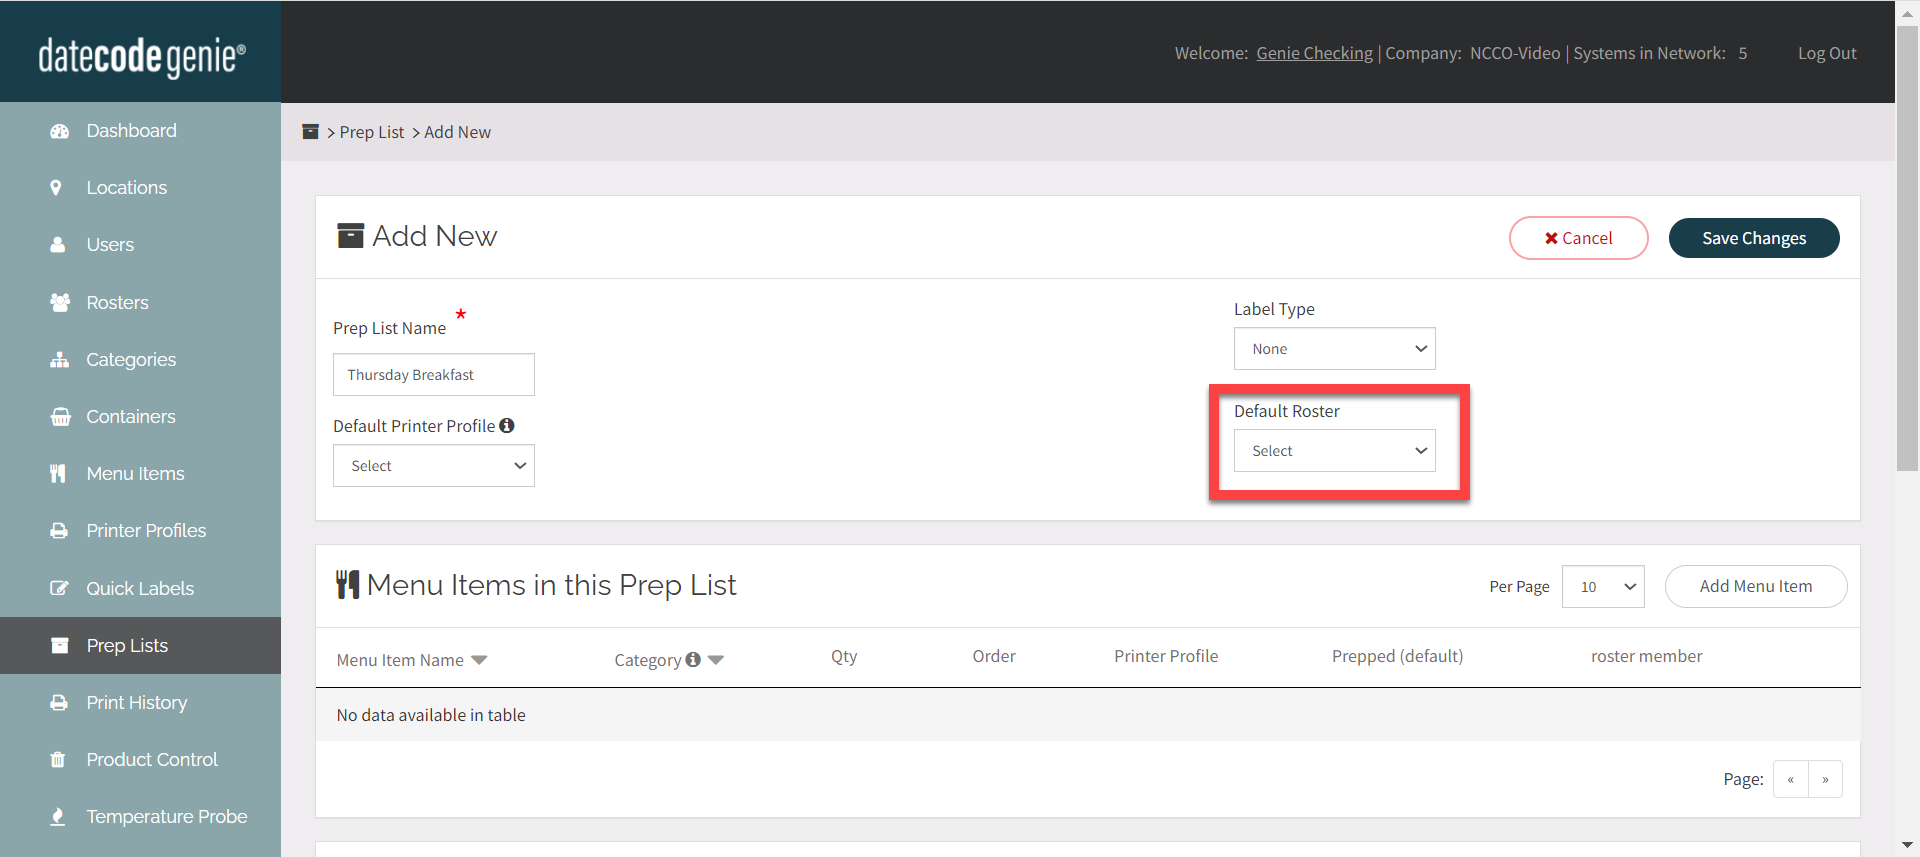
4. Klicken Sie auf die Schaltfläche „Menüelement hinzufügen “ und wählen Sie das hinzuzufügende Menüelement aus.

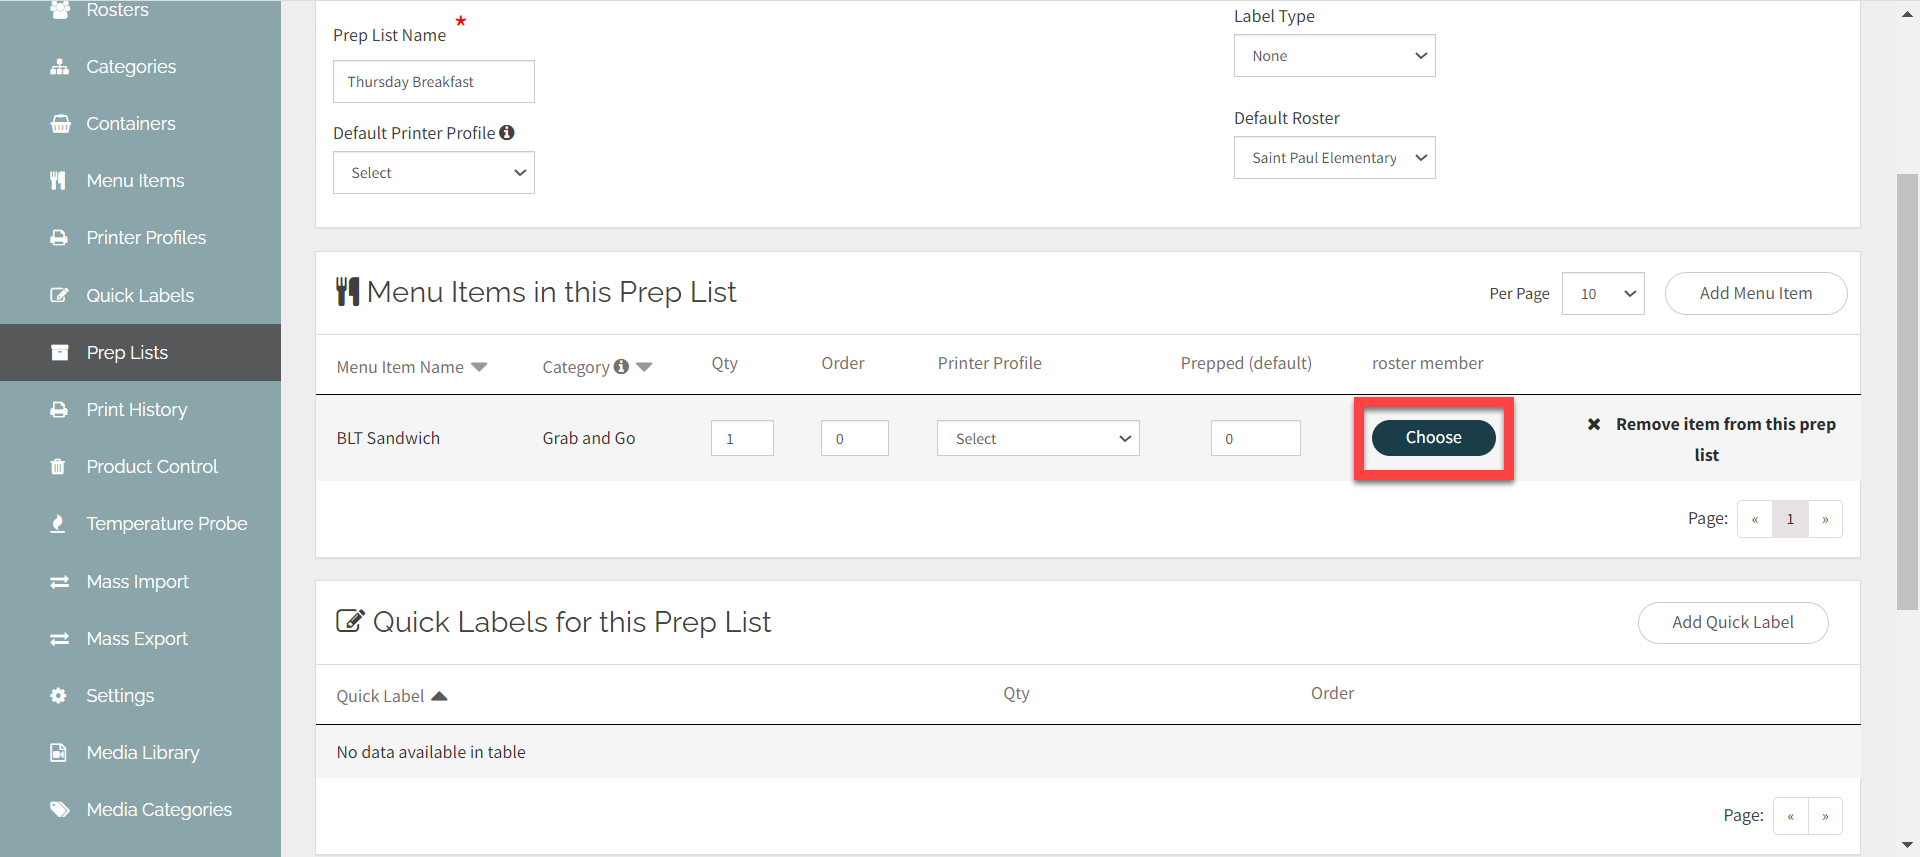
5. Klicken Sie auf die Schaltfläche „Auswählen“ für ein Menüelement unter „Mitgliederliste“ und für jedes Menüelement mit erforderlicher Mitgliederliste.
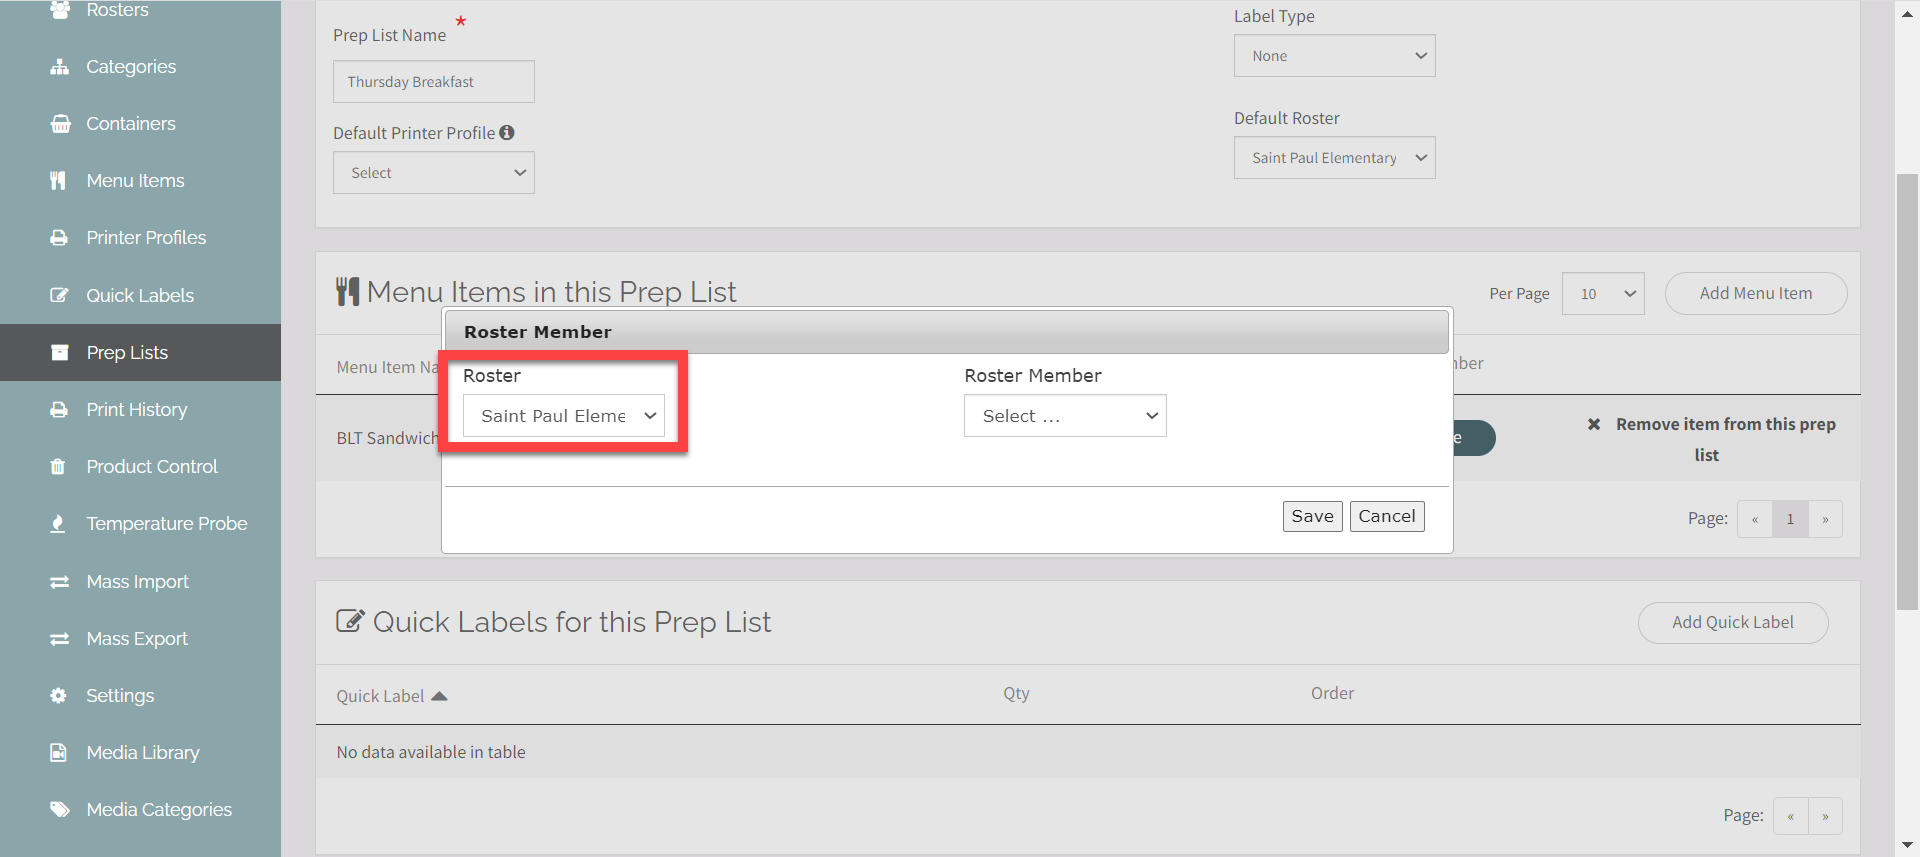
6. Klicken Sie auf das Dropdown-Menü „Dienstplan“ und wählen Sie den Dienstplannamen aus.
7. Klicken Sie auf das Dropdown-Menü „Dienstplanmitglied“ und wählen Sie den Namen des Dienstplanmitglieds aus.
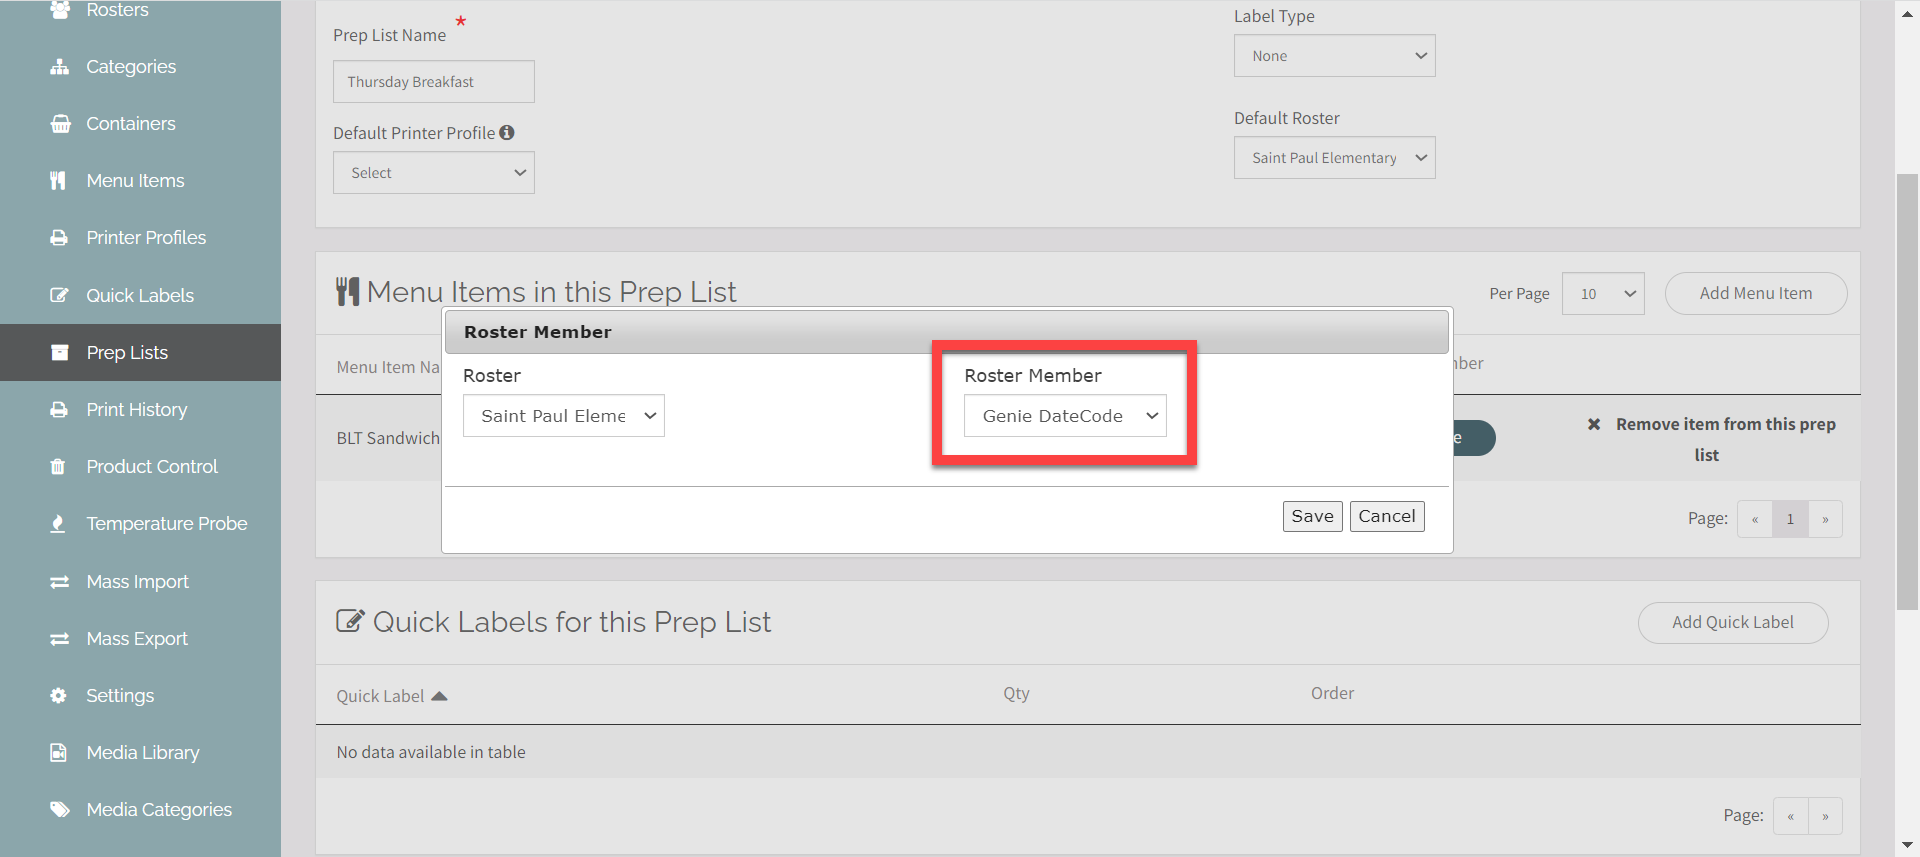
8. Klicken Sie auf Speichern .
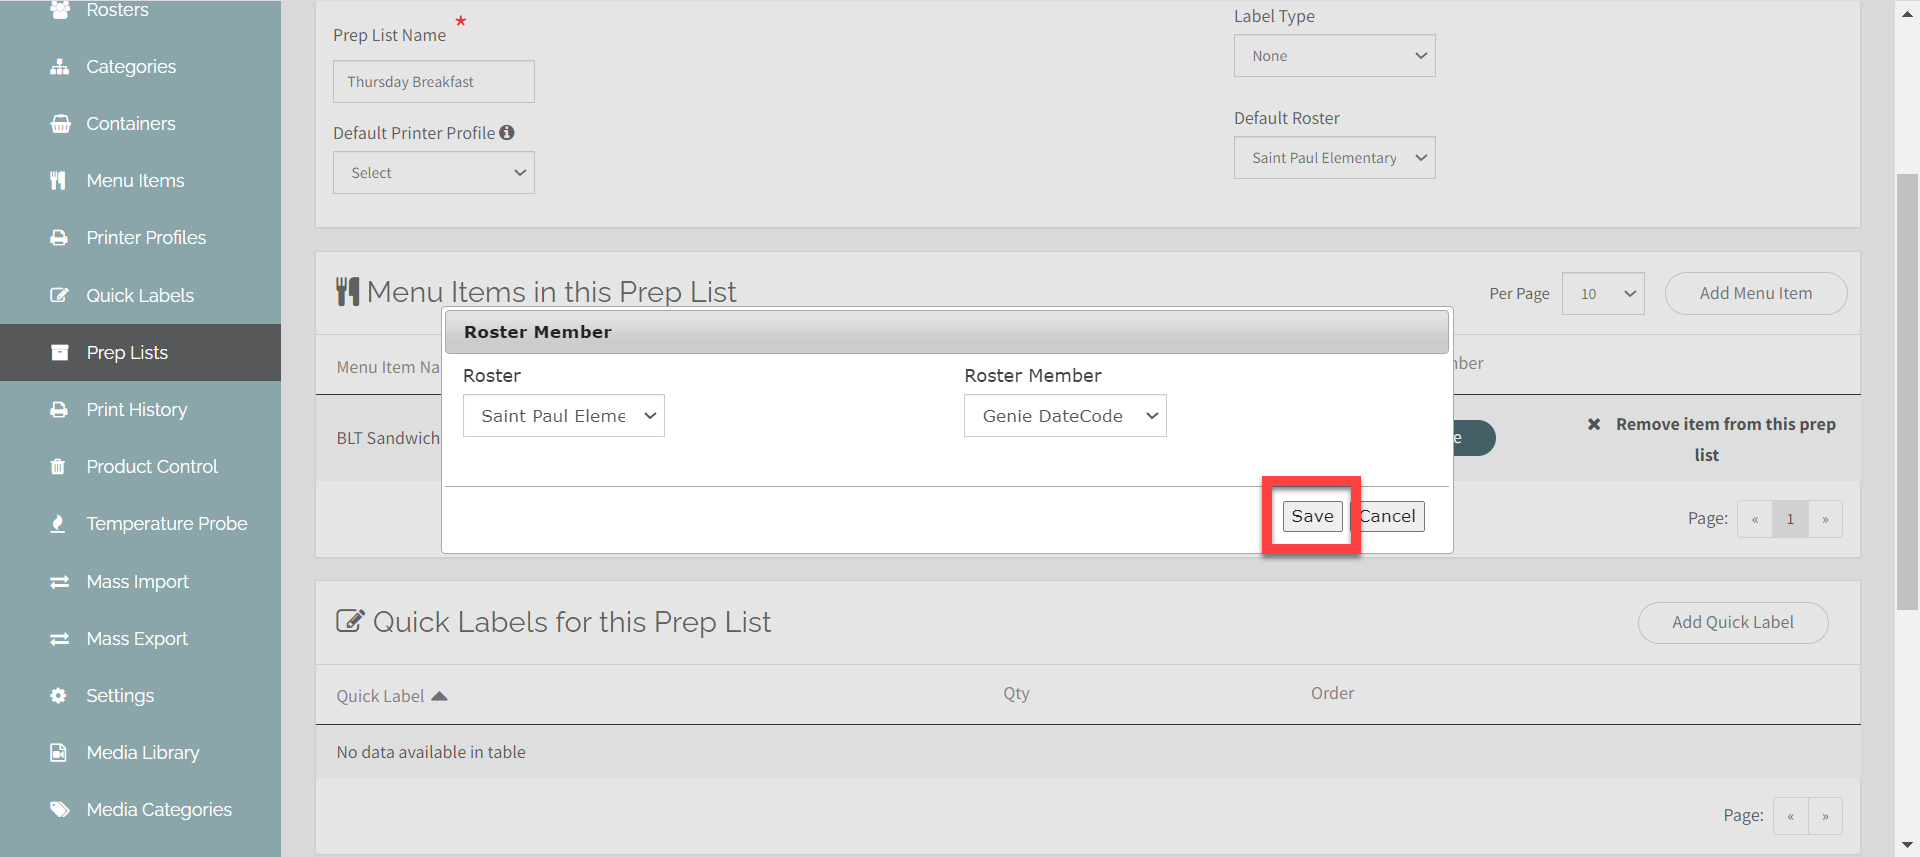
9. Wiederholen Sie die Schritte 4 bis 8 für jeden Menüpunkt, den Sie für jedes Mitglied benötigen.
10. Klicken Sie auf die Schaltfläche „Änderungen speichern“ .
