Configurar botones de acceso rápido en el portal
Los botones de acceso rápido son un acceso directo a un perfil de impresora en la aplicación.
Se deben completar dos pasos para configurar botones de acceso rápido en el portal:
1. Configure los botones de acceso rápido en la pestaña Perfiles de impresora
CONSEJOS Y TRUCOS
Vea qué perfiles de impresora tienen botones de acceso rápido ordenándolos por la columna de botones de acceso rápido.
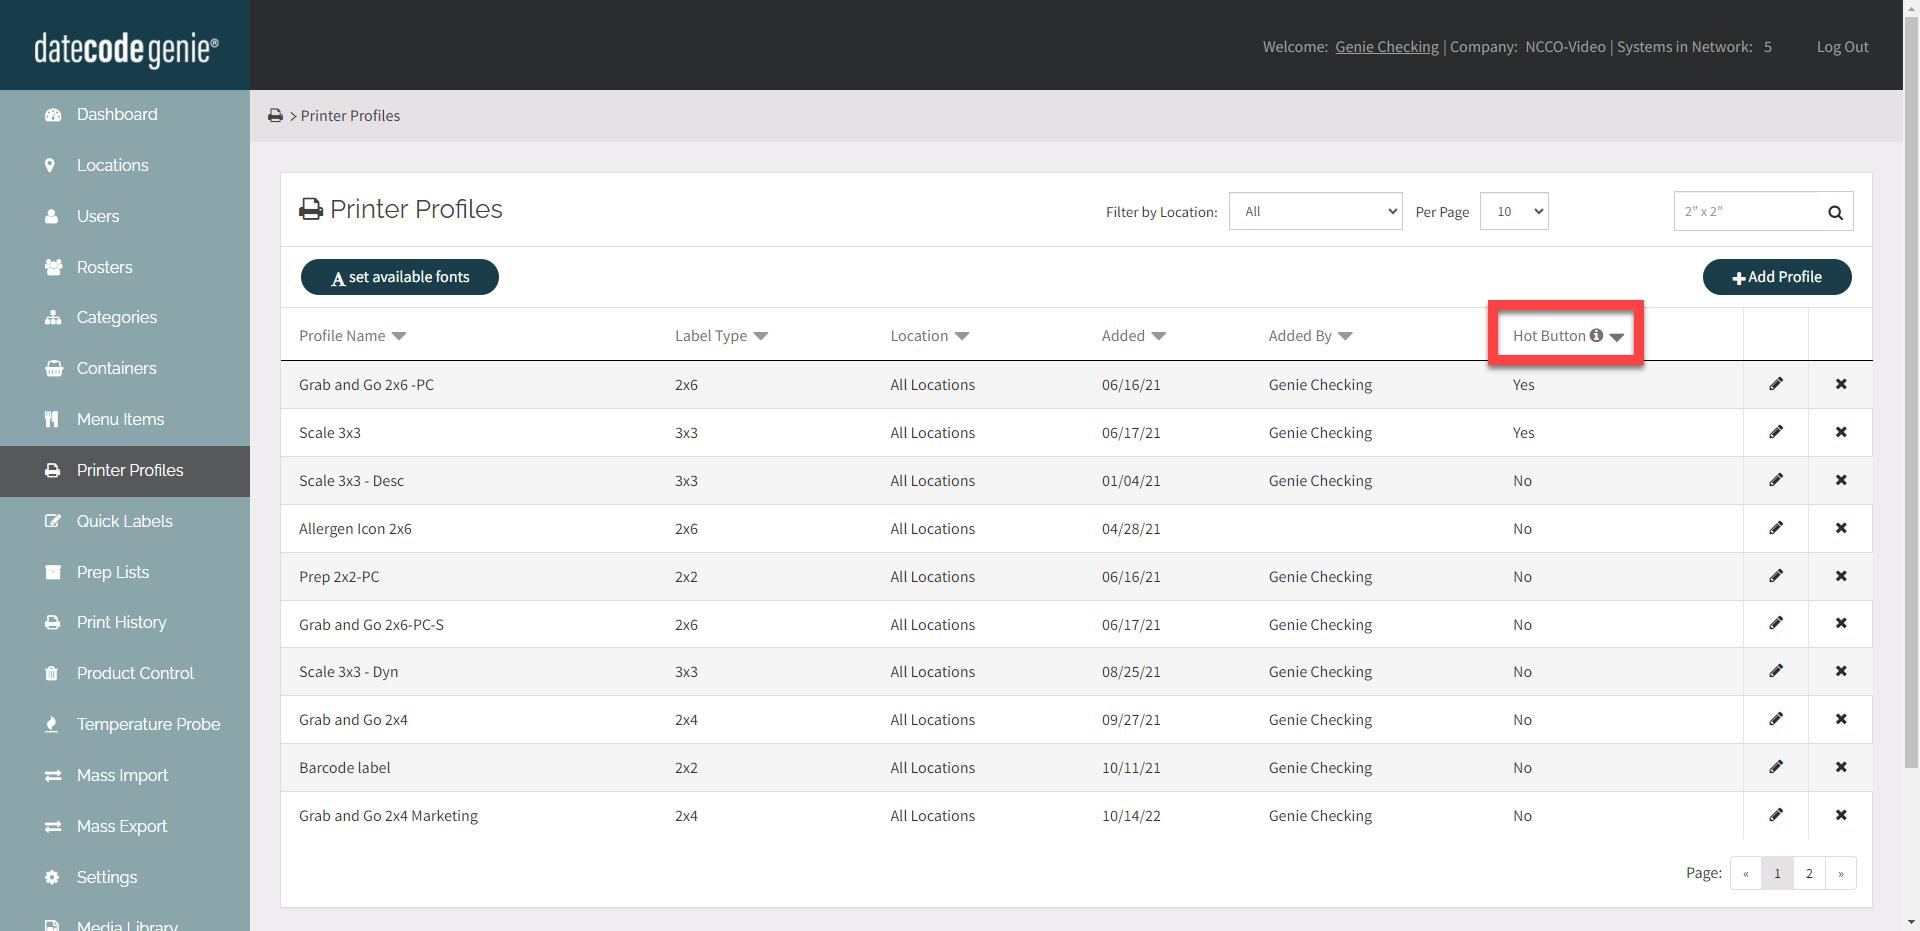
1. Inicie sesión en www.datecodegenie.com utilizando el navegador recomendado; consulte ¿Qué navegador de Internet debo utilizar para acceder a mi portal DateCodeGenie®?
2. Haga clic en la pestaña Perfiles de impresora en la barra lateral. 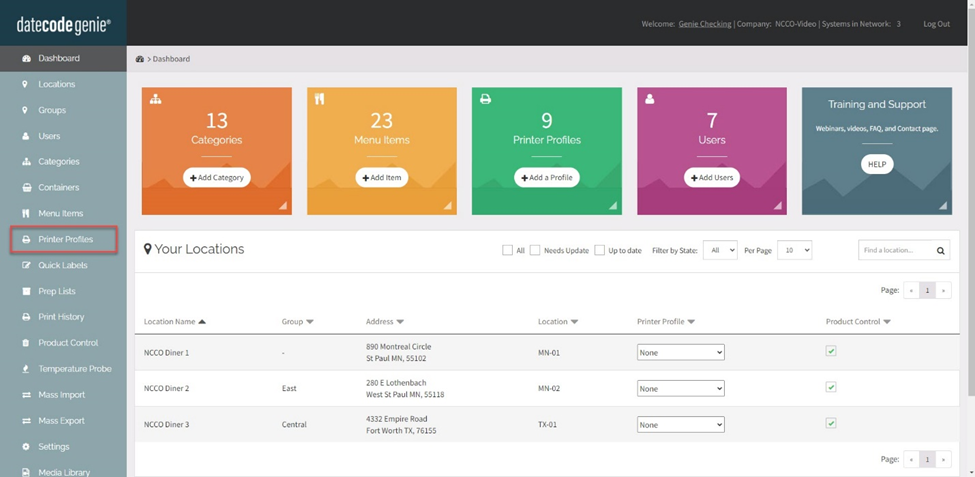
3. Haga clic en el botón Editar (icono de lápiz) de un perfil de impresora para editar o agregar un nuevo perfil de impresora. Consulte Cómo agregar etiquetas usando perfiles de impresora . 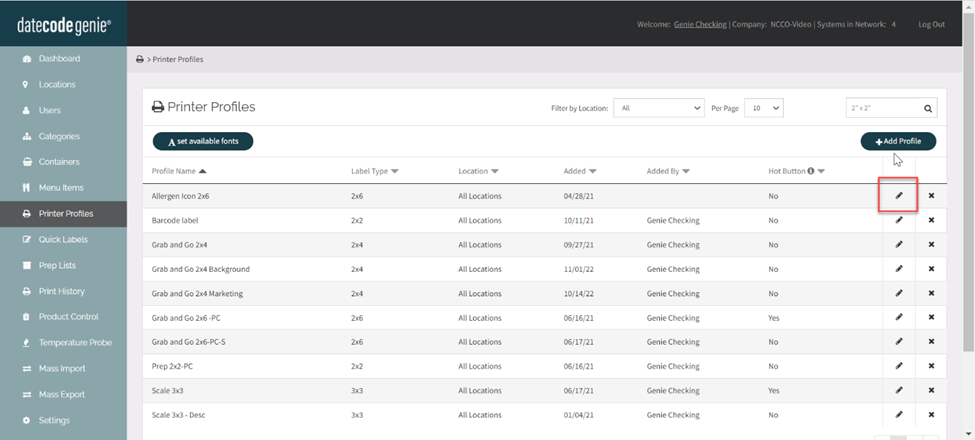
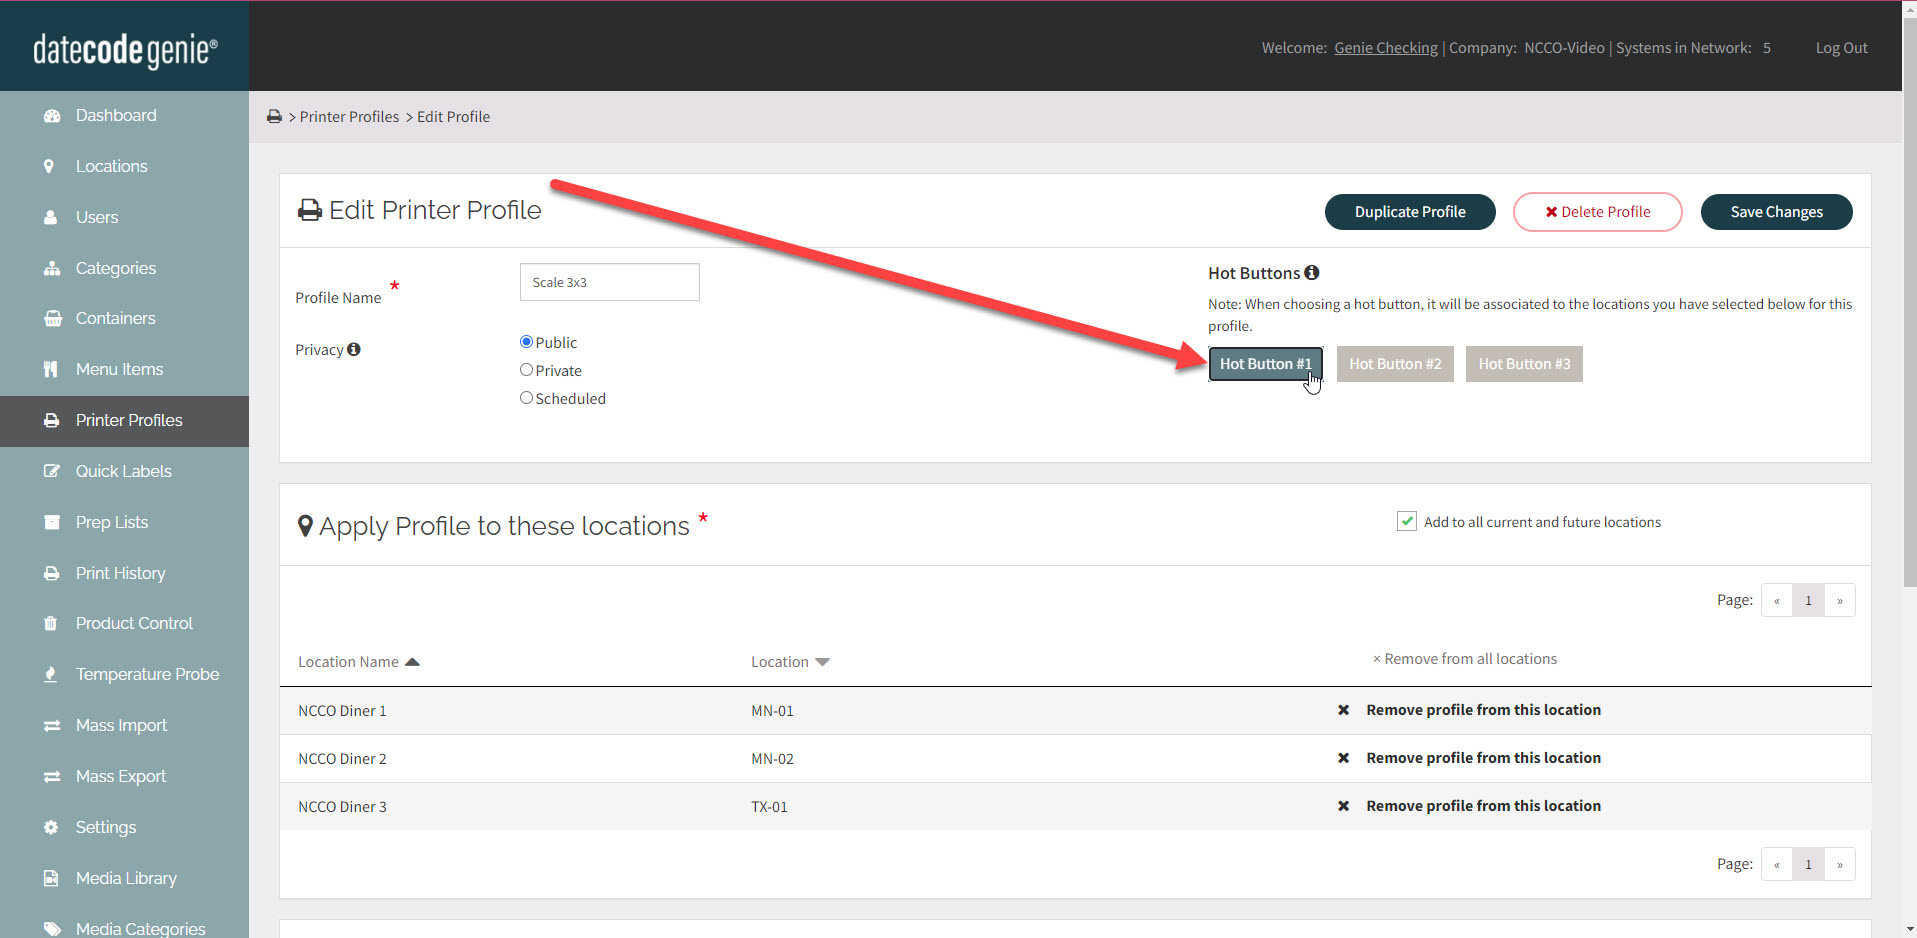
4. Haga clic en uno de los accesos directos preferidos de los botones de acceso rápido , para que se muestre cuando esté en la aplicación para el perfil de impresora configurado del elemento del menú en las ubicaciones seleccionadas.
NOTAS
- Sólo se permiten tres botones de acceso rápido.
- El error Botón de acceso rápido en uso aparece si ese botón de acceso rápido está asignado a otro perfil de impresora. Seleccione un botón de acceso rápido diferente o edite el perfil de impresora enumerado y elimine el botón de acceso rápido.
5. Haga clic en Guardar cambios . 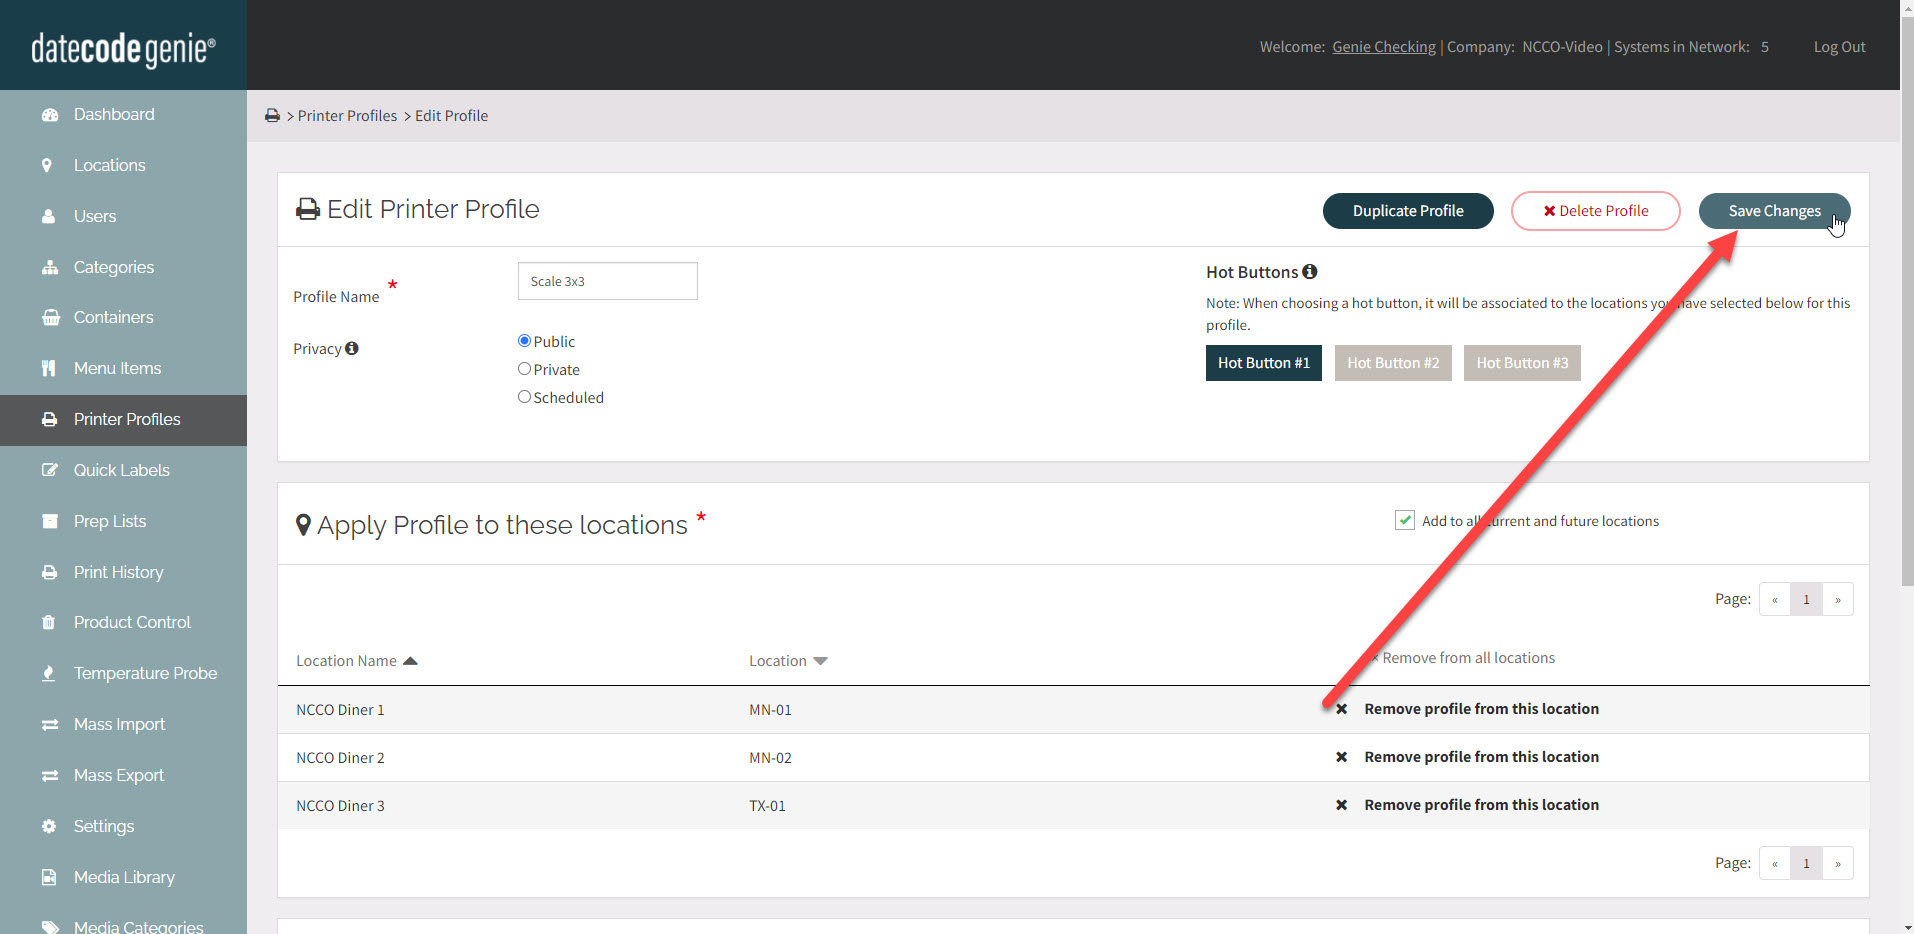
2. Configure el perfil de impresora predeterminado y habilite los botones de acceso rápido en la pestaña Elementos del menú
1. Haga clic en la pestaña Elementos del menú en la barra lateral.
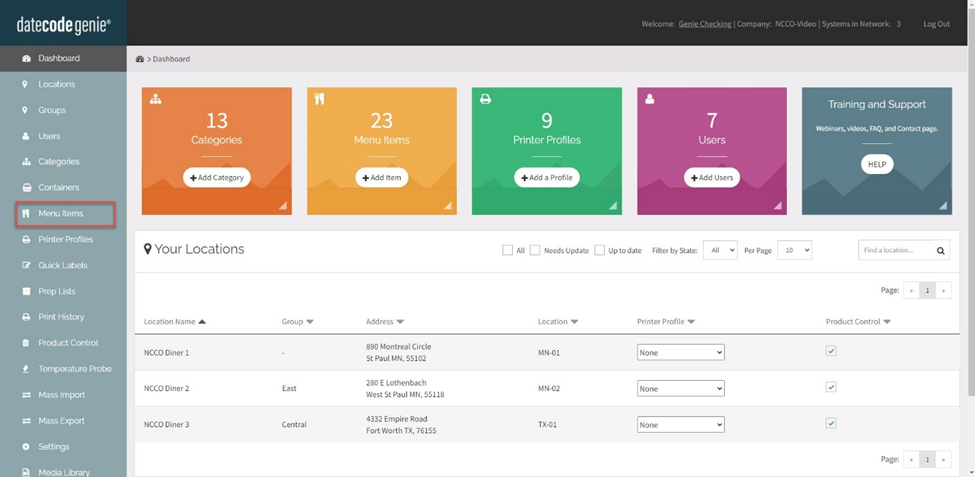
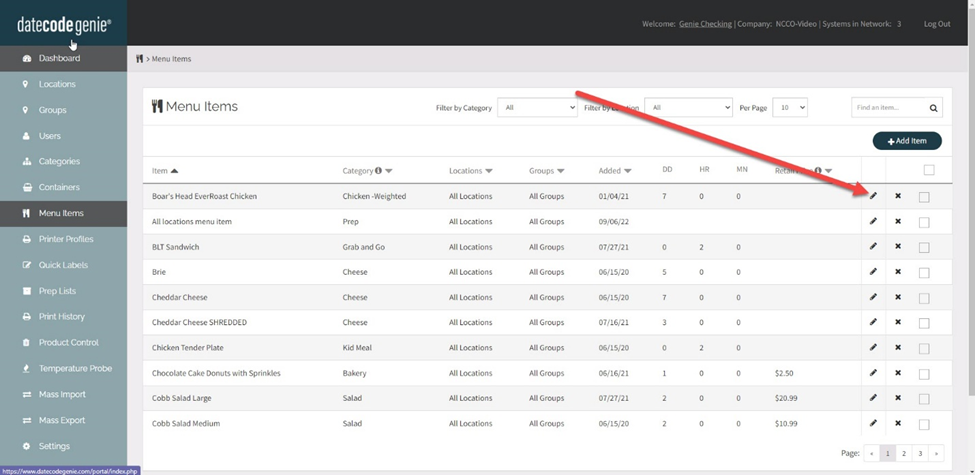
2. Haga clic en el botón Editar (icono de lápiz) de un elemento del menú para editarlo o agregar un nuevo elemento del menú. Consulte ¿Qué es un elemento de menú y cómo lo agrego o edito?
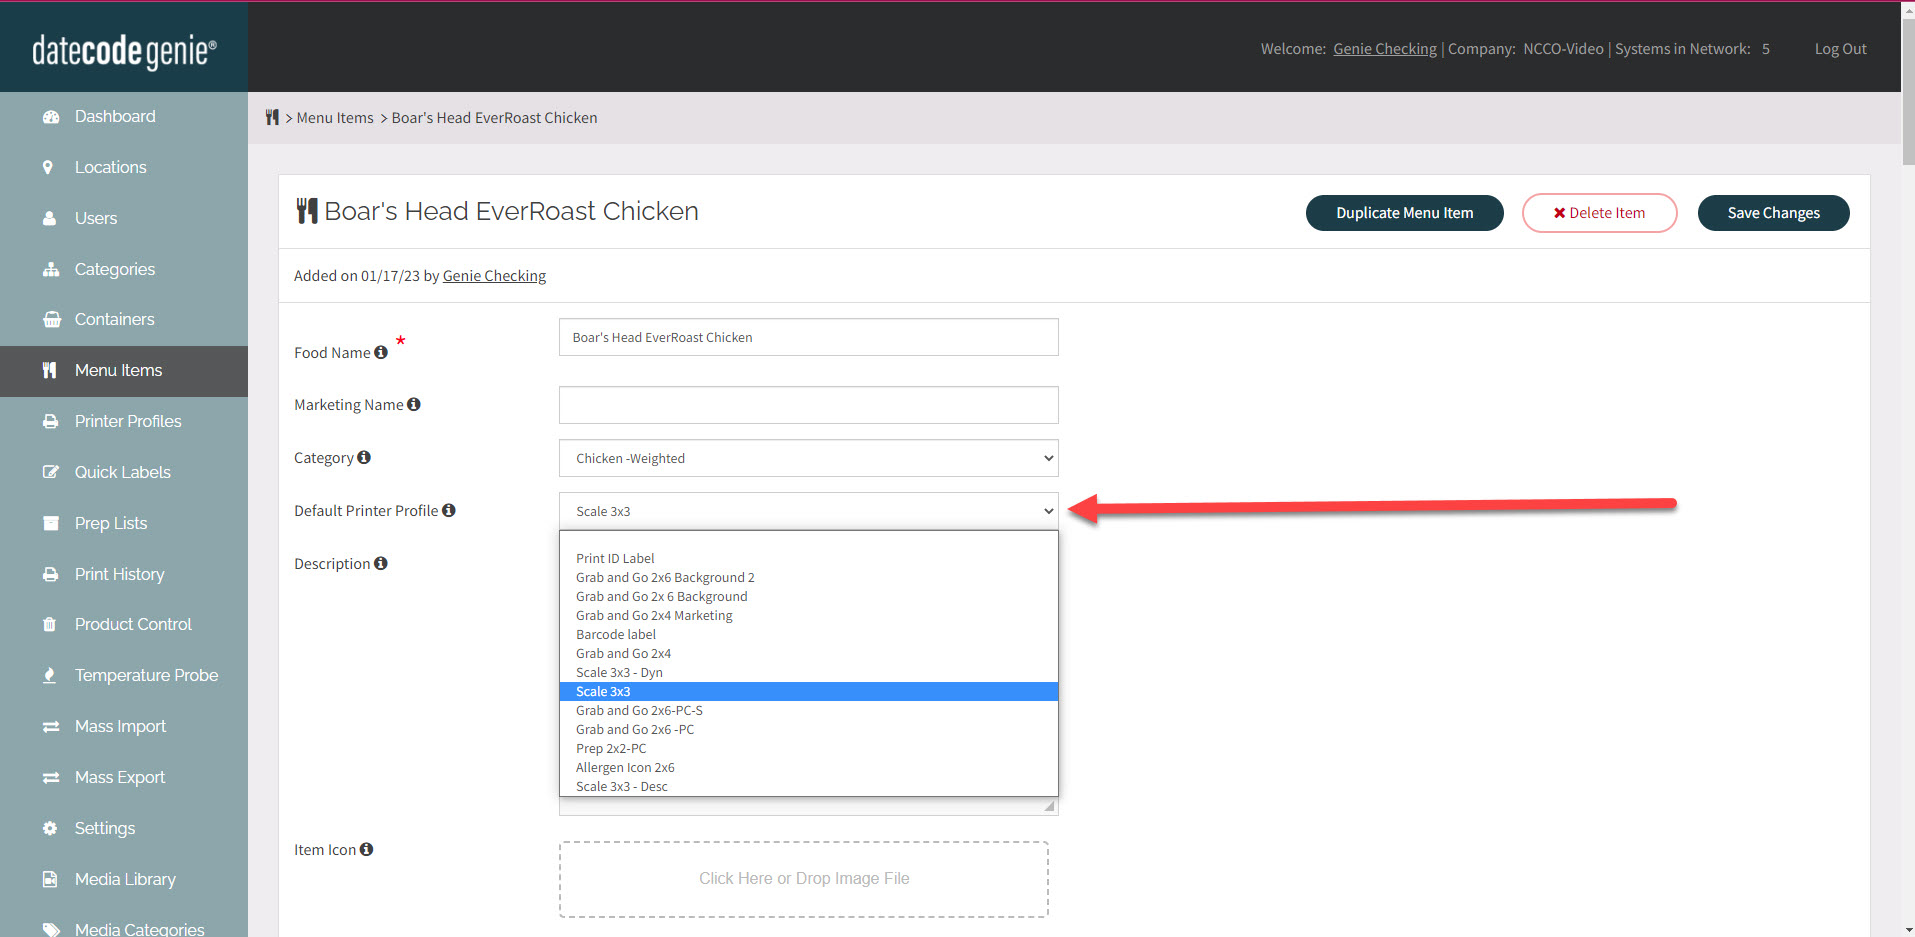
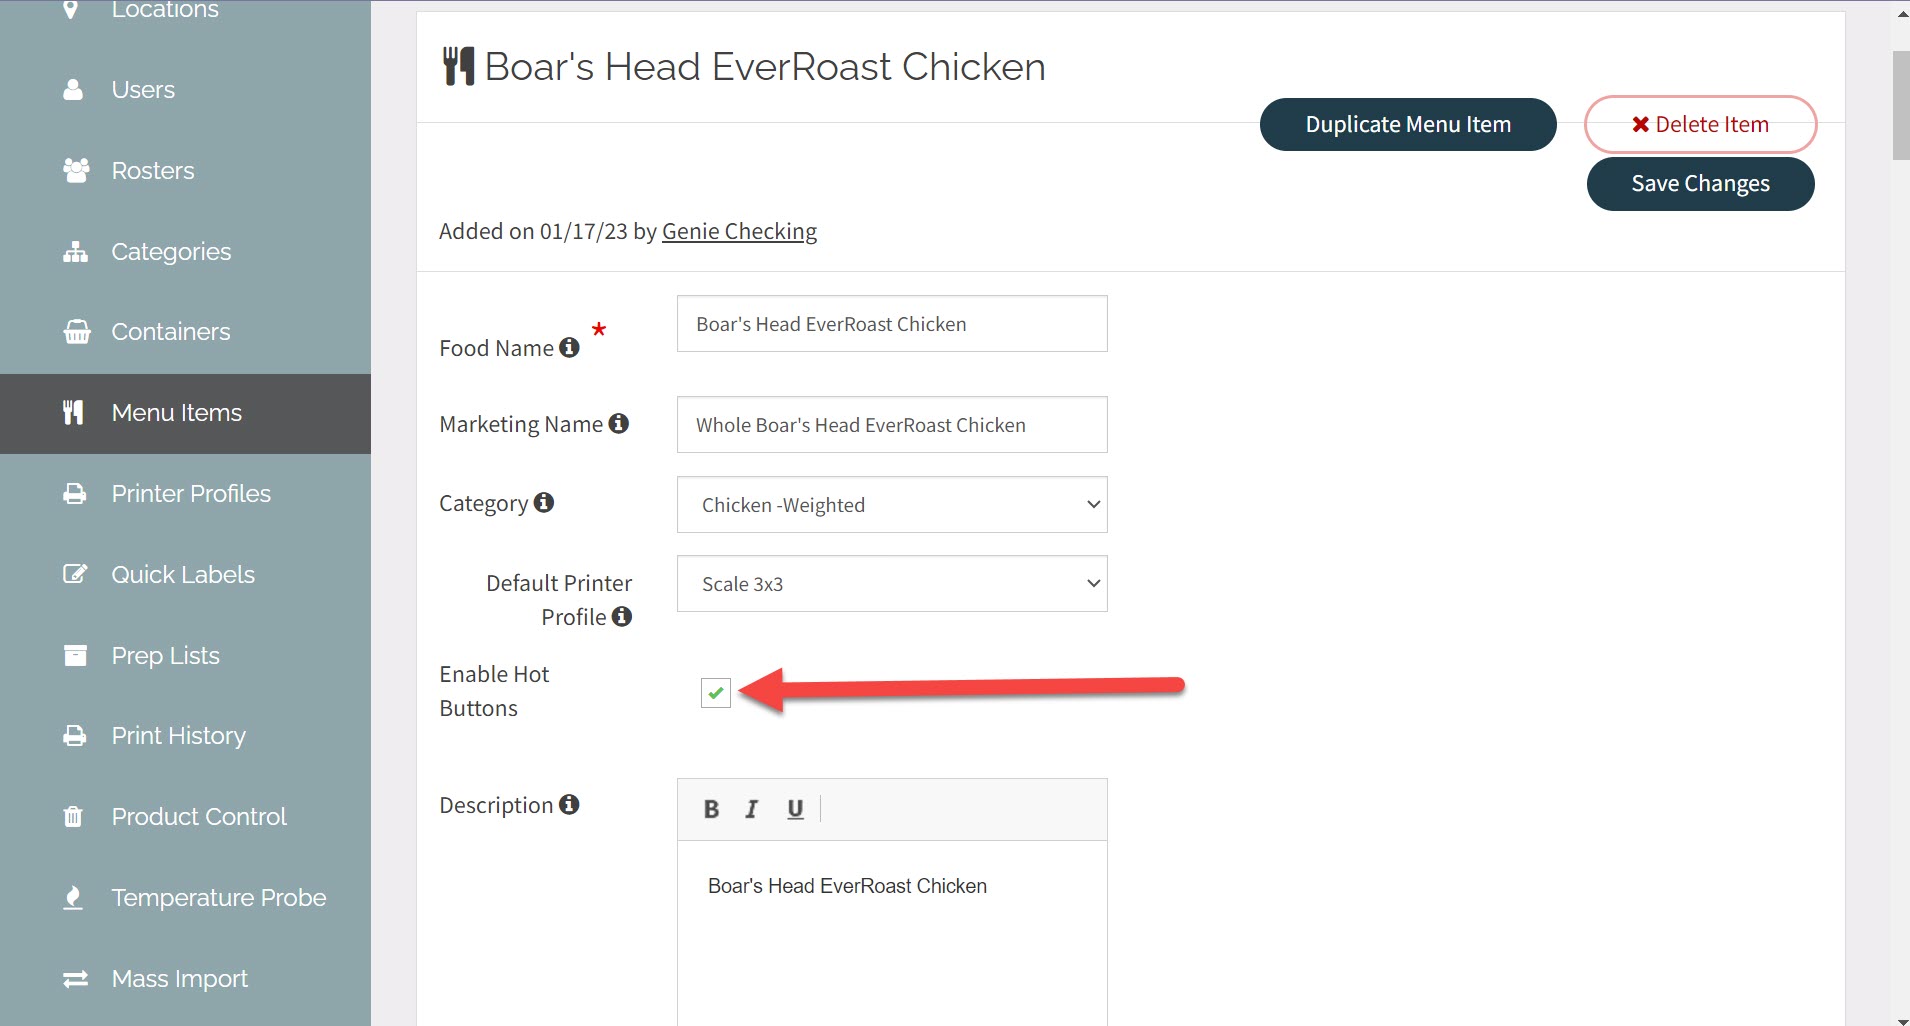
3. Seleccione el perfil de impresora predeterminado de la lista desplegable para obtener una vista previa en la aplicación.
NOTA
Se debe seleccionar el perfil de impresora predeterminado para usar los botones de acceso rápido.
4. Haga clic en la casilla de verificación Habilitar botones de acceso rápido para configurar el perfil de la impresora para que se muestre como un botón de acceso directo cuando se selecciona el elemento del menú en la aplicación.
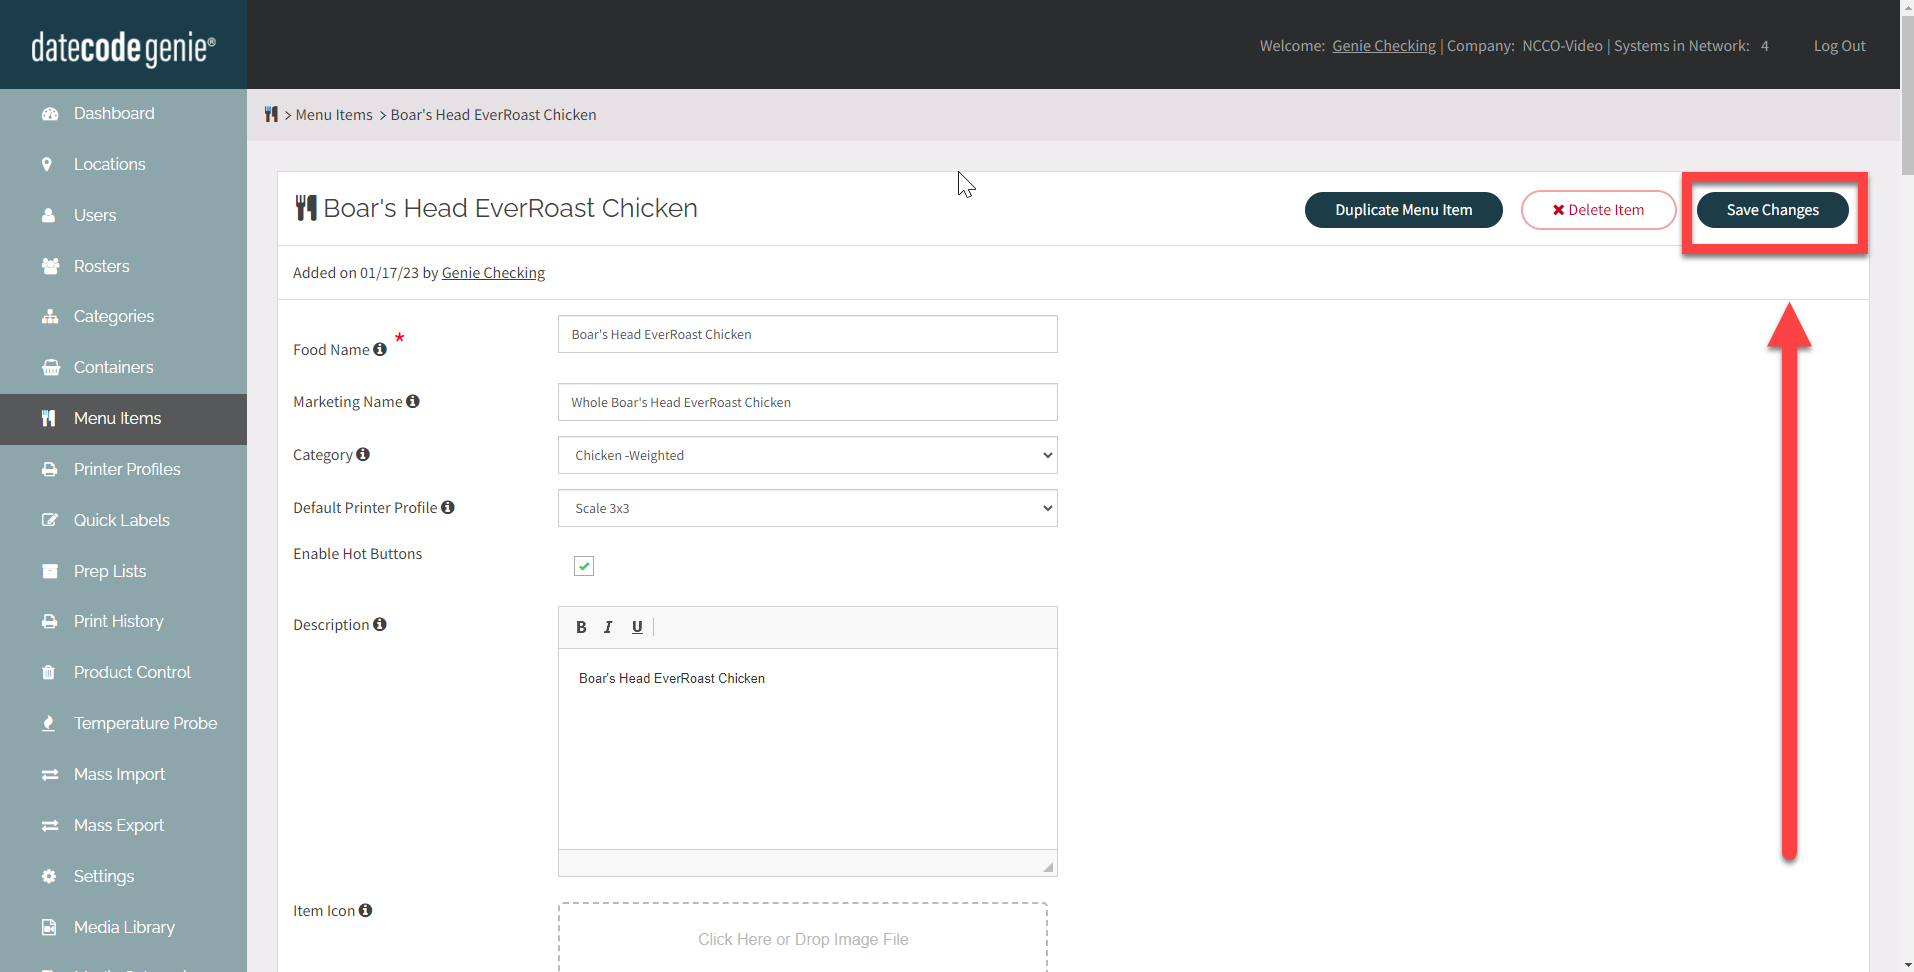
5. Haga clic en Guardar cambios .
NOTA
Los elementos del menú de importación masiva con un perfil de impresora predeterminado tienen botones de acceso rápido activados de forma predeterminada.
Administradores con permiso para seleccionar botones de acceso rápido, anulando el permiso del perfil de impresora predeterminado Puede seleccionar botones de acceso rápido.
Para obtener ayuda adicional, consulte Contacto y soporte


