
Connect the mC-Label3 Printer to the X Series Device
Table of Contents
Connect the mC-Label3 printer as an additional printing option for the X Series device.
The setup involves three steps: first, locate the serial number on the X Series device and contact Support & Repair. Next, pair the device with the printer using Bluetooth. Finally, use the app to print labels.
1. Locate serial number and contact Support & Repair
If you have purchased an mC-Label3 printer and want to use it as an additional printer with your X Series device, your system must be updated by Support & Repair .
1. Locate the serial number of the X Series device that will be paired with the mC-Label3 printer. See Find the Model and Serial Number on DateCodeGenie® Devices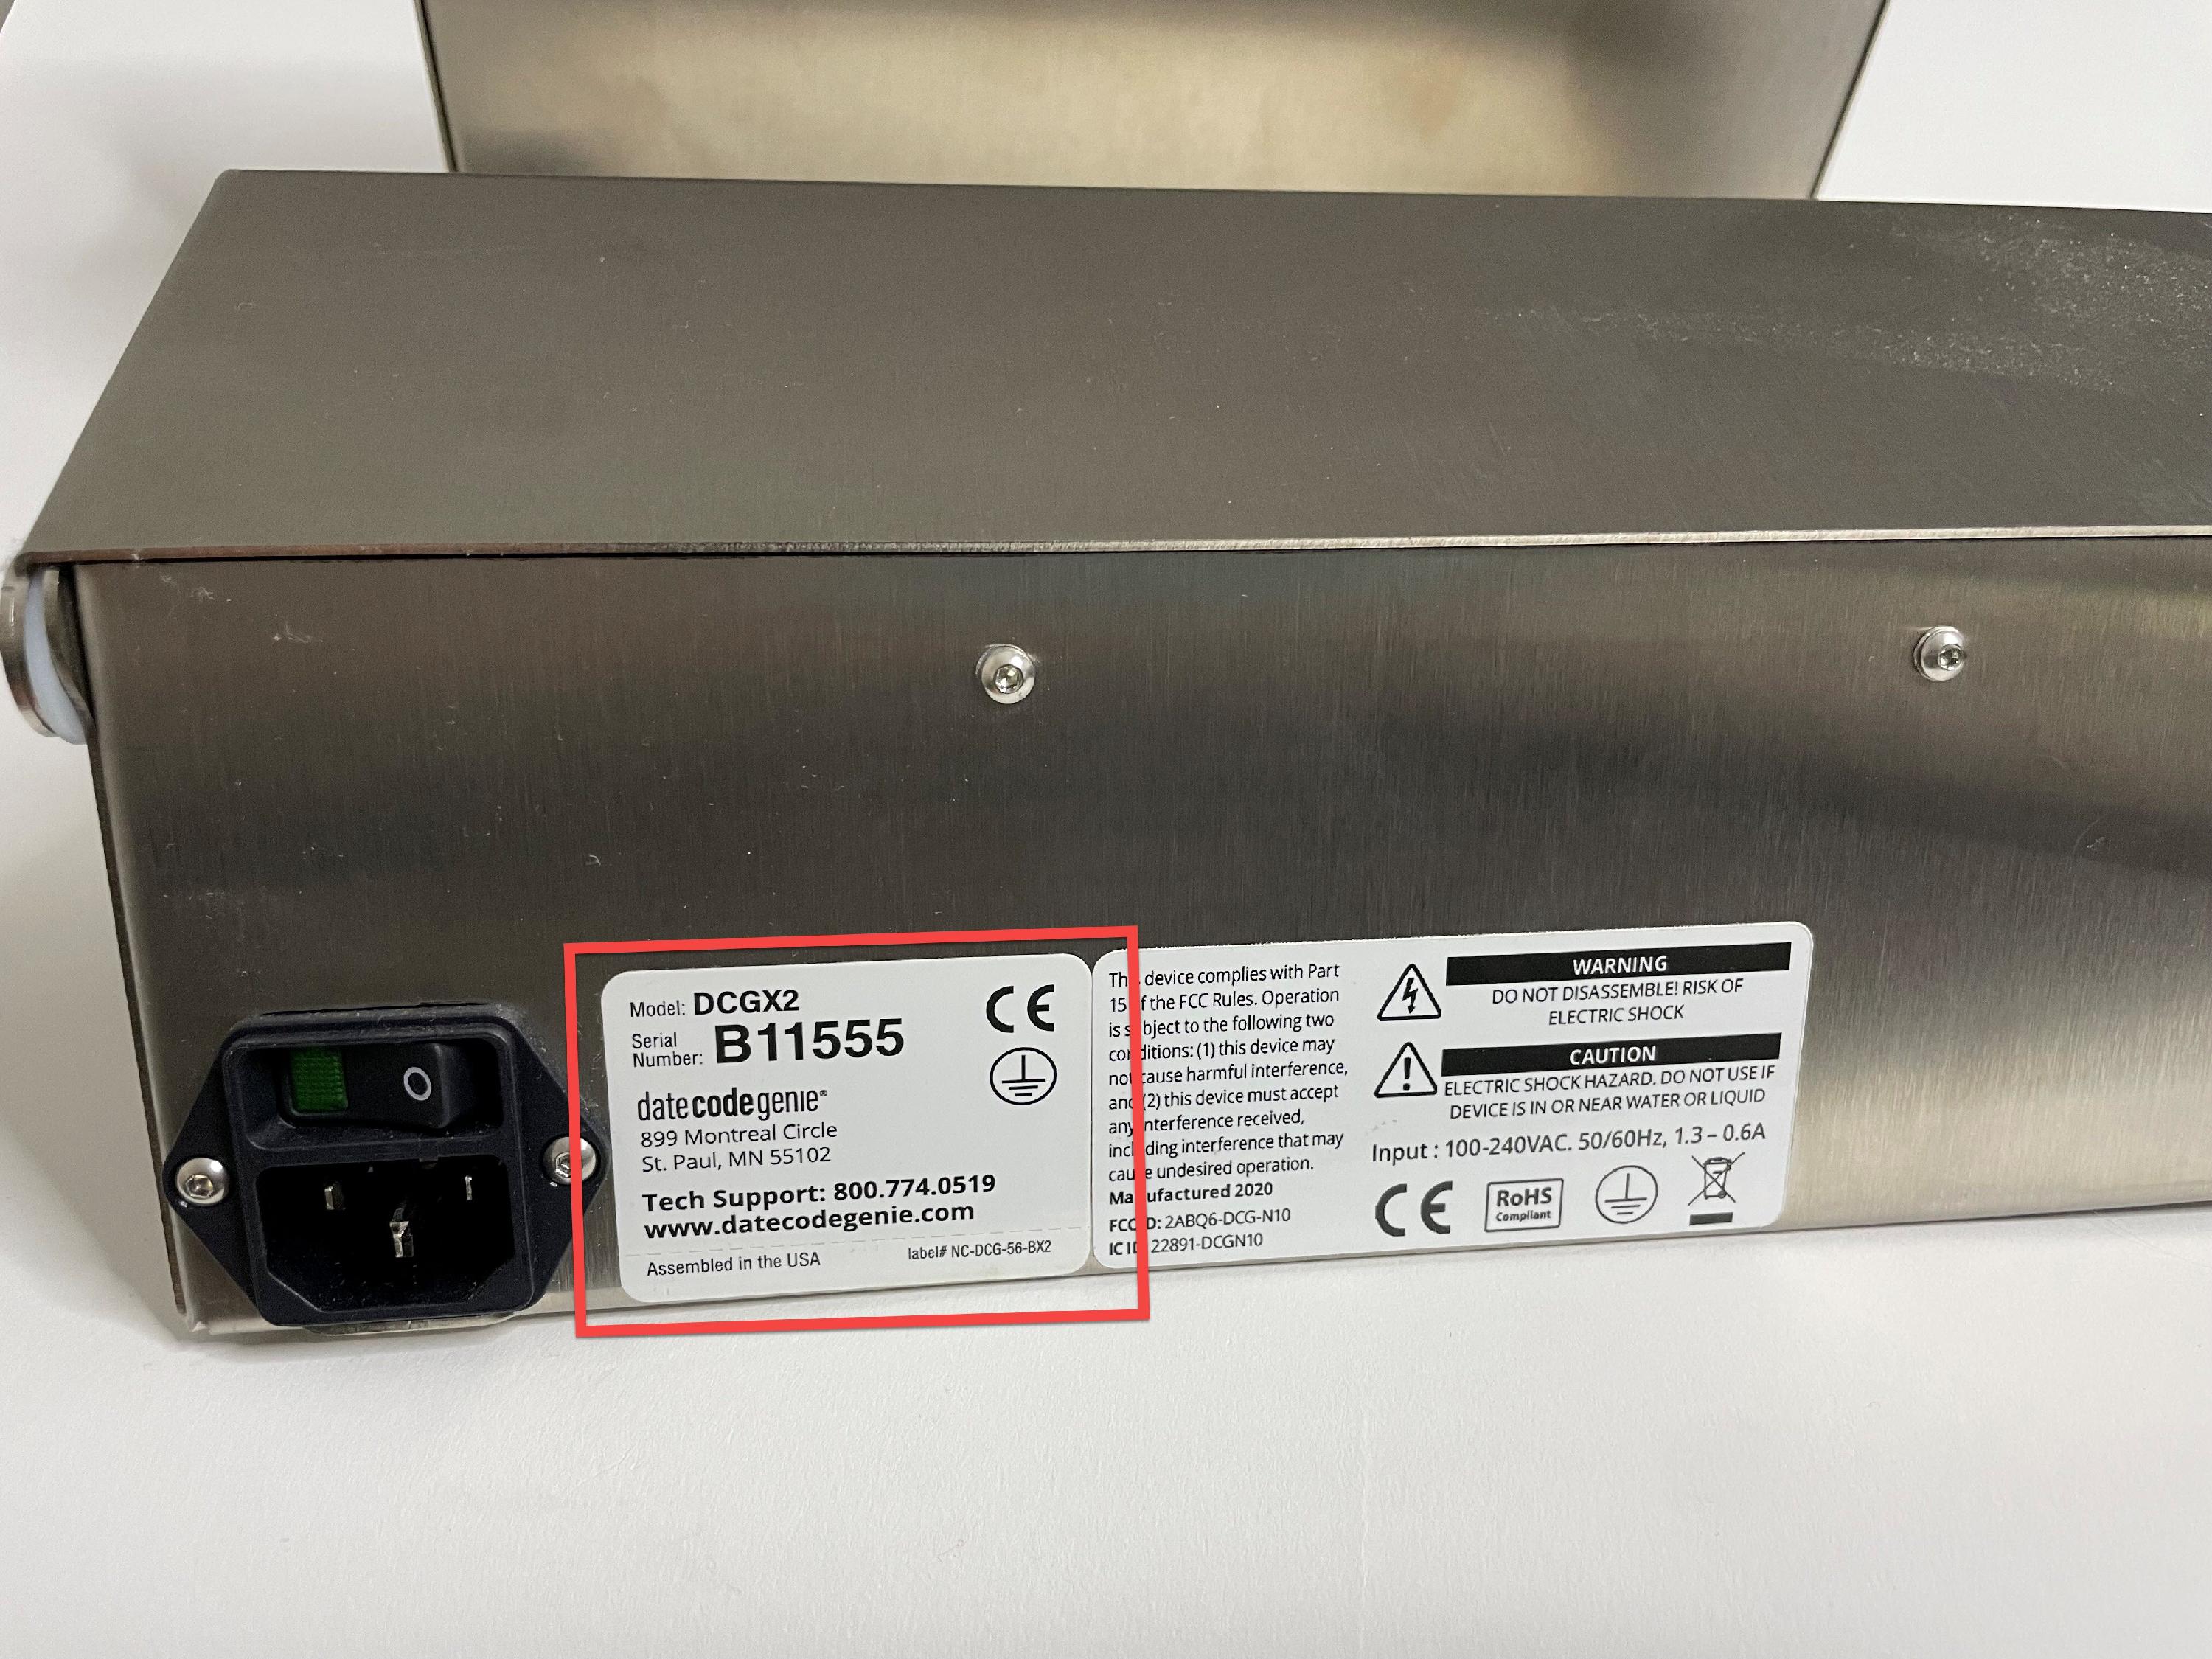
2. Contact Support & Repair and provide the serial number. See Contact & Support
3. Support & Repair will update your system to enable compatibility with the additional mC-Label3 printer.
2. Pair X Series device with mC-Label3 printer
1. Turn on the X series device by pressing and holding the tablet power button, releasing when DateCodeGenie® displays.

2. Turn on the mC-Label3 printer.
| 1. Attach printer power cord and printer power supply. Connect to port on back of printer and to an outlet. | 2. Press the printer power button on the left side of printer. A blue light will flash and stay lit. Push the lever on the right side of the printer to open lid. |
 |
 |
3. Scroll to Settings app (gear icon) on tablet home screen to open.

4. Tap Connected devices to open.

5. Tap Pair new device.

6. Locate mC-Label3-J0007.

7. Tap PAIR.

8. The mC-Label3 printer will display under PREVIOUSLY CONNECTED DEVICES, indicating that it's connected to the X Series device.

3. Print linerless or black line labels in the app
1. Tap home button to return to tablet home screen and tap the Date Code Genie app.

2. Log in to the app with your username and password, if required.
3. Tap the navigation button to open options. Scroll and tap Settings to open.

4. Scroll and tap Printer Setup.

5. Select SET BLACKMARK DETECTION to print black line labels or SET CONTINOUS FEED to print linerless labels.
WARNINGS
- Printing a black line printer profile while the mC-Label3 printer is set for linerless printing will automatically reset the printer to blackmark detection only.
- The mC-Label3 printer will display Error 300x2 if a communication issue occurs, and it may take time to reconnect. See (Error 300x2) Printer Not Ready for mC-Label3 Printer to troubleshoot if error continues.

6. Tap the Save button (floppy disc icon) to save the printer setup.

7. Tap the back button (arrow icon) to return to the App Dashboard.

8. Select a menu item.

9. Tap the print button (printer icon).

NOTE
For the Select Printer window to appear, the label type size must be identical for the mC-Label3 and an X Series printer. If the sizes do not match, printing will automatically be sent to the printer that can fit the size.
Example of this feature:
Select the printer to continue printing labels.

