
Labels Not Cutting Correctly
Labels advance through the device’s printer but are not cutting correctly and may print one or multiple labels.
Troubleshoot Labels Not Cutting Correctly
Select model or printer:
Verify black line on back of labels is solid and not faded. See DateCodeGenie Labels for reference.
If black line is incorrect, replace with label roll with correct black line and try to print again.
Print a test print
How to Self Print Test the 2.0 and Fit Model Device
The 2.0 model has been discontinued.
The DateCodeGenie uses a thermal printer to print labels. To print and cut labels correctly, the DateCodeGenie printer reads the black line on the backside of the label.
Printing a self-test can help determine if the printer is not cutting or advancing labels correctly.
Steps:
1. Verify the labels are inserted correctly in the printer, see How to Load Labels in the 2.0 and Fit Model Devices.
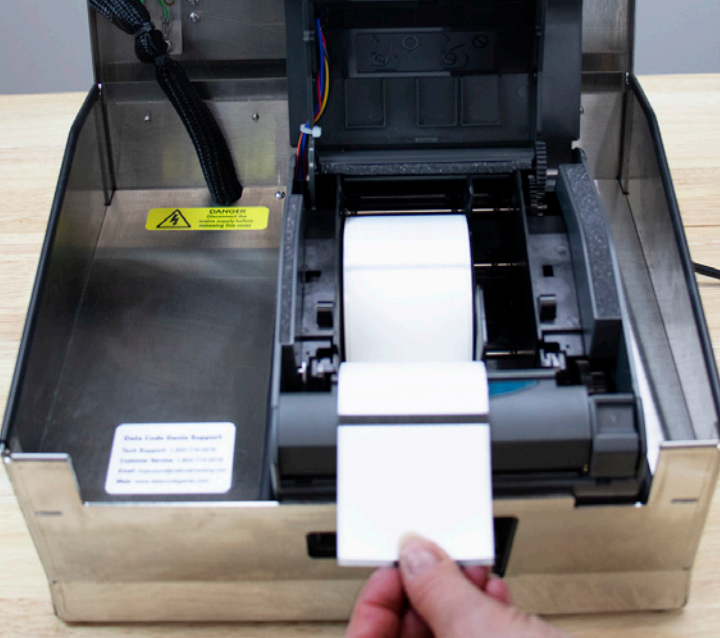
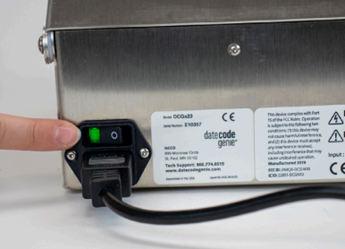
2. Set power switch on the front of the printer to the O position.
3. Press and hold on FEED button located inside the opening.
4. Set power switch to the I position while continuing to hold FEED button. Printer will advance labels and cut labels in correct location.

For additional assistance see Contact & Support
Verify black line on back of labels is solid and not faded. See DateCodeGenie Labels for reference.
If black line is incorrect, replace with label roll with correct black line and try to print again.
Calibrate printer
Printer Calibration (X Series)
Calibrating the DateCodeGenie® printer may help if the printer is not cutting or advancing labels correctly. This article goes over calibrating the X Series (X2, X22, X23) printer.
Steps:
1. Check that label roll is loaded with the labels facing upward and with the black line facing down. For more information on label loading, see Load Labels in the X Model Device.
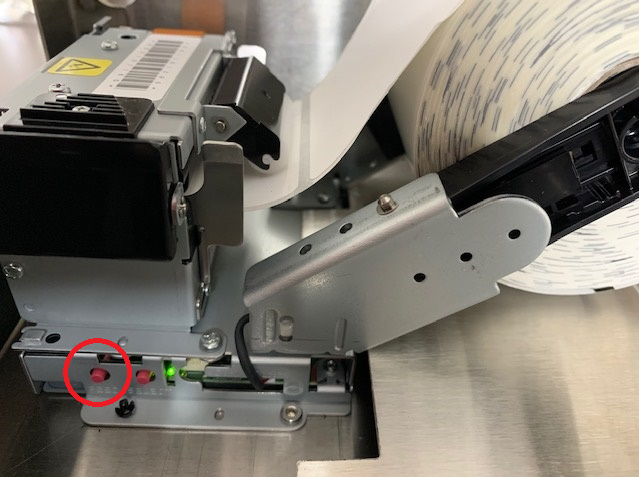
2. Locate the 2 red or black buttons on the right side of each printer near the bottom housing.
NOTE
A pencil can be used to gently press the buttons on the right sided printer if you cannot reach.

3. Press and hold the SELECT button, the BACK button, until the labels advance, then release.
NOTE
If labels continually feed and do not stop, replace with a new roll with a solid black line on the back. For more information on correct and incorrect labels, see DateCodeGenie® Labels.
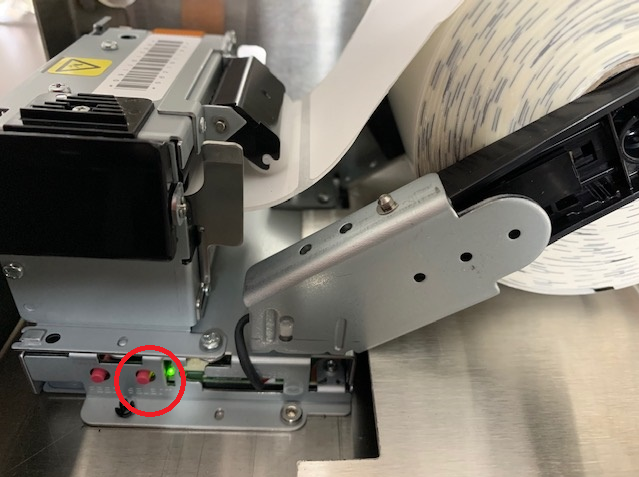
4. Press the FEED button, the FRONT button. Labels will advance to the black line and cut.
NOTE
If the printer doesn't cut on a black line, repeat this step.
5. Repeat these steps for each printer.
Failed Sensitivity Errors: Failed sensitivity errors that occur during printer calibration can be caused by three things:
1. Missing or faded lines on the label
Check that there is a solid black line on the back of the label. To see incorrect labels, see the chart in DateCodeGenie® Labels.
2. Debris blocking the black line sensor
Clean the printer black line sensor and thermal head. See Device Placement, Maintenance and Cleaning.
Print a test print
Test Print Labels (X Series)
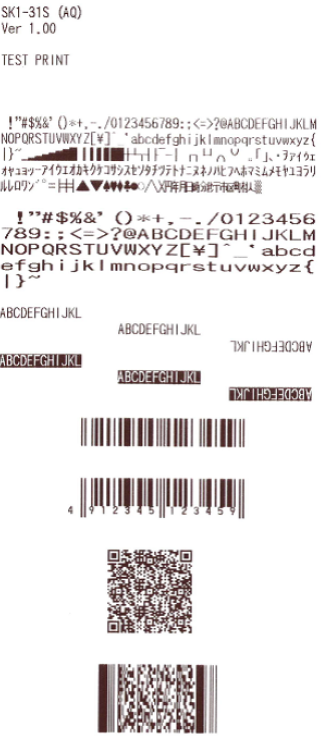
This troubleshooting shows the printer is working correctly and is able to advance, print an image and cut labels correctly.
Steps:
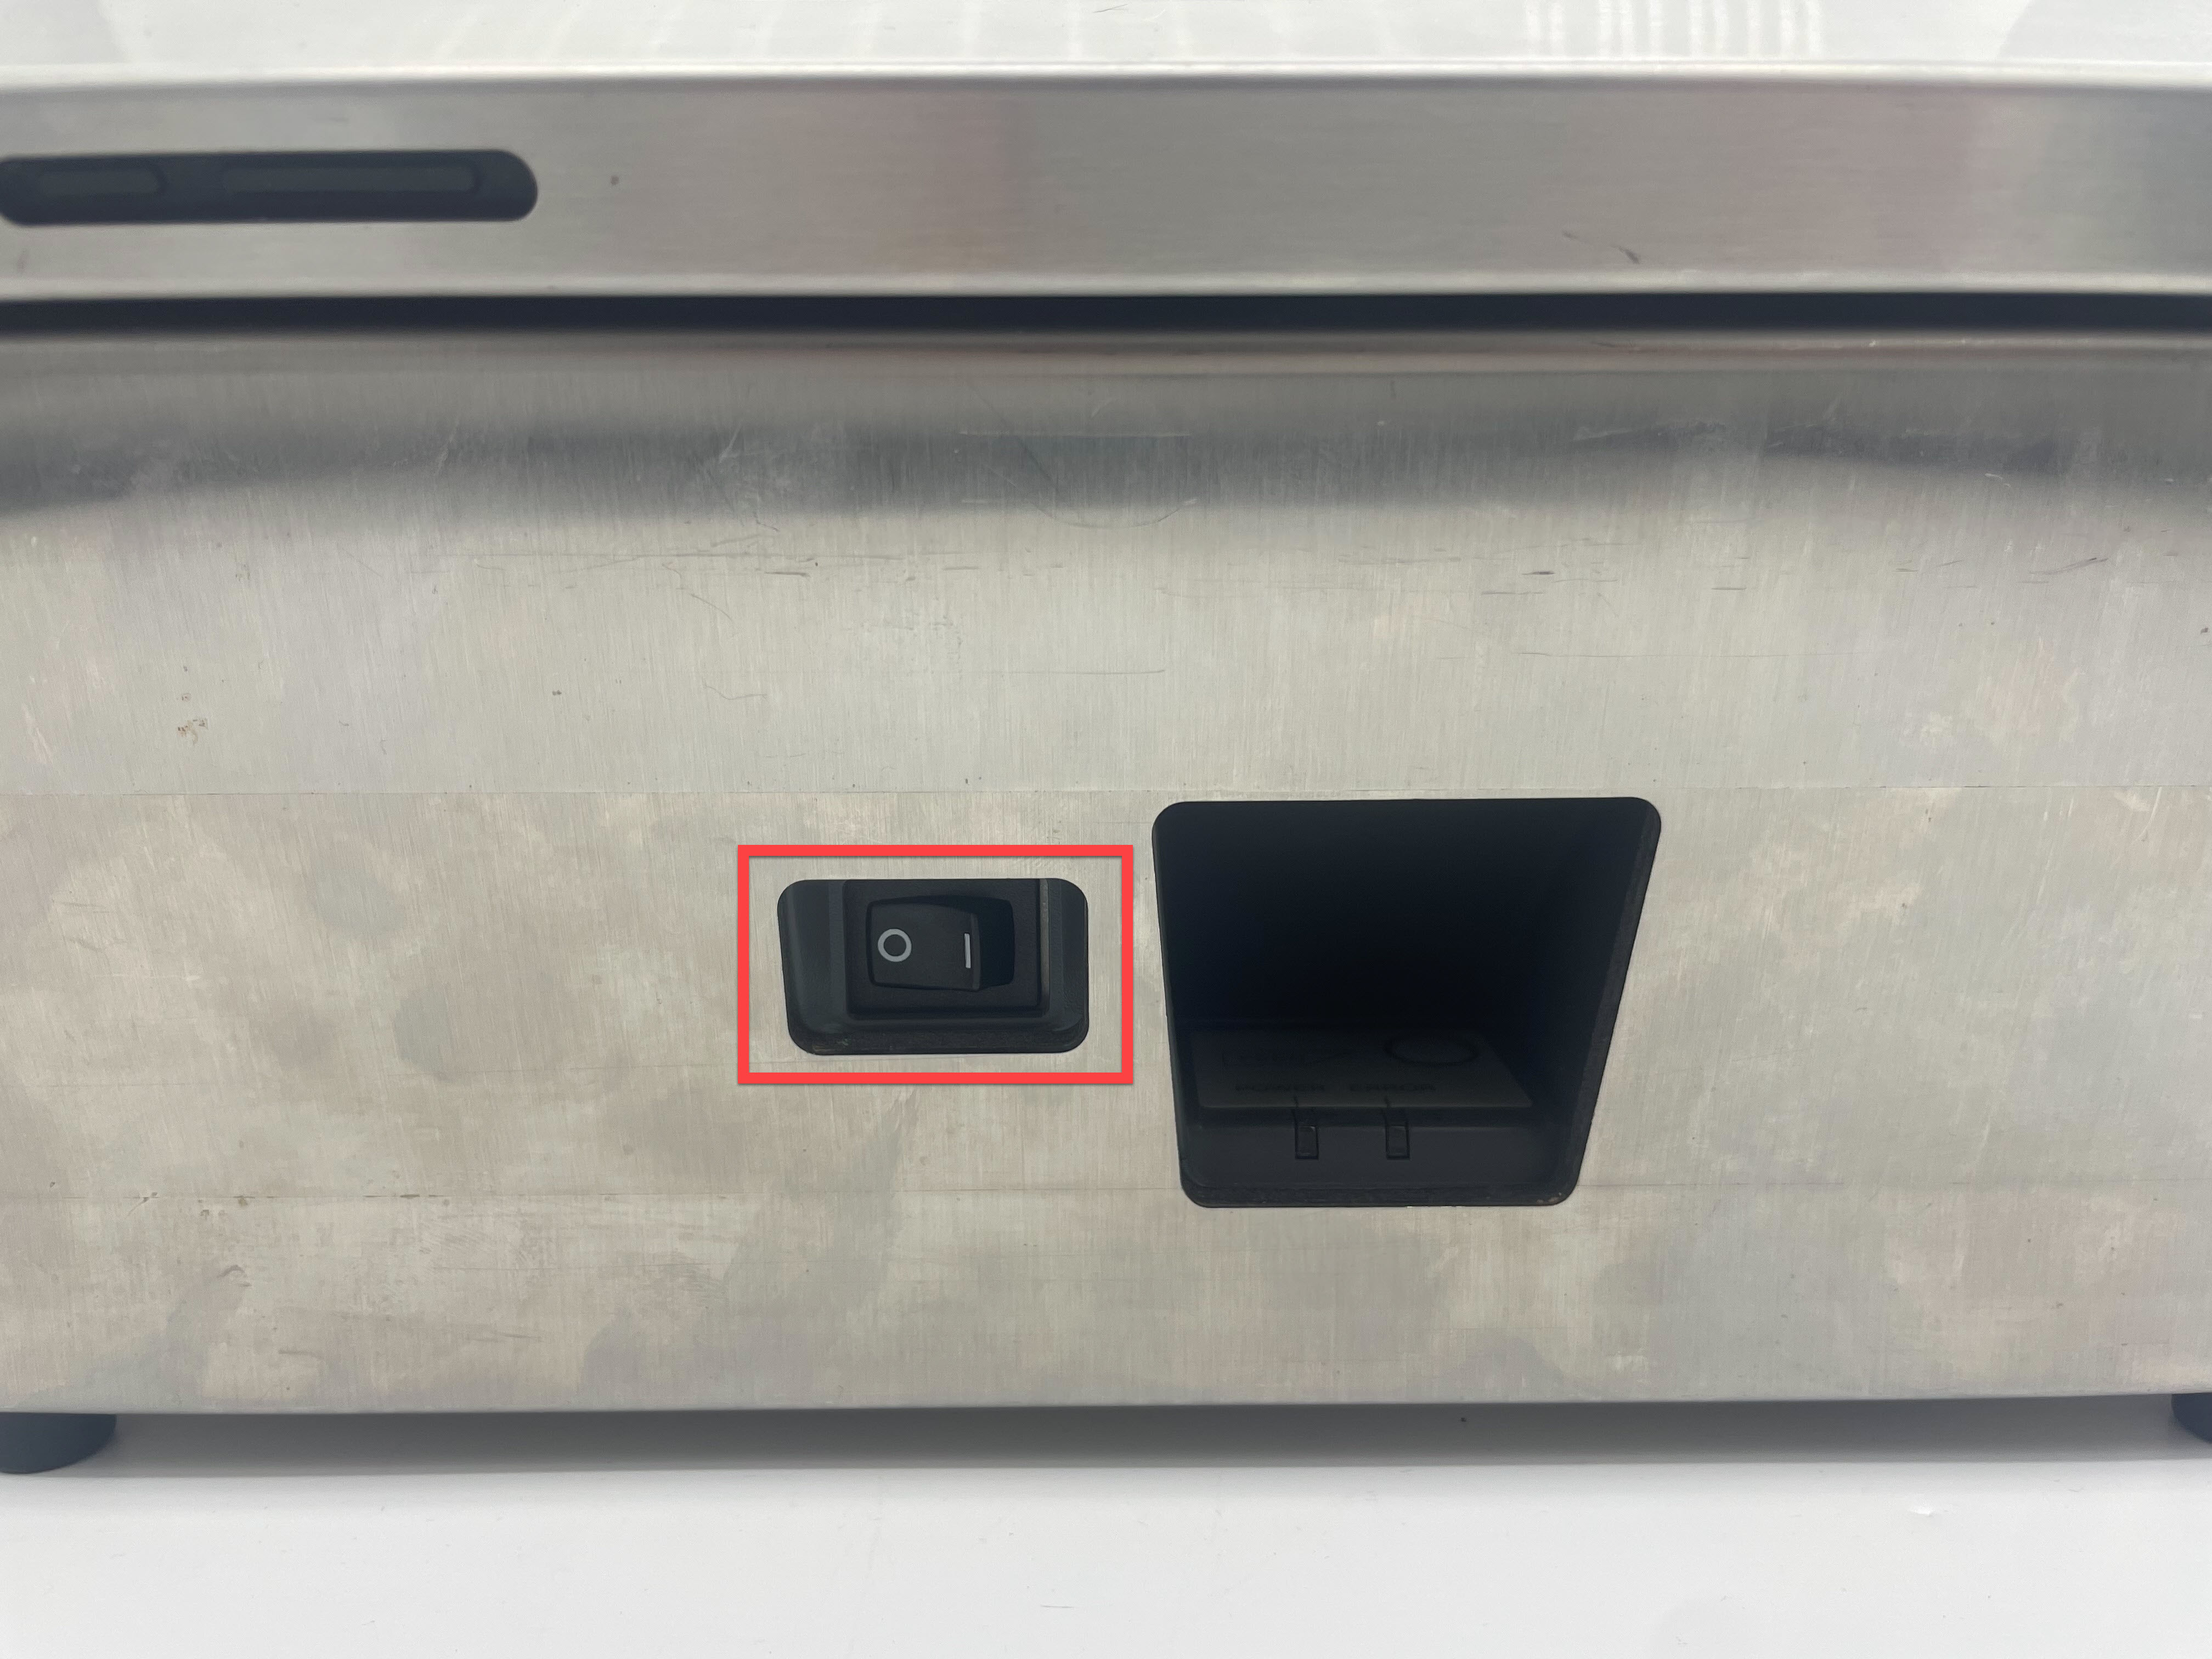
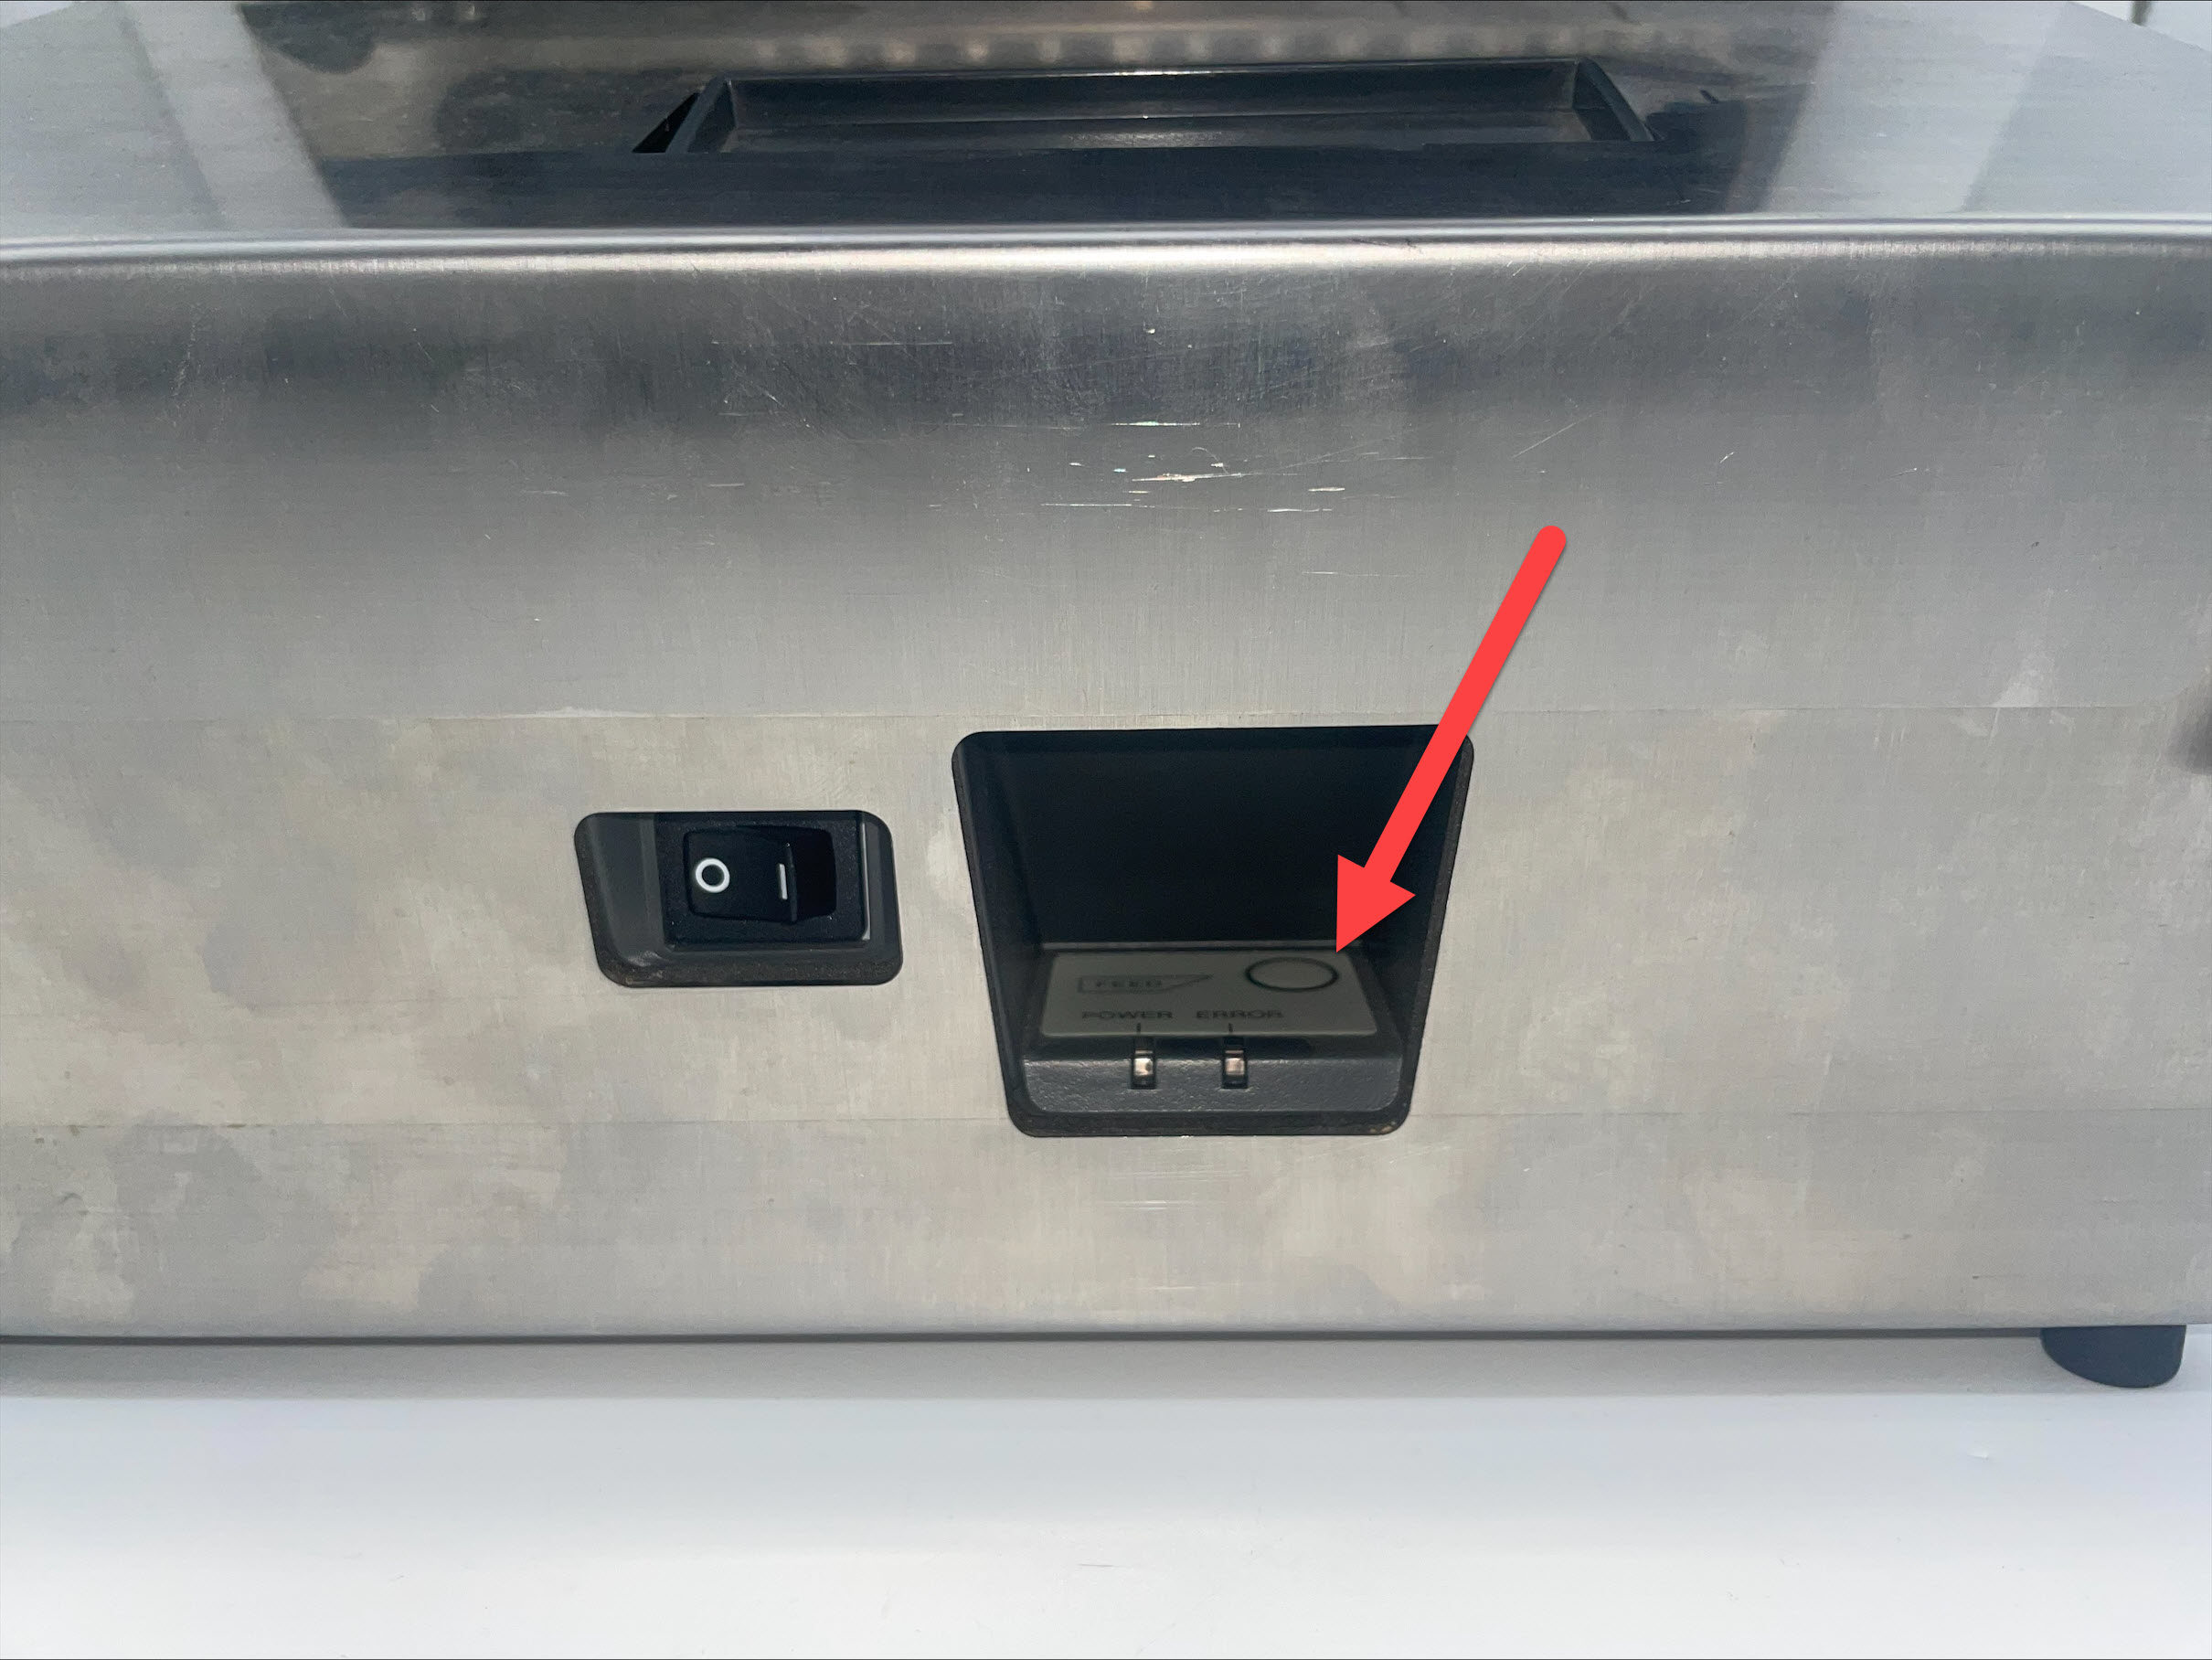
1. Turn OFF printer by using master power switch on rear of housing.
2. While pressing and holding the FEED button, front button on printer, turn printer ON by using the master power switch.
3. The printer will start the self test print. Once printing starts, the FEED button can be released.
4. After completing the self test printing, the printer will automatically cut and go into standby mode, ready for the next print job.
Test label will look similar to this:
5. If printer cuts test label in middle, press the feed button again.
6. If the printer does not advance labels or is cutting incorrectly on the label after pressing the feed button, try the process again.
For additional assistance see Contact & Support
Verify black line on back of labels is solid and not faded. See DateCodeGenie Labels for reference.
If black line is incorrect, replace with label roll with correct black line and try to print again.
Print a test print
How to Self Print Test the 2.0 and Fit Model Device
The 2.0 model has been discontinued.
The DateCodeGenie uses a thermal printer to print labels. To print and cut labels correctly, the DateCodeGenie printer reads the black line on the backside of the label.
Printing a self-test can help determine if the printer is not cutting or advancing labels correctly.
Steps:
1. Verify the labels are inserted correctly in the printer, see How to Load Labels in the 2.0 and Fit Model Devices.
2. Set power switch on the front of the printer to the O position.
3. Press and hold on FEED button located inside the opening.
4. Set power switch to the I position while continuing to hold FEED button. Printer will advance labels and cut labels in correct location.
For additional assistance see Contact & Support
Verify black line on back of labels is solid and not faded. See DateCodeGenie Labels for reference.
If black line is incorrect, replace with label roll with correct black line and try to print again.
Calibrate printer
Printer Calibration (Lite)
If labels are not printing, advancing or cutting correctly, calibrating the printer will reset the black line and tear for proper printing.
There are options for calibrate the printer:
Manual Printer Calibration
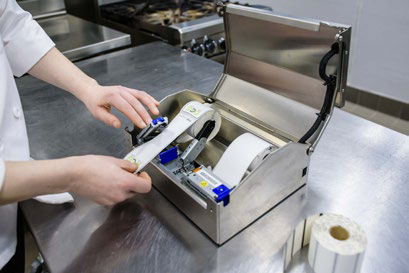
1. Open the printer by pressing the two blue/green printer release buttons at the same time and lifting upward.

2. Slide the black line sensor to the far right of the opening.

3. Feed labels through the blue/green guides and extend over the edge of the printer. Insert the blue/green roll guides onto the blue/green core bar and adjust them to the label width to ensure the roll remains centered.
| 3a. Slide one roll guide onto the blue/green core bar first. Place the label roll onto the bar against the first guide. | 3b. Slide the second roll guide onto the bar and adjust both so the roll is centered and snug. |
|---|---|
 |
 |

NOTE
Need to load labels? See Load Labels in the Lite Model Device.
4. Snap the printer lid closed.
5. Press the power switch to the O position to turn off the printer.

6. Hold the yellow feed button down with one hand while turning the power back on with the other hand, releasing the feed button when you hear the beeps and the red light flashes. Self-test labels will print.

7. Press the feed button once more to advance labels to the black line and pull down to tear.
App Printer Calibration
1. Log in to the app with your username and password, if required.
2. Tap the Navigation Button (three line icon) in the upper left hand corner.
3. Tap Settings from the menu.
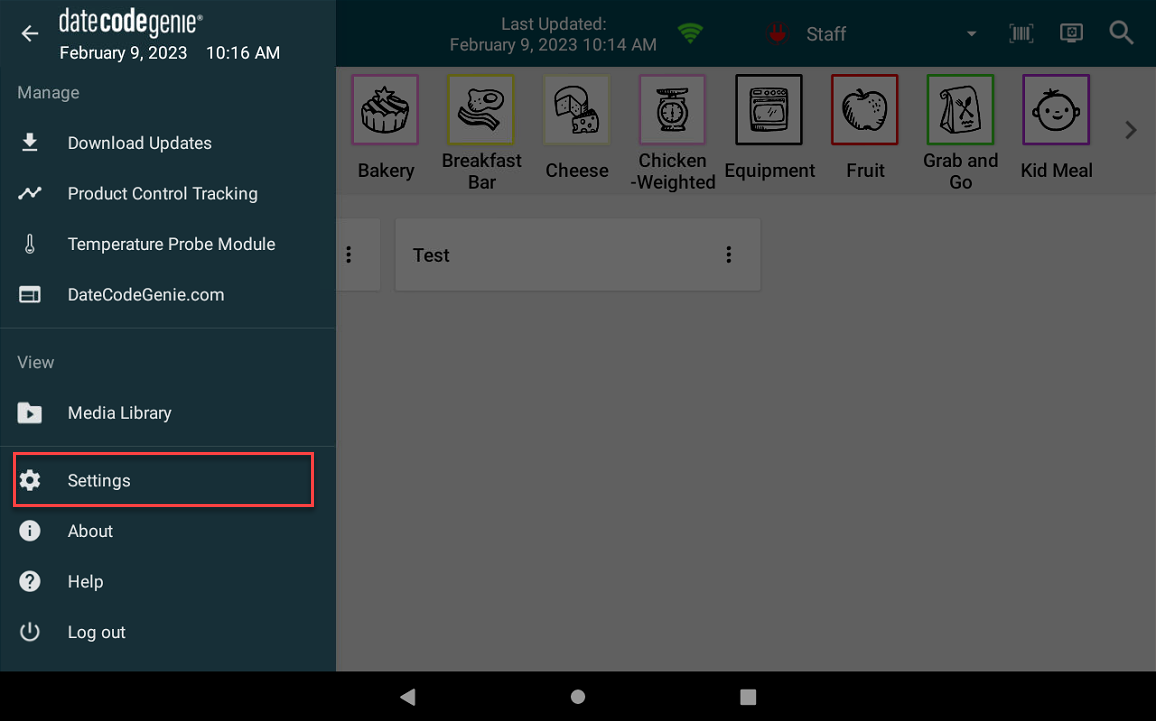
4. Tap Printer Setup.

5. Add Label Type if none is listed.
NOTE
Incorrect label type will result in the printer not calibrating correctly.
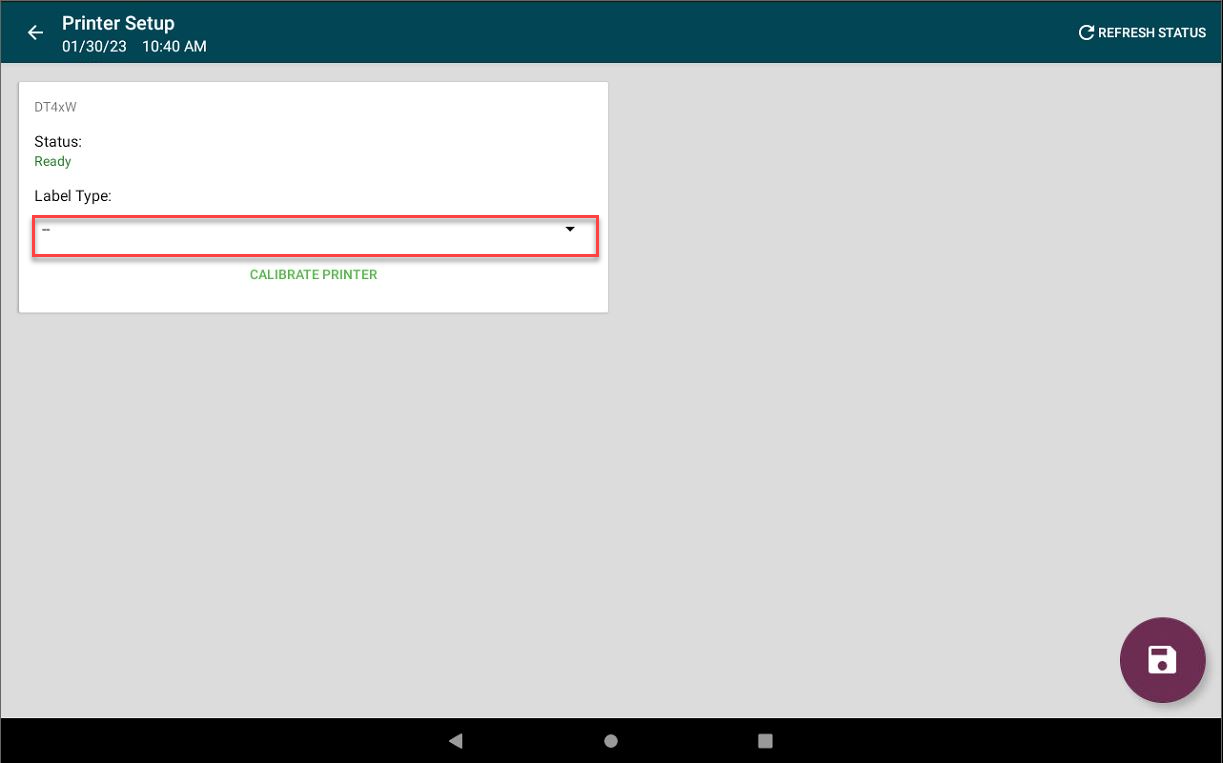
6. Tap Calibrate Printer.
NOTE
Status needs to be "Ready" to print labels. If having issues with printer connection, see Printer Connection Issue (Error 300x1) for Lite Device.
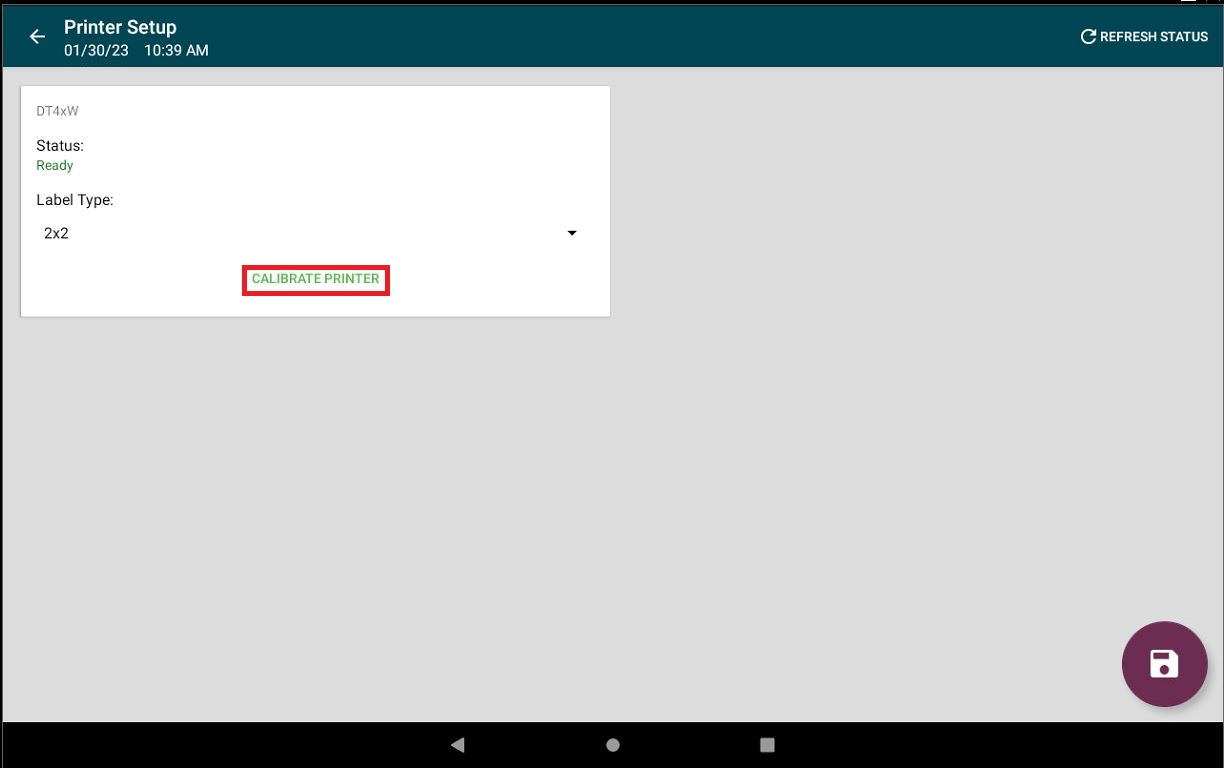
7. A self-test label will print.
Verify black line on back of labels is solid and not faded. See DateCodeGenie Labels for reference.
If black line is incorrect, replace with label roll with correct black line and try to print again.
Print a test print
Printing a self-test can help determine if the printer is not cutting or advancing labels correctly.
1. Open the printer lid.
2. Gently push the label roll into the guides to insert shafts on each side of label roll to snap in place. Extend labels over the edge of printer and close printer lid. Extend labels over the edge of printer and close printer lid.
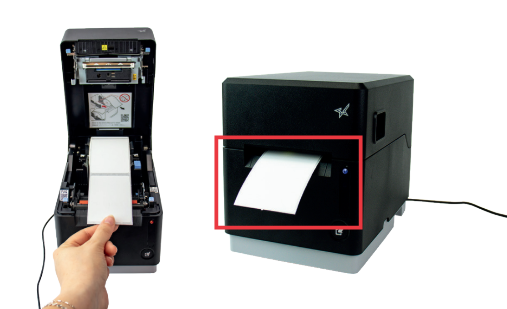
NOTE
Need to load labels? See Load Labels in the mC-Label3 Printer.
3. Turn the printer off by pressing and holding the printer power button on the side of the printer for about 2 seconds and release until power LED display turns black.

4. While holding down the feed button (arrow pointing to box icon), press and release the printer power button. Release the feed button when self-printing has started.

5. Once self-printing is finished, remove the Bluetooth and network information label that was printed.

