NL Dutch
FR French
IT Italian
DE German
US English (US)
ES Spanish
menu

Contact Us

No results found. Still need help? Contact us

  • Scheduled Assistance
  • Contact Us
English (US)
NL Dutch
FR French
IT Italian
DE German
US English (US)
ES Spanish
arrow_back
  • DateCodeGenie
  • RightBytes
  • Task Manager
  • Scheduled Assistance
  • Contact Us

Use Rosters on the App

Contact Us

If you still have questions or prefer to get help directly from an agent, please submit a request.
We’ll get back to you as soon as possible.

  • Getting Started
    Getting Started Guides Set Up Training
  • Devices
    Troubleshooting Device Overview 2.0 Model X Series Model Fit Model Lite Model mC-Label3 Printer CL-S700III Printer Device Tablet Internet Connection Warranty & Support
  • App
    Error Codes Troubleshooting App Overview Mobile App Subscription Prep Lists Quick Labels Print History Product Control Location Overrides Temperature Probe Rosters Scale Language Settings
  • Portal
    Portal Overview Locations Groups Users Rosters Categories Containers Items Printer Profiles Quick Labels Prep List Print History Product Control Temperature Probe Mass Import and Export Settings Media Library Support Location Overrides Scale
  • Admin Settings
    Start with Admin Settings Admin Settings Overview Locations Devices and Licenses
  • Accessories
    Bluetooth Scanner USB Scanner Temperature Probe Scale Label Rewinder Fit Printer Shelf Warranty
  • Labels
    Overview Troubleshooting
  • Repairs
    2.0 Model X Series Model Lite Model DateCodeGenie® Tablet
  • APIs
    Inbound APIs Outbound APIs
+ More
  • Home
  • DateCodeGenie
  • App
  • Rosters

Rosters can print customized information for specific customers. Rosters must first be set up in the portal, see How to Set Up Rosters. 

Labels with roster fields can be printed individually or using prep lists on the app.

Using Prep Lists

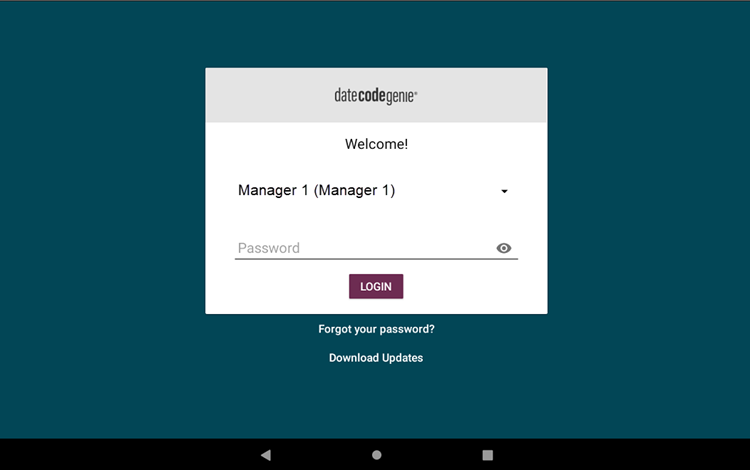
1. Login to the app.

2. Tap Prep Lists.

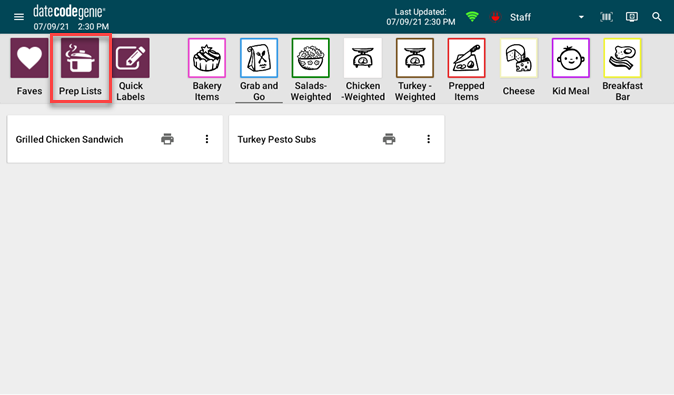
3. Tap your preferred prep list.

4. Edit prep list as desired, see How to Use Prep Lists on the App.

5. Tap the Click to set button to select or change roster members.

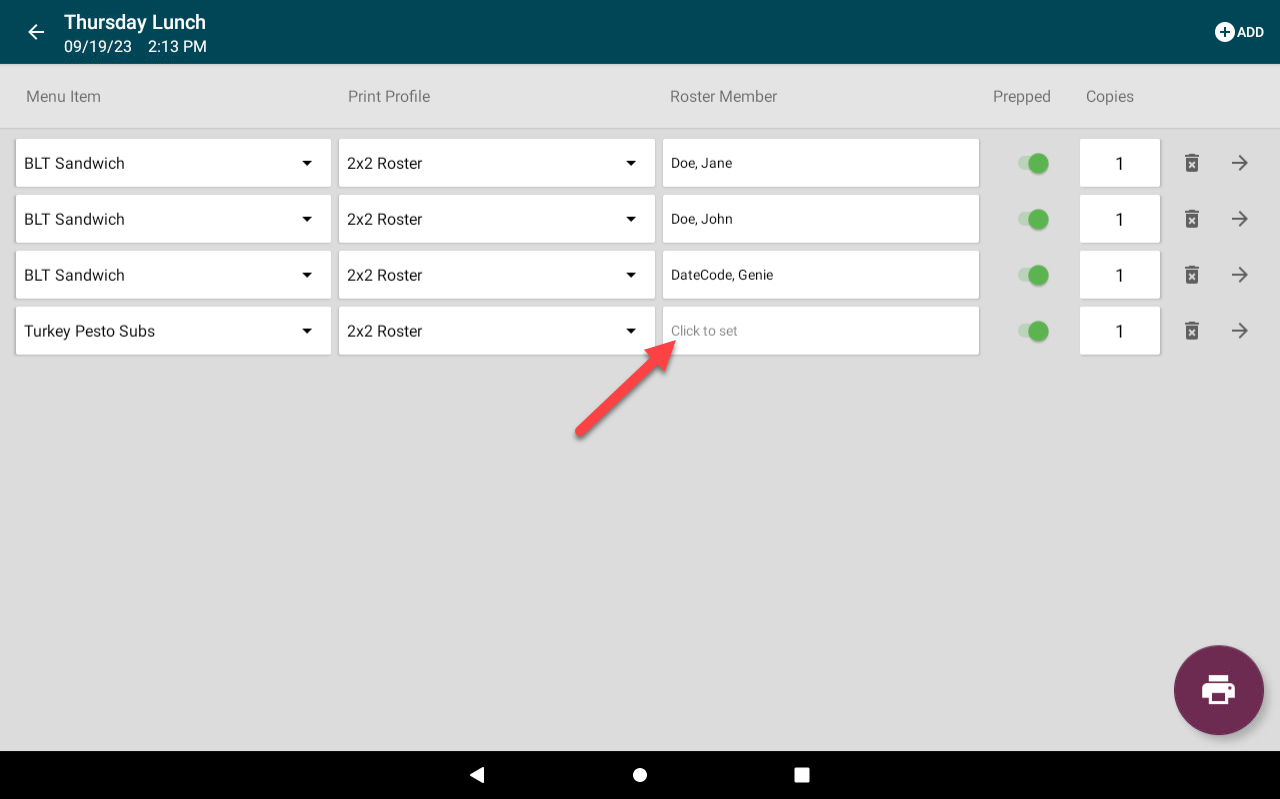
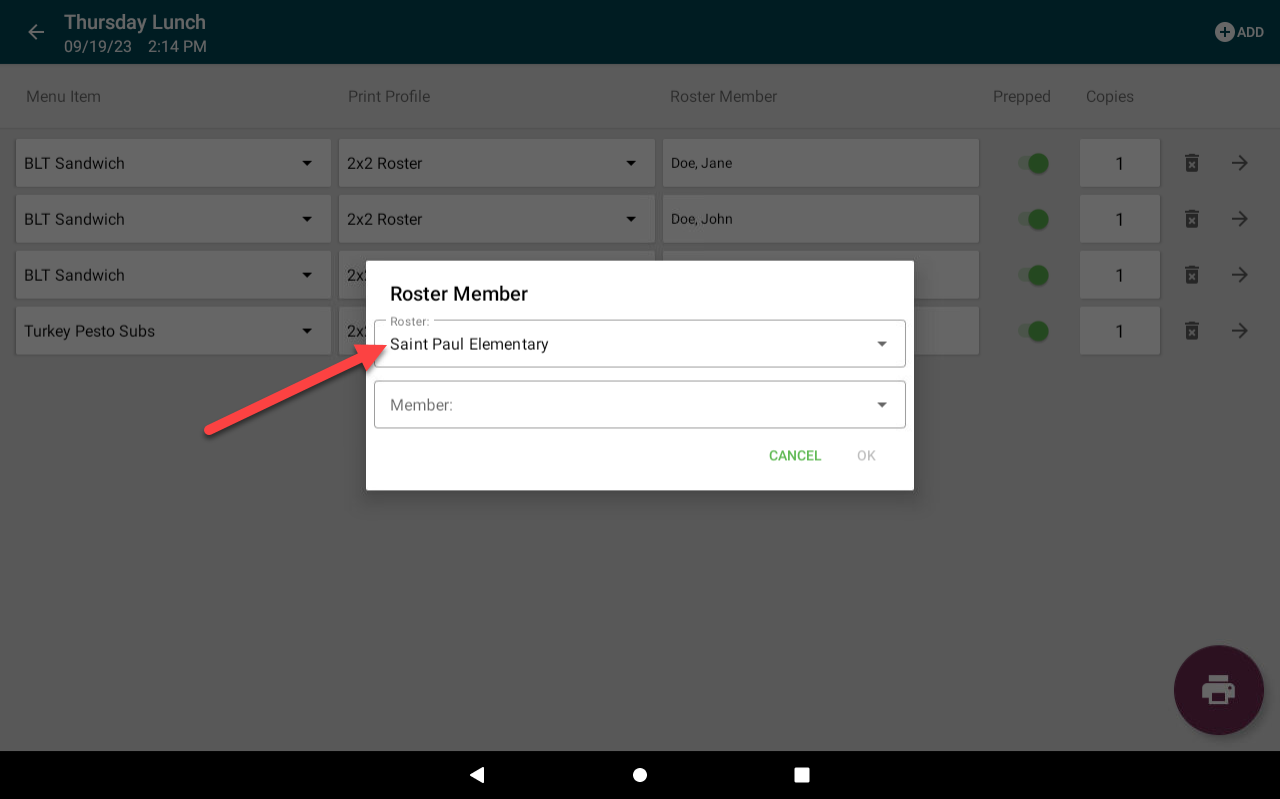
6. Tap the Roster dropdown to select roster. Start typing to bring up available rosters. 

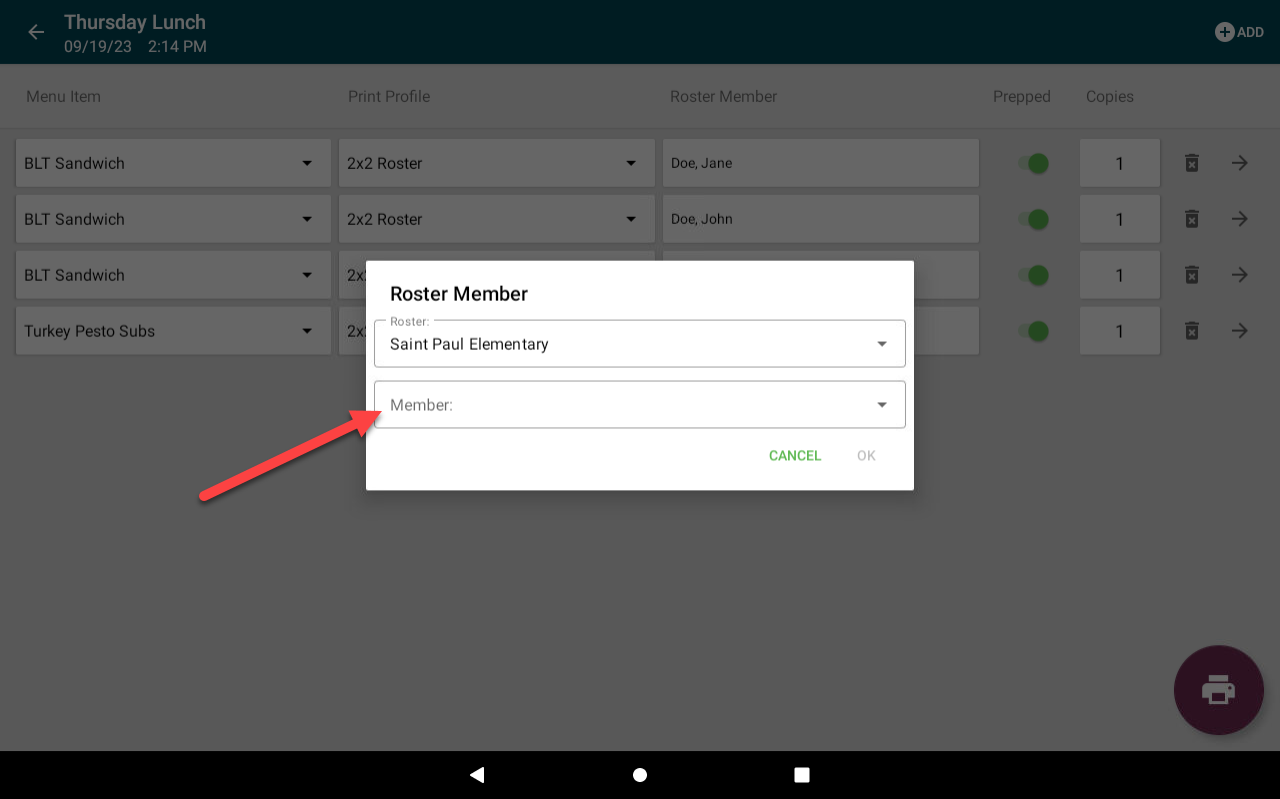
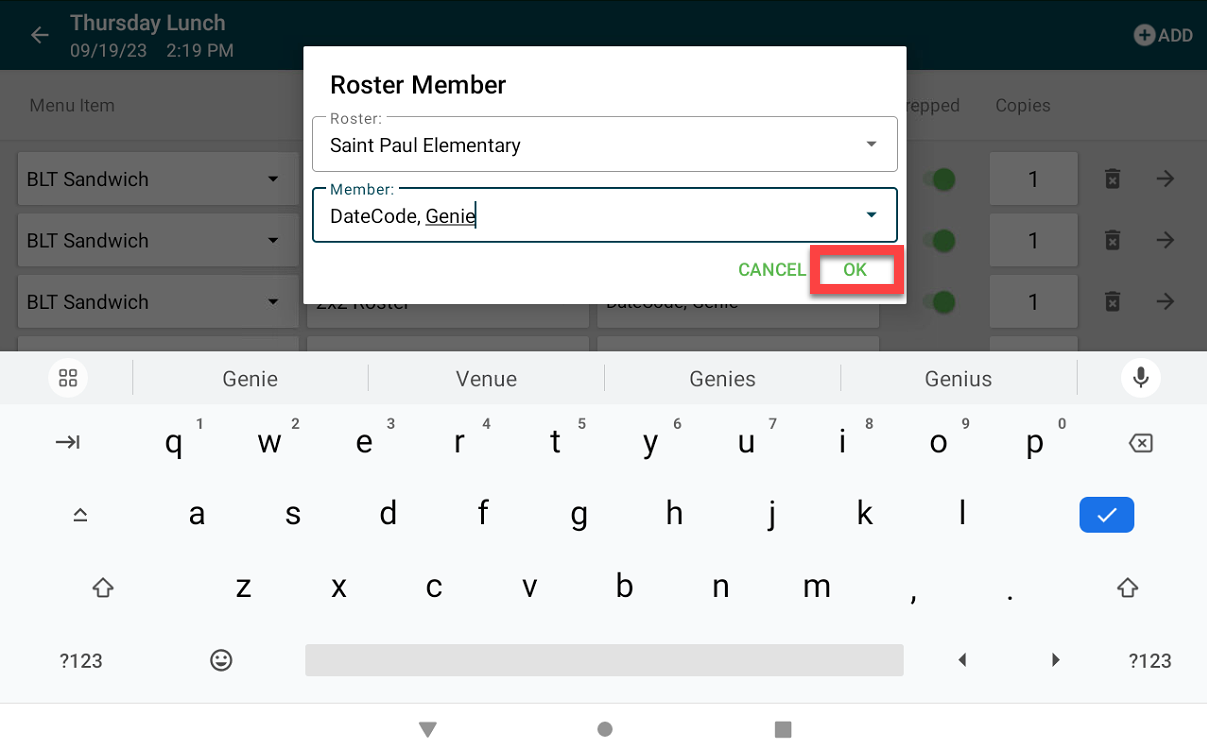
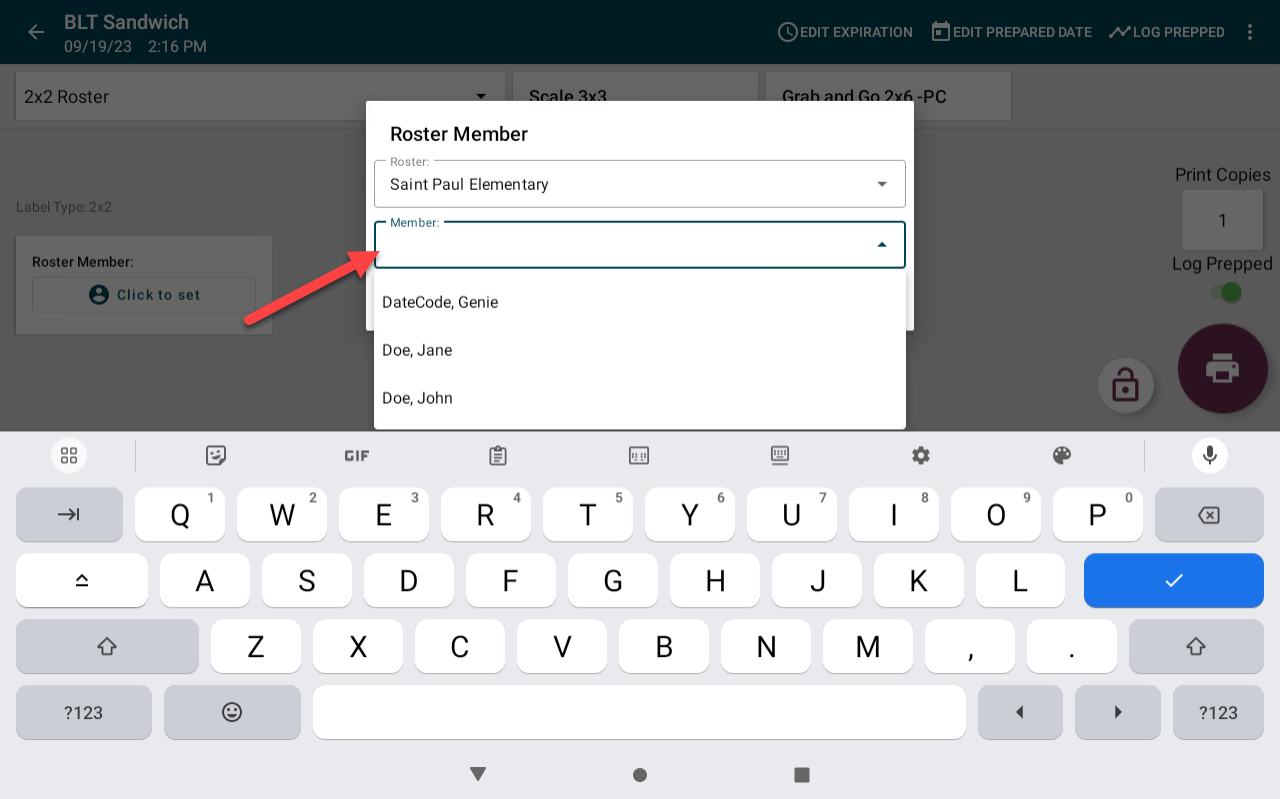
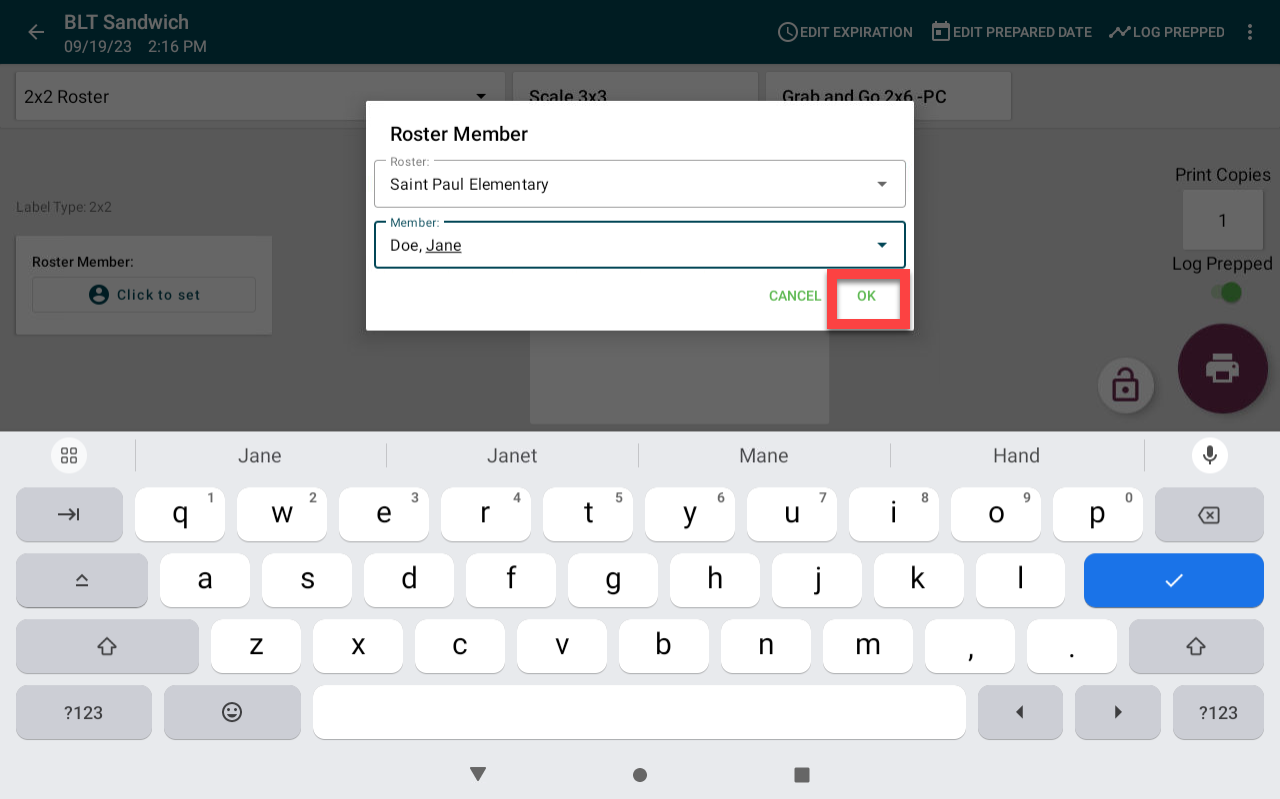
7. Tap the Member dropdown to select Roster Member. Start typing member name to search. 

8. Tap OK.

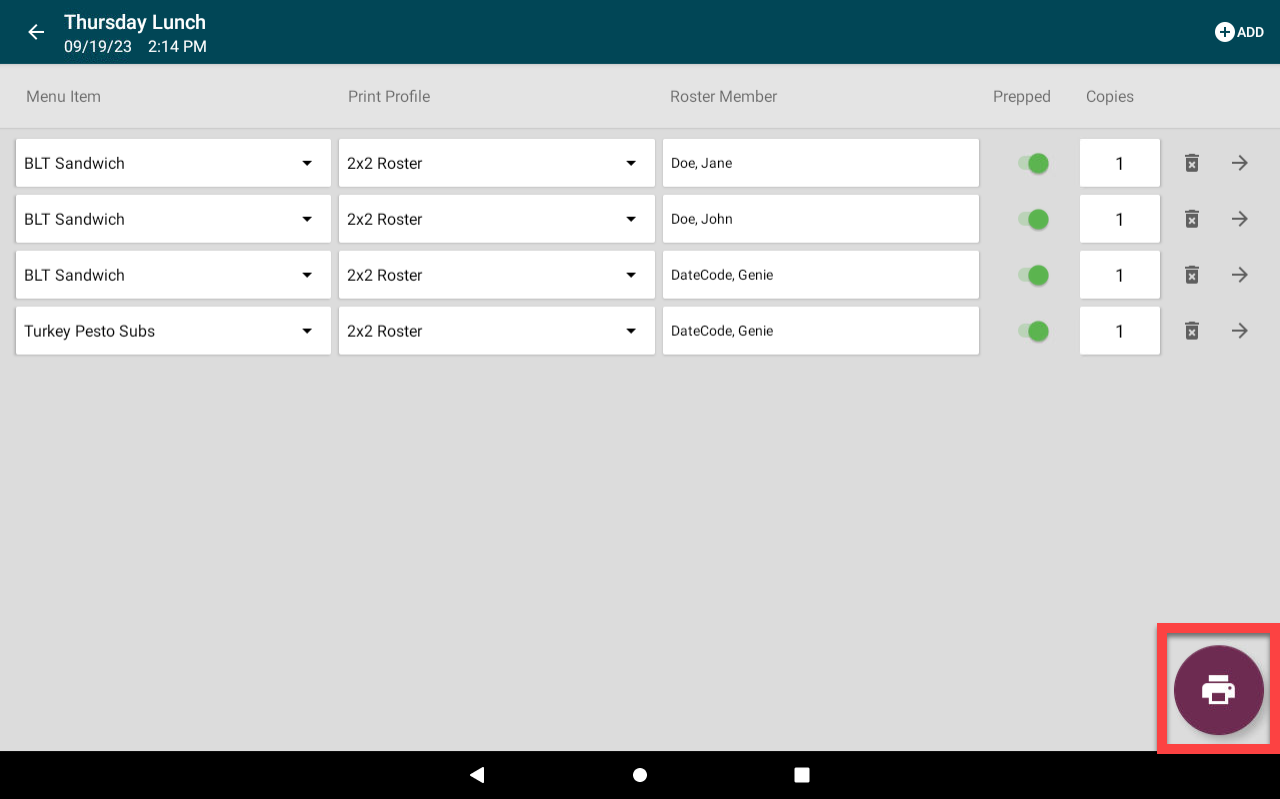
9. Tap the Print button (printer icon). 


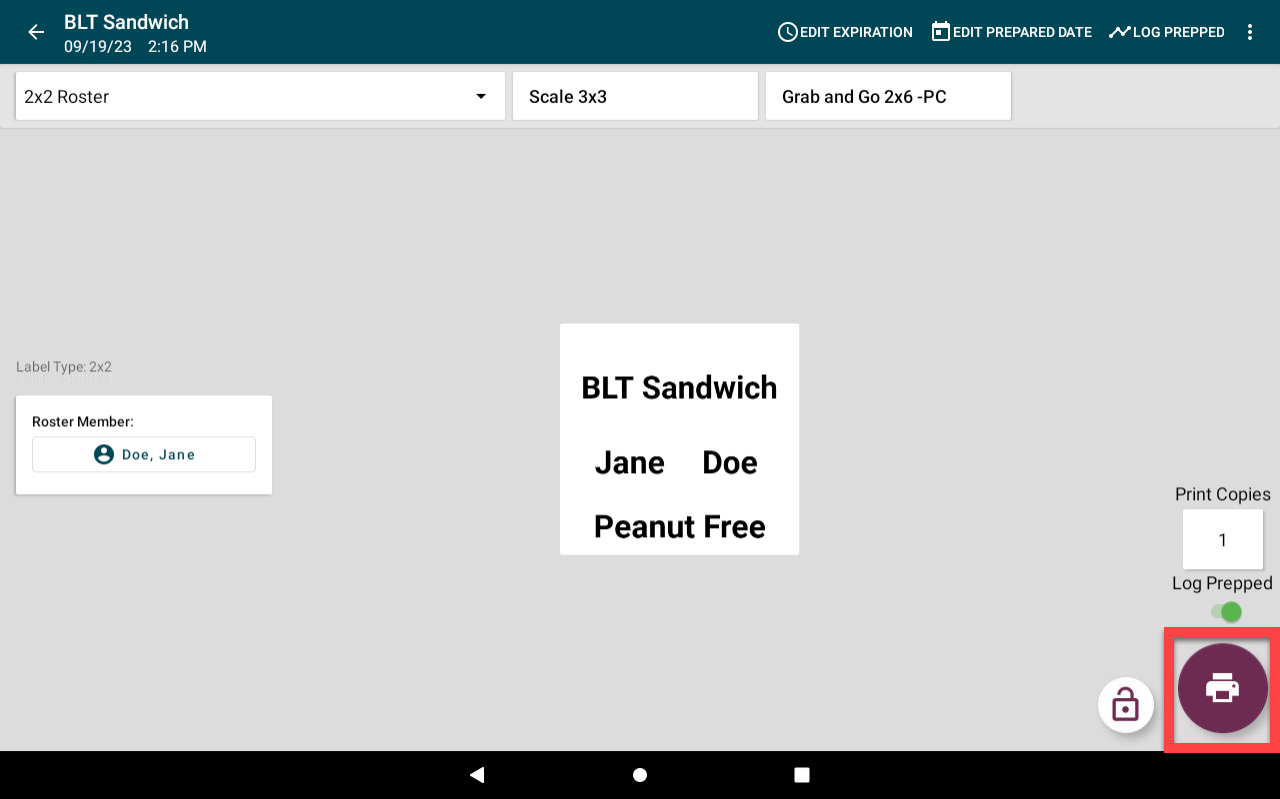
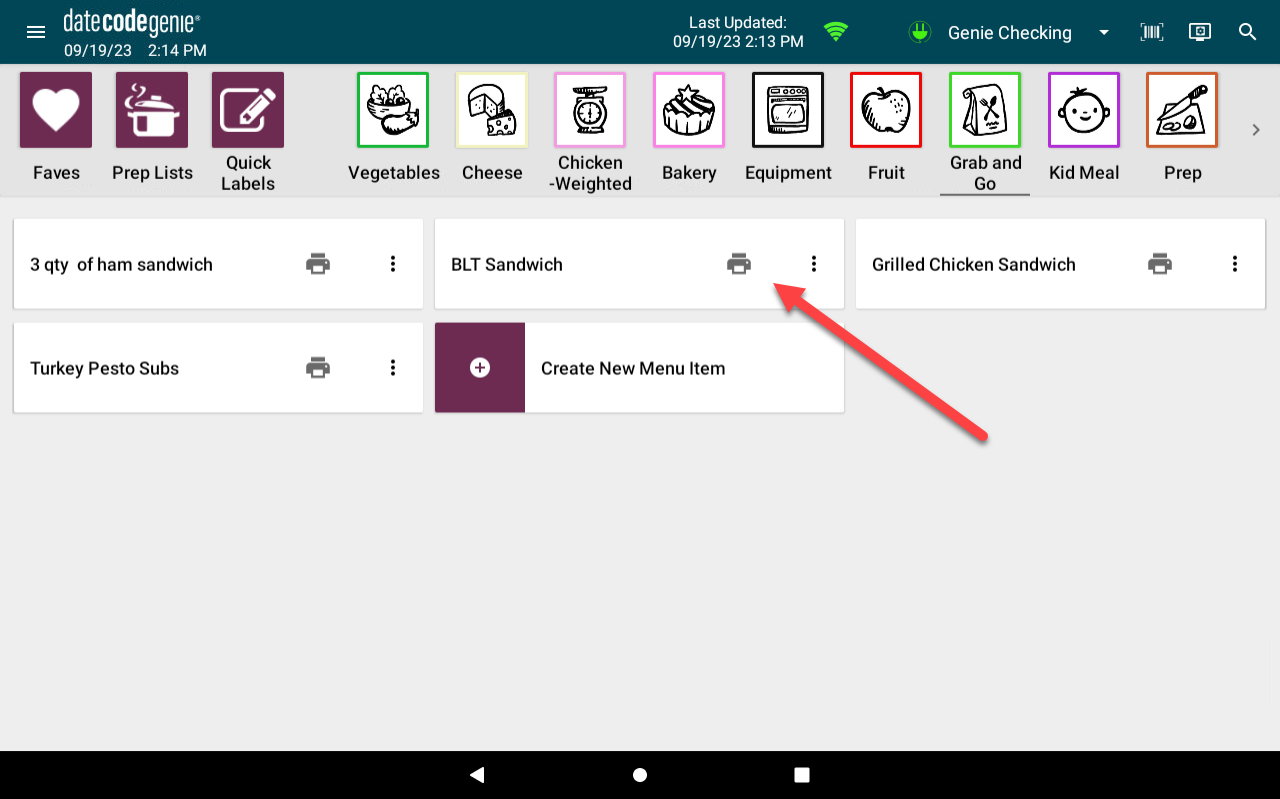
Printing Individual Labels

1. Tap a menu item to print.

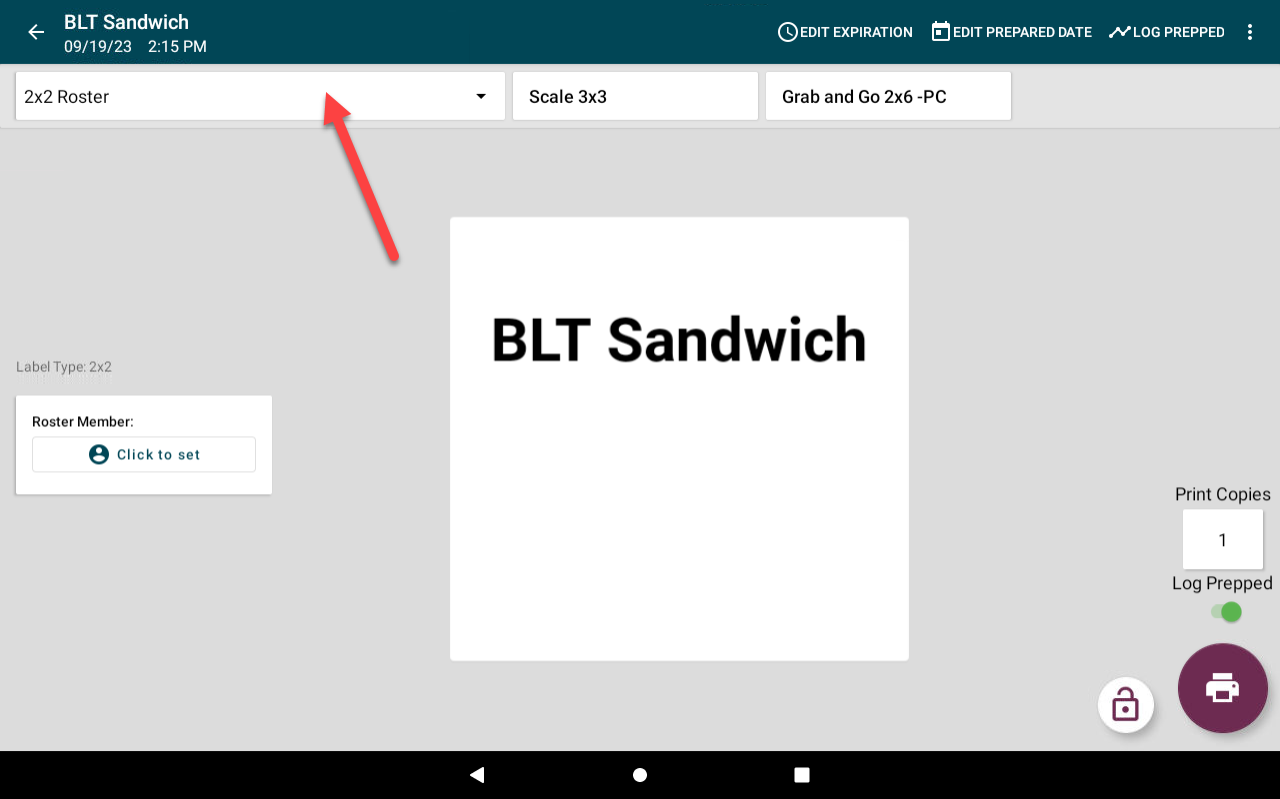
2. Tap the printer profile dropdown and select profile with roster fields. 

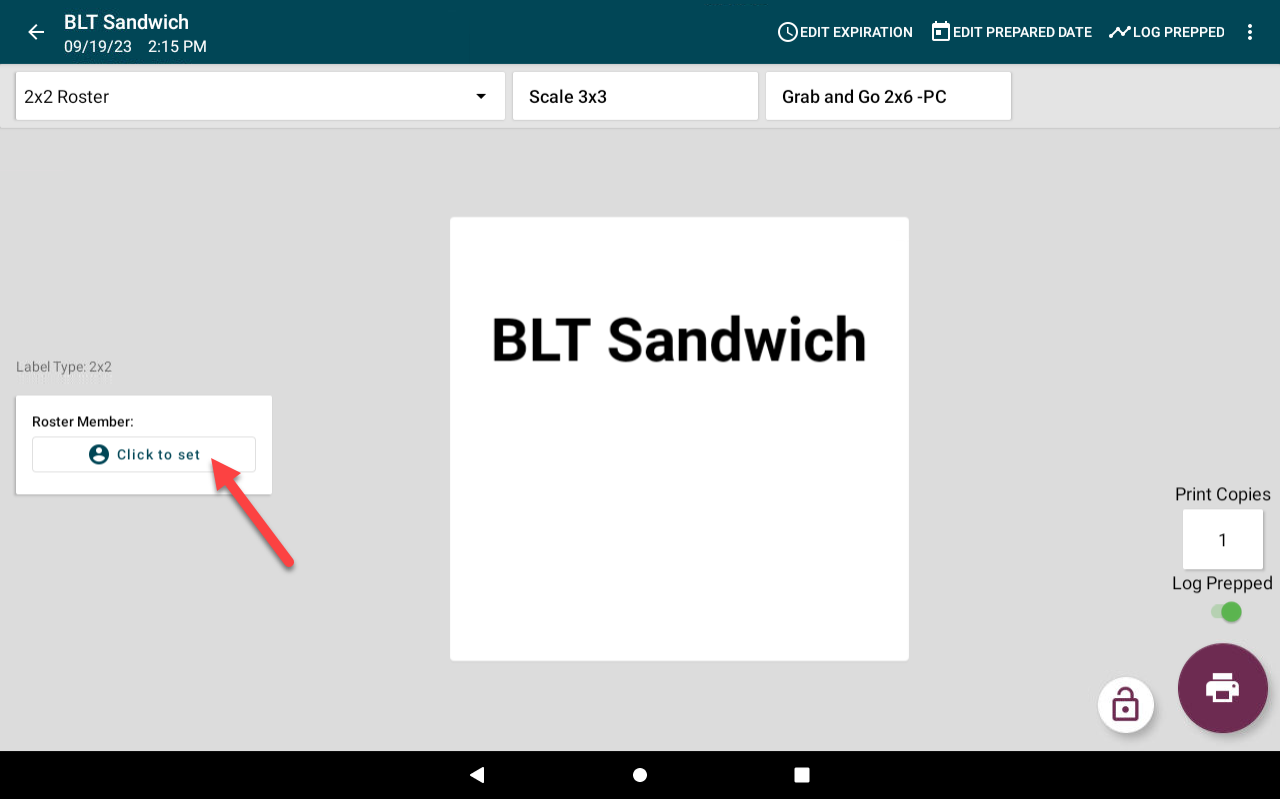
3. Tap the Click to set button in the Roster Member window. 

4. Tap the Roster dropdown. Start typing to bring up available rosters. 

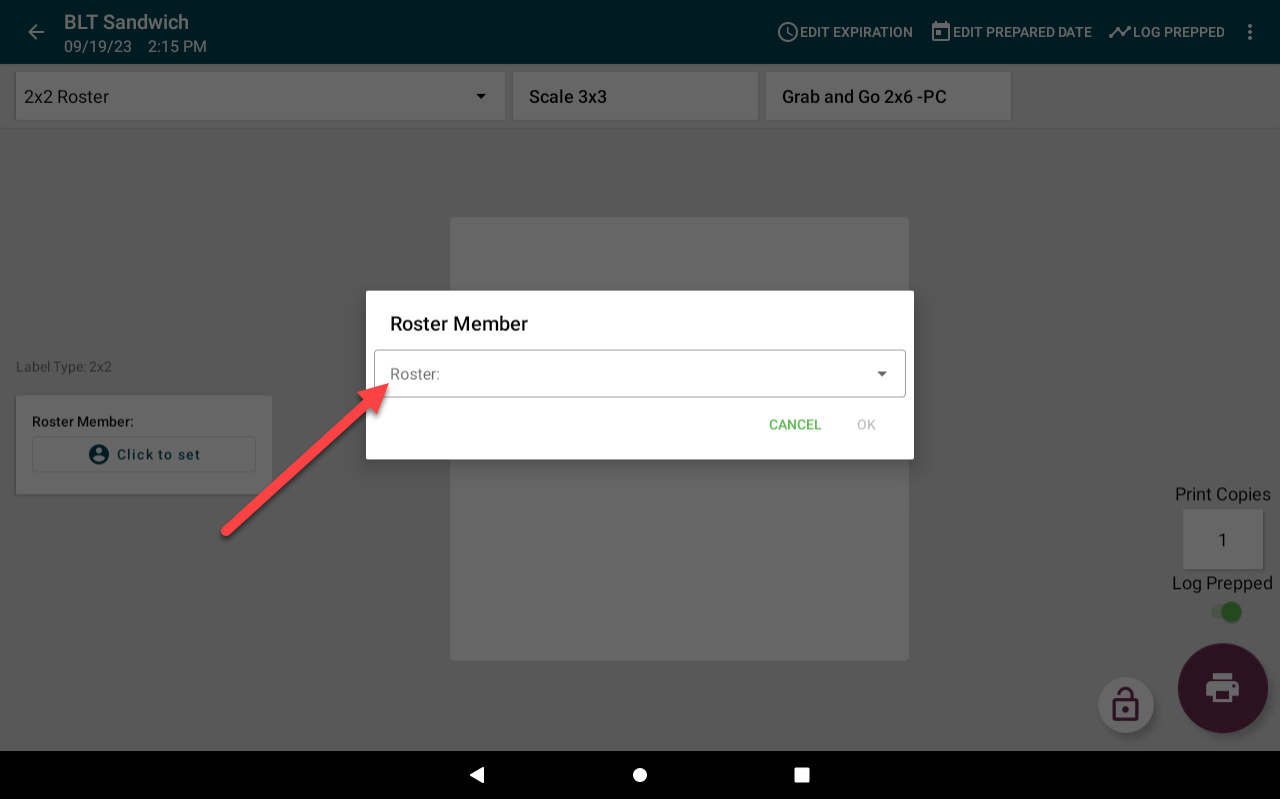
5. Tap the Member dropdown and select the roster member. Start typing member name to search. 

6. Tap OK.

7. Tap the Print button (printer icon) to print. 


Related Articles

  • Set Up Rosters in the Portal
  • Print a Prep List on the App

Was this article helpful?

Yes
No
Give feedback about this article For additional assistance, see Contact & Support

Related Articles

  • Set Up Rosters in the Portal
  • Print a Prep List on the App
© 2026 DateCodeGenie

899 Montreal Circle, St. Paul, MN 55102

Privacy Policy

Learn more about our product
contact us
About NCCO

Knowledge Base Software powered by Helpjuice

Expand